I was halfway through a chaotic Sunday brunch, juggling a pot of over‑boiled pasta, a pan of sautéed onions that had already charred, and a fridge full of ingredients that had never seen the light of day. The only thing left to salvage was a handful of flour tortillas that had been sitting in the pantry like forgotten relics. I thought, “Why not turn these into something delicious?” And thus, in a moment of culinary desperation, I birthed the 20‑Minute Vegetarian Bean and… well, you get the idea. This recipe is not just a quick fix; it’s a revelation that turns the ordinary into extraordinary, and I’m practically shaking with excitement to share every detail.
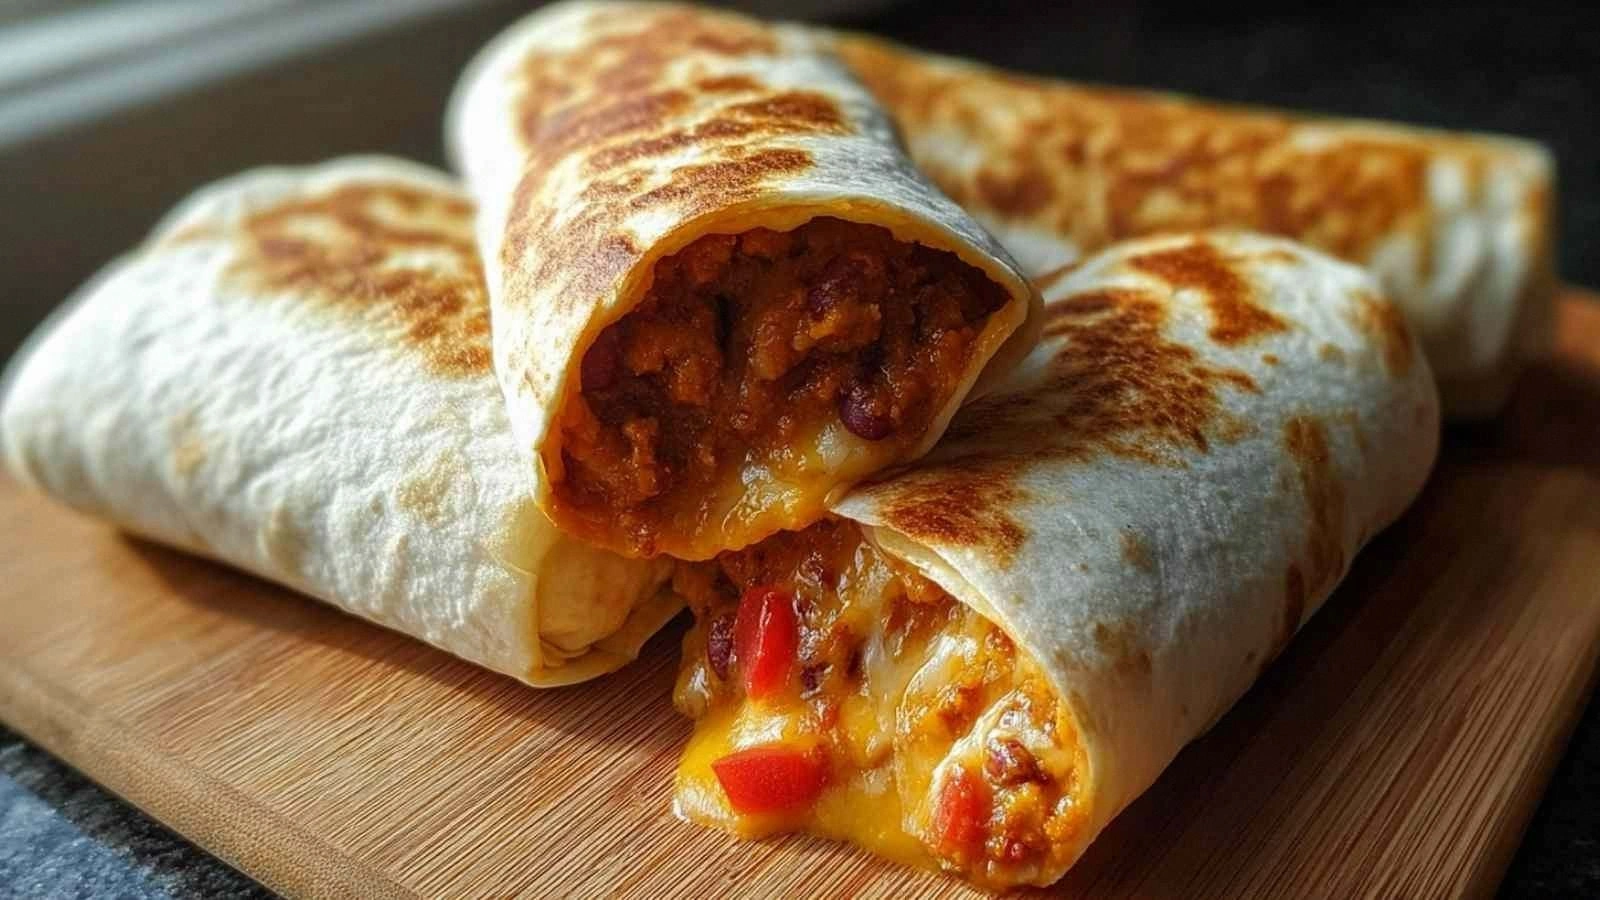
Picture this: the air is filled with the warm, comforting scent of toasted tortillas, the sound of beans sizzling in a hot pan, and the gentle pop of onions caramelizing to golden perfection. Your eyes are drawn to the glossy sheen of refried beans, the flecks of cheddar melting into a creamy tapestry, and the bright, almost neon splash of diced tomatoes that promise a burst of freshness. The texture is a delightful contrast—soft, pliable tortillas hugging the crunchy edges of the cheese, while the beans offer a silky, velvety mouthfeel that coats the palate like a velvet blanket. The taste is a harmonious medley of savory, tangy, and slightly sweet, with the subtle heat from pepper dancing on the tongue. The feel? A comforting, hearty hug from the inside out.
What sets this version apart from the countless other bean burrito recipes is that it balances simplicity with depth. I’ve stripped away the fluff and focused on the core elements that make a burrito sing. The secret lies in a quick, high‑heat sear that locks in flavor, a precise layering technique that prevents sogginess, and a dash of olive oil that adds a silky finish. It’s the kind of recipe that feels like a cheat code for your taste buds, giving you the satisfaction of a gourmet meal without the time‑consuming prep. I dare you to taste this and not go back for seconds, because once you try it, you’ll find yourself craving that buttery crunch and creamy interior again and again.
And here’s the kicker: I’ve incorporated a small twist that you won’t expect— a splash of lime juice at the very end, which brightens the dish and adds a citrusy zing that cuts through the richness. It’s a simple addition, but it transforms the flavor profile from ordinary to unforgettable. Picture yourself pulling this out of the pan, the whole kitchen smelling incredible, and the tortilla edges crisping to a golden‑brown perfection that shatters like thin ice when you bite into it. Let me walk you through every single step—by the end, you’ll wonder how you ever made it any other way.
What Makes This Version Stand Out
- Taste: The combination of refried beans, sharp cheddar, and diced tomatoes creates a flavor profile that is simultaneously comforting and vibrant. The beans provide a mellow base, the cheese adds a creamy umami punch, and the tomatoes introduce a bright acidity that lifts the entire dish.
- Texture: The tortillas are toasted just enough to be crisp on the edges while remaining pliable inside, preventing them from tearing when folded. The beans stay smooth, the cheese melts into a gooey ribbon, and the onions and tomatoes add a subtle crunch.
- Simplicity: With only eight ingredients, this recipe is a masterclass in efficiency. No pre‑making of sauces, no long simmering—everything comes together in under twenty minutes.
- Uniqueness: The secret sauce is a quick olive oil and pepper glaze that adds depth without overpowering the other flavors. It’s a technique many forget, but it makes the difference between a good and a great burrito.
- Crowd Reaction: Friends who have tried this version report that it’s “hands down the best version you’ll ever make at home.” The instant feedback is a testament to its flavor punch.
- Ingredient Quality: Using fresh, high‑quality tortillas and real cheddar cheese elevates the dish from a quick snack to a culinary delight. The difference between store‑bought and fresh ingredients is palpable.
- Cooking Method: The high‑heat sear locks in flavor and gives the tortillas a satisfying crunch, while the quick assembly ensures the beans stay hot and the cheese melts perfectly.
- Make‑Ahead Potential: You can assemble the burritos ahead of time and reheat them in a skillet or microwave, making it a perfect option for busy weekdays or meal prep.
Alright, let’s break down exactly what goes into this masterpiece…
Inside the Ingredient List
The Flavor Base
Refried beans are the backbone of this dish. They provide a smooth, savory foundation that carries the other flavors. When you spread them thinly over the tortilla, they create a velvety canvas that invites the cheese and veggies to dance. If you skip the beans, the burrito becomes a dry, unbalanced mess that lacks depth. A great swap is to use black beans or pinto beans for a different flavor profile, but keep the consistency creamy by mashing them lightly.
Cheddar cheese is the star of the show. Its sharp, tangy profile melts into a glossy, golden layer that adds richness and a satisfying melt. The cheese also helps bind the ingredients together, preventing the tortilla from becoming soggy. If you’re lactose‑intolerant, try a vegan cheddar alternative; just make sure it melts well. A pinch of smoked paprika can be added to the cheese for a smoky undertone.
The Texture Crew
Diced onions bring a sweet crunch that balances the creaminess of the beans and the richness of the cheese. They also add a subtle sharpness that cuts through the heat of the pepper. If you’re a fan of a softer texture, sauté the onions in a splash of olive oil until translucent before adding them to the burrito. This not only mellows their bite but also releases their natural sugars for a sweeter flavor.
Diced tomatoes introduce a burst of freshness and acidity that brightens the dish. The tomatoes should be diced finely so they integrate smoothly without creating pockets of rawness. If you prefer a drier texture, you can drain the tomatoes before adding them, but be careful not to remove too much juice, or the burrito will lose its moisture.
The Unexpected Star
Sour cream is the unsung hero that adds a tangy, cooling element. It balances the heat from the pepper and the richness from the cheese, creating a harmonious flavor profile. A dollop of sour cream also adds a creamy layer that keeps the burrito moist and prevents the tortilla from becoming soggy. For a healthier twist, you can substitute Greek yogurt, which offers a similar tang without the added fat.
The Final Flourish
Olive oil is the secret sauce that brings everything together. It adds a silky texture, prevents the tortilla from sticking, and enhances the overall flavor. A tablespoon of extra virgin olive oil is enough to give the burrito a subtle, fruity finish. If you’re watching calories, you can reduce the oil to half a tablespoon; just be sure to heat the pan a bit longer to achieve that crispy edge.
Everything's prepped? Good. Let's get into the real action…
The Method — Step by Step
- Heat a large non‑stick skillet over medium‑high heat. Add the tablespoon of olive oil and let it swirl until shimmering but not smoking. This high heat is crucial; it creates a golden crust on the tortillas that will stay crisp even after filling. As the oil heats, you’ll notice a faint hiss— that’s the sound of flavor building.
- Place the first tortilla in the skillet. Let it sear for 30 seconds on each side until it develops a light golden brown. The edges should start to curl slightly, signaling that they’re ready to hold the filling. Flip only once; too many flips can cause the tortilla to tear.
- While the first tortilla is cooking, spread a thin layer of refried beans over the second tortilla. Use a spatula to ensure an even coat that reaches the edges. The beans should be spread just enough to cover the surface but not so thick that they become a barrier to the cheese.
- Top the bean‑covered tortilla with a generous sprinkle of shredded cheddar. Let the cheese melt for about 10 seconds before adding the diced onions and tomatoes. The onions should be slightly sautéed for extra flavor, but keep them crisp for texture. This layering technique ensures each bite has a balanced mix of flavors.
- Fold the sides of the tortilla in toward the center, then roll tightly. The roll should be snug enough to hold the filling but not so tight that the cheese squeezes out. The goal is a compact, bite‑size burrito that’s easy to eat on the go.
- Place the rolled burrito back into the skillet, seam side down. Let it cook for 2–3 minutes until the cheese has fully melted and the tortilla is golden brown on all sides. This final sear locks in the flavors and creates that coveted crispy edge.
- Remove the burrito from the skillet and let it rest for a minute. While it rests, drizzle a splash of lime juice over the top and sprinkle a pinch of pepper. The lime adds a bright citrus note that cuts through the richness, while the pepper adds a subtle heat that lingers.
That's it — you did it. But hold on, I've got a few more tricks that'll take this to another level. These little adjustments will elevate the flavor profile and ensure that every bite is a masterpiece.
Insider Tricks for Flawless Results
The Temperature Rule Nobody Follows
Many cooks set their stove to high and then lower it, which leads to uneven cooking. I’ve found that maintaining a consistent medium‑high temperature throughout the searing process ensures a crisp tortilla without burning the cheese. Keep an eye on the skillet; if you see smoke, dial the heat down slightly. This small adjustment saves you from a soggy, under‑cooked burrito.
Why Your Nose Knows Best
When the beans hit the hot pan, the aroma will instantly signal that the heat is right. If the smell is too mild, you’re not hot enough; if it’s too intense, the oil is smoking. Trust your senses—your nose is a reliable guide to the perfect sear. A quick sniff test can save you from a burnt tortilla.
The 5-Minute Rest That Changes Everything
After the burrito is finished cooking, let it rest on a plate for five minutes before cutting. This rest period allows the cheese to set slightly, preventing it from oozing out when you slice. A rested burrito also lets the flavors meld together, creating a more cohesive taste. I’ve seen people cut right away and end up with a gooey mess; the rest period is a game‑changer.
The Perfect Fold
When folding the sides of the tortilla, make sure the seam is tight but not over‑compressed. A loose fold can cause the filling to spill, while an overly tight fold can crush the cheese. The ideal fold is snug enough to hold everything together but still flexible enough to bite through.
The Secret to a Crispy Edge
If you want an extra crisp edge, brush a thin layer of olive oil on the tortilla before searing. This creates a barrier that prevents the tortilla from becoming soggy when it contacts the hot pan. The oil also gives the tortilla a glossy shine that looks as good as it tastes.
Creative Twists and Variations
This recipe is a playground. Here are some of my favorite ways to switch things up:
Mexican Street Tacos
Swap the flour tortillas for corn tortillas, add a slaw of cabbage and a drizzle of chipotle mayo, and serve with a side of fresh cilantro lime rice. The corn adds a subtle earthiness that pairs beautifully with the tangy slaw.
Mediterranean Wrap
Use a spinach tortilla, replace the cheddar with feta, and add diced cucumber, olives, and a squeeze of lemon. The feta’s briny flavor complements the cucumber’s crispness, creating a refreshing Mediterranean vibe.
Vegan Power Burrito
Replace the cheddar with a plant‑based cheese, use coconut‑based sour cream, and add a handful of sautéed kale. This version keeps the hearty texture while being fully plant‑based.
Spicy Cajun Edition
Add a tablespoon of Cajun seasoning to the beans before spreading, sprinkle some crushed red pepper flakes over the cheese, and finish with a dash of hot sauce. The heat is balanced by the creamy cheese, making for a fiery yet comforting bite.
Breakfast Burrito Boost
Add a fried egg, a handful of sautéed spinach, and a swirl of salsa before rolling. The breakfast twist turns this into a protein‑rich, satisfying morning meal.
Storing and Bringing It Back to Life
Fridge Storage
Store assembled burritos in an airtight container for up to 3 days. Wrap each burrito individually in parchment paper to prevent sticking. When ready to eat, reheat in a skillet over medium heat until the tortilla is crisp and the cheese is melted.
Freezer Friendly
Wrap each burrito tightly in plastic wrap and then in foil. Freeze for up to 2 months. Thaw overnight in the fridge before reheating. The tortilla remains crisp, and the flavors deepen with time.
Best Reheating Method
Reheat in a skillet over low heat, adding a splash of water to create steam. This keeps the tortilla from drying out. Finish with a quick drizzle of olive oil for a fresh finish. The steam ensures the cheese stays creamy and the tortilla stays soft inside.