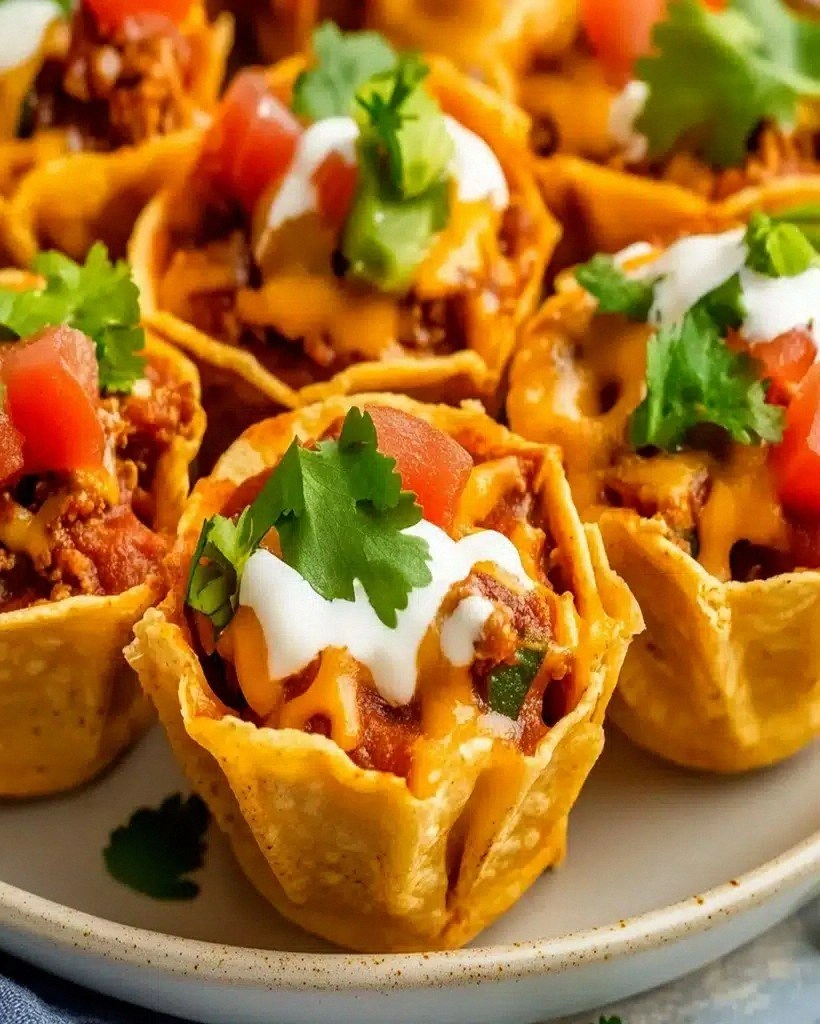
I burned dinner last Tuesday. Not just a little charred-around-the-edges kind of burned—I'm talking smoke-detector-screaming, pan-ruining, call-the-fire-department burned. In the middle of that culinary chaos I discovered something magical: enchilada cups that taste like they were kissed by the flavor gods and take less effort than ordering take-out. Picture this: crispy corn tortilla edges that shatter like thin ice, revealing a molten core of spiced chicken, gooey cheese, and a sauce so rich it could write romance novels. The aroma? A fiesta of cumin, garlic, and chili that wraps around your kitchen like a warm hug from your favorite aunt. The best part? You get all the glory of traditional enchiladas without the rolling, tucking, and praying they don't fall apart in the pan. These handheld beauties are about to become your new obsession, and I'm not even sorry about it. Let me walk you through every single step—by the end, you'll wonder how you ever made it any other way.
What Makes This Version Stand Out
Crispy Meets Gooey: Most enchilada recipes force you to choose between crispy edges or saucy softness. These cups give you both in every single bite, creating a textural experience that'll make your taste buds do a happy dance.
Weeknight Warrior Approved: From fridge to table in under 45 minutes, this recipe doesn't care if you forgot to plan dinner. It's faster than delivery and infinitely more satisfying than another sad desk lunch.
Party Perfect: These handheld heroes disappear faster than free drinks at a wedding. I've watched grown adults fight over the last cup like it contained the secret to eternal youth.
Customizable Chaos: Vegetarian? Swap the chicken for black beans. Heat seeker? Add chipotle. Feeding picky kids? Keep it mild and watch them devour vegetables they normally wouldn't touch with a ten-foot pole.
Freezer Friendly Champions: Make a double batch, freeze half, and future-you will send present-you a thank-you note when dinner's ready faster than you can say "what's for dinner?"
One-Pan Wonder: Everything bakes in a muffin tin, which means minimal cleanup and maximum bragging rights. Your dishwasher will thank you, and so will your Saturday morning self.
Restaurant Quality at Home: The secret's in the sauce—a homemade enchilada sauce that'll make you swear off the canned stuff forever. It's so good you'll want to put it on everything from eggs to ice cream (okay, maybe not ice cream).
Inside the Ingredient List
The Flavor Base
Let's talk about the foundation that makes these cups sing. The enchilada sauce isn't just any sauce—it's a deep, complex blend of dried chilies, tomatoes, and spices that tastes like it simmered for hours (spoiler: it didn't). I use a combination of ancho chili powder for its smoky depth and regular chili powder for that familiar enchilada flavor punch. The garlic doesn't just sit there looking pretty; it melts into the sauce creating these tiny pockets of aromatic bliss that'll make you close your eyes and sigh with each bite. Cumin is the unsung hero here, adding an earthy warmth that makes everything taste like it came from your favorite Mexican restaurant. Skip the cumin and you'll end up with sad, flat cups that taste like they lost their passport.
The Texture Crew
Shredded chicken is the protein powerhouse that gives these cups substance, but here's the thing—don't you dare use bland, unseasoned chicken. I poach mine in broth with onions and garlic, then shred it while it's still warm so it absorbs every drop of flavor. The cheese blend is where the magic happens: sharp cheddar for that tangy bite and Monterey Jack for its incredible melting properties. Together they create this golden, bubbly blanket that stretches like a cheese pull from a food commercial. Black beans aren't just filler—they're little protein bombs that add creaminess and keep everything from becoming a greasy mess. Corn kernels bring pops of sweetness that play beautifully against the spicy sauce, like nature's candy scattered throughout.
The Unexpected Star
Corn tortillas are the real MVPs here, transforming from humble flat circles into edible vessels that hold everything together while getting crispy around the edges. I prefer white corn tortillas for their delicate flavor and superior crisping ability, but yellow works in a pinch. The trick is cutting them into quarters and overlapping them in the muffin tin to create a sturdy base that won't leak or fall apart. A quick brush with oil before baking ensures they turn golden and crispy, not sad and soggy. These aren't just containers—they become part of the experience, adding a toasty corn flavor that corn chips only wish they could achieve.
The Final Flourish
Fresh cilantro isn't just a garnish; it's the bright, herbaceous note that cuts through all the richness like a flavor palette cleanser. A squeeze of lime right before serving awakens every other ingredient, making the spices sing and the cheese taste even cheesier. Sour cream dolloped on top isn't optional in my house—it provides a cooling contrast that makes you want to dive back in for another bite. Green onions add a fresh crunch and pretty color that makes these cups Instagram-worthy, not that they'll last long enough for photos. A final sprinkle of cotija cheese brings that authentic Mexican street food vibe that'll transport you straight to a taco stand in Tijuana.
The Method — Step by Step
- Preheat your oven to 400°F and position the rack in the center. This temperature is crucial—too low and you'll get soggy cups, too high and they'll burn before the cheese melts. While it's heating, grab your muffin tin and give it a light spray with cooking oil. I learned the hard way that skipping this step results in cups that refuse to leave their metal homes, tearing apart in a tragic display of wasted deliciousness. The sizzle when you add the ingredients later? That's the sound of success.
- Cut each tortilla into quarters with a sharp knife or pizza cutter. I stack four tortillas and cut them all at once—it's faster and satisfies my need for efficiency in the kitchen. You'll need about 24 quarters total, which sounds like a lot until you realize how quickly they disappear into the muffin tin. The key is to overlap two quarters in each cup, creating an X pattern that forms a sturdy base. Press them down gently with your fingers, making sure they conform to the cup's shape without tearing.
- Make the enchilada sauce by heating 2 tablespoons of oil in a saucepan over medium heat. Add the flour and whisk constantly for one minute—it should smell nutty and look like pale gold. This is your roux, and it's what gives the sauce body and prevents it from being watery. Add the chili powders, garlic powder, and cumin, whisking for another 30 seconds until fragrant. The aroma should make you want to bottle it and wear it as perfume.
- Slowly pour in the chicken broth while whisking constantly to prevent lumps. I cannot stress this enough—add it gradually like you're making a sophisticated French sauce, not dumping it all in like you're watering a plant. Bring it to a gentle simmer and let it bubble away for 5-7 minutes until it thickens enough to coat the back of a spoon. Season with salt and pepper, but go easy—you can always add more later, but you can't take it out.
- Combine the shredded chicken with half the enchilada sauce in a bowl, mixing until every piece is coated in that glorious red goodness. This is where the flavor infusion happens—the chicken soaks up the sauce like a sponge, ensuring every bite is packed with taste. Add the black beans and corn, stirring gently so you don't mash the beans into paste. The mixture should look like a party in a bowl, with colorful bits peeking through the sauce.
- Divide the filling among the tortilla cups, pressing down lightly to pack them full without overstuffing. I use about 2 heaping tablespoons per cup, but let's be honest—I always end up adding more because I'm greedy for flavor. Top each cup with a generous pinch of the cheese blend, letting it cascade down like a dairy waterfall. The cheese will melt and create a golden blanket that seals in all the goodness.
- Bake for 18-20 minutes until the cheese is bubbly and golden, and the tortilla edges are crispy and browned. Your kitchen will smell like a Mexican restaurant had a baby with a cheese factory—in the best possible way. Let them cool for exactly 5 minutes in the tin; this brief rest allows the cheese to set slightly so they hold together when you remove them. Use a butter knife to gently lift them out, working your way around the edges first.
- While they're cooling, prep your toppings. Chop the cilantro, slice the green onions, and cut lime wedges. I like to set up a little topping bar so everyone can customize their cups—some like it loaded, others prefer the simple life. The contrast between the hot cups and cool toppings creates a temperature dance that makes each bite interesting.
- Serve immediately on a platter, garnished with your chosen toppings. These wait for no one—they're best enjoyed hot, when the cheese is still stretchy and the tortillas retain their crispness. I dare you to taste just one and not go back for seconds. I've seen people hover by the serving plate like vultures, claiming they're "just making sure they're cool enough" while sneaking cup after cup.
Insider Tricks for Flawless Results
The Temperature Rule Nobody Follows
Here's the thing about baking these cups—temperature matters more than your relationship status on Facebook. I preheat my muffin tin in the oven for 3-4 minutes before adding the tortillas. This quick heat blast creates an instant seal on the bottom, preventing any dreaded sogginess. The tortillas should sizzle slightly when they hit the hot metal—that's the sound of crispy edges being born. Don't skip this step unless you enjoy eating enchilada-flavored mush, in which case, carry on.
Why Your Nose Knows Best
Your sense of smell is your secret weapon here. When the cheese is perfectly melted and just starting to brown, you'll smell it before you see it—a nutty, toasty aroma that signals they're ready. If you wait for visual cues alone, you might miss the window between perfectly golden and tragically burnt. I once got distracted by a phone call and returned to find my precious cups transformed into charcoal briquettes. Learn from my pain—trust your nose, not just your eyes.
The 5-Minute Rest That Changes Everything
I know, I know—when something smells this good, waiting feels like torture. But those 5 minutes of resting time aren't just me being mean; they're crucial for structural integrity. The cheese needs time to set slightly, creating a cohesive unit that won't fall apart when you bite into it. Plus, the filling redistributes, so you don't get a mouthful of molten cheese followed by a sad, cheese-less bite. My nephew once ignored this advice and ended up with a lap full of enchilada filling and a burn on his tongue that ruined his taste buds for a week.
The Cheese Blend Secret
Don't just grab any cheese and call it a day. The ratio matters—two parts Monterey Jack to one part sharp cheddar gives you the perfect balance of meltability and flavor. The Jack provides that Instagram-worthy stretch, while the cheddar brings the flavor punch. I've seen people use all cheddar and end up with greasy, separated cheese that looks like it has abandonment issues. Mix them together in a bowl first, then sprinkle—this ensures even distribution and prevents cheese clumping.
The Fresh vs. Dried Herb Debate
Fresh cilantro isn't just pretty—it brings a brightness that dried herbs can't touch. But here's the kicker: add it at the very end, not before baking. Heat turns fresh herbs bitter and dull, while adding them fresh keeps their flavor vibrant and alive. I keep the stems too—they have just as much flavor and add a nice textural contrast. If you absolutely must use dried, reduce the amount by half and add it to the sauce while it simmers.
Creative Twists and Variations
This recipe is a playground. Here are some of my favorite ways to switch things up:
The Breakfast Champion
Replace the chicken with scrambled eggs and breakfast sausage, add some diced potatoes, and you've got morning glory in cup form. Top with salsa verde instead of red sauce for a fresh twist that'll make you excited to wake up. I once served these at a brunch and watched my friends cancel their afternoon plans just to stay and eat more. The key is undercooking the eggs slightly since they'll continue cooking in the oven.
The Veggie Powerhouse
Skip the meat entirely and load up on roasted vegetables—zucchini, bell peppers, mushrooms, and spinach create a rainbow of nutrition. Add some crumbled queso fresco for tang and toasted pumpkin seeds for crunch. Even dedicated carnivores devour these without complaint, probably because they're too busy enjoying the flavor to notice the absence of meat. The secret is roasting the vegetables first to concentrate their flavors.
The Seafood Sensation
Shrimp enchilada cups are what happens when Mexico meets the coast. Use small shrimp, toss them in chili powder and lime, and add them raw—they'll cook perfectly in the oven. Mix in some corn and black beans for texture, and use a white cheese blend instead of yellow. These feel fancy enough for date night but easy enough for Tuesday dinner. Just don't overcook the shrimp or they'll turn into rubber bands.
The Heat Seeker's Dream
Add chipotle peppers in adobo sauce to the enchilada sauce—start with one pepper and work your way up depending on your pain tolerance. I've got a friend who adds three and claims it's "just a little kick." Top with pickled jalapeños and a drizzle of hot honey for that sweet-heat combo that keeps you coming back despite the sweat on your brow. Serve with milk, not water—it actually helps with the heat.
The Thanksgiving Remix
Use leftover turkey instead of chicken, add some cranberry sauce to the filling, and use a mix of cheddar and gruyere for a sophisticated twist. Sage and thyme in the sauce make it taste like the holidays in every bite. These are perfect for using up Thanksgiving leftovers in a way that doesn't feel like punishment. My family requests these more than the original Thanksgiving dinner.
The Kid-Friendly Version
Keep it simple with mild sauce, lots of cheese, and maybe some hidden vegetables finely chopped so they can't pick them out. Use ground beef seasoned with just cumin and garlic—nothing scary. Let them add their own toppings, even if that means just more cheese. I've seen the pickiest eaters devour these, probably because they're fun to eat and don't look like vegetables. Sometimes I add a little cream cheese to the filling for extra richness that kids love.
Storing and Bringing It Back to Life
Fridge Storage
Let the cups cool completely before storing—warmth creates condensation, and condensation is the enemy of crispiness. Store them in an airtight container with paper towels between layers to absorb moisture. They'll keep for up to 4 days, though I doubt they'll last that long. Don't store them with toppings—keep those separate so they stay fresh and crisp. The refrigerator will inevitably soften the tortillas slightly, but we'll fix that in the reheating.
Freezer Friendly
These freeze beautifully, making them perfect for meal prep or emergency dinners. Flash freeze them first on a baking sheet for an hour, then transfer to freezer bags. This prevents them from freezing into one giant enchilada block. They'll keep for up to 3 months, though mine never make it past 3 weeks. Label the bag with the date and a warning that these are addictive—future-you will thank present-you for the reminder.
Best Reheating Method
The oven is your friend here—375°F for 10-12 minutes from the fridge, or 15-18 minutes from frozen. Add a tiny splash of water to the baking sheet and cover loosely with foil for the first half—this creates steam that revives the filling without making the bottoms soggy. Remove the foil for the last few minutes to recrisp the edges. The microwave works in a pinch, but you'll sacrifice that delightful crunch. I've been known to reheat these in my air fryer at 350°F for 5-6 minutes—game changer.