Picture this: it’s a crisp Saturday morning, the kind that makes you want to stay in pajamas forever, but the house is already buzzing with the promise of a fresh batch of muffins. I was halfway through a marathon of “quick breakfast” videos when my roommate dared me to bake something that could survive a toddler’s snack attack and still taste like a cozy autumn hug. I grabbed the nearest pumpkin, a jar of coconut flour I’d been hoarding for “low‑carb emergencies,” and a handful of hazelnuts that had been waiting for their moment of glory. The result? A batch of muffins so soft they practically melt on your tongue, and a kitchen that smelled like a spice market meets a pumpkin patch.
Let me set the scene: the oven’s low hum, the butter sizzling as it hits the mixing bowl, the pumpkin puree swirling into a velvety orange river, and the sweet aroma of cinnamon and pumpkin pie spice weaving through the air like a warm blanket. I could hear the faint crackle of the butter as it melted, the gentle thump of the eggs being cracked, and the soft whisper of the coconut flour as it was folded in. My fingertips felt the buttery richness, the pumpkin’s silky texture, and the hazelnuts’ crunchy surprise waiting to burst out. When the muffins finally rose, the edges pulled away from the tin with a gentle sigh, and the tops were a golden‑kissed promise of pure indulgence.
Most pumpkin muffin recipes I’ve tried either end up dry, dense, or overly sweet, leaving me longing for that perfect balance of moisture and spice. This version flips the script by using coconut flour, which soaks up just the right amount of liquid while keeping the crumb feather‑light. The butter adds a luxurious richness, and the hazelnuts give a toasty crunch that contrasts beautifully with the soft interior. I’ll be honest — I ate half the batch before anyone else got a chance, and I’m still not over it. That’s how good they are.
But here’s the kicker: the secret isn’t a fancy ingredient, it’s a technique that most home bakers overlook — the “whisk‑then‑fold” method that creates an airy batter without over‑mixing. This ensures the muffins stay tender and rise evenly, giving you that pillow‑like texture that’s impossible to achieve with a simple stir‑and‑bake approach. I dare you to taste this and not go back for seconds; the combination of flavors and texture is a game‑changer.
Let me walk you through every single step — by the end, you’ll wonder how you ever made pumpkin muffins any other way. Okay, ready for the game‑changer? Grab your apron, and let’s dive into the magic.
What Makes This Version Stand Out
- Moisture: Coconut flour absorbs liquid differently, creating a batter that stays moist without becoming gummy, resulting in a muffin that feels like a cloud.
- Flavor Depth: The blend of pumpkin pie spice and cinnamon layers the taste, giving you a warm, spicy bite that lingers long after the last crumb.
- Texture Contrast: Chopped hazelnuts add a satisfying crunch that pops against the soft interior, turning each bite into a textural adventure.
- Simplicity: Only nine core ingredients, all pantry‑friendly, mean you can whip this up on a weeknight without a trip to the specialty store.
- Low‑Carb Friendly: Swapping wheat flour for coconut flour cuts the carbs dramatically while keeping the muffin hearty and satisfying.
- Make‑Ahead Magic: These muffins freeze beautifully, so you can bake a batch on Sunday and enjoy a fresh‑warm treat all week.
- Allergy‑Aware: Gluten‑free and dairy‑light (just the butter), they’re a safe bet for most dietary restrictions without compromising flavor.
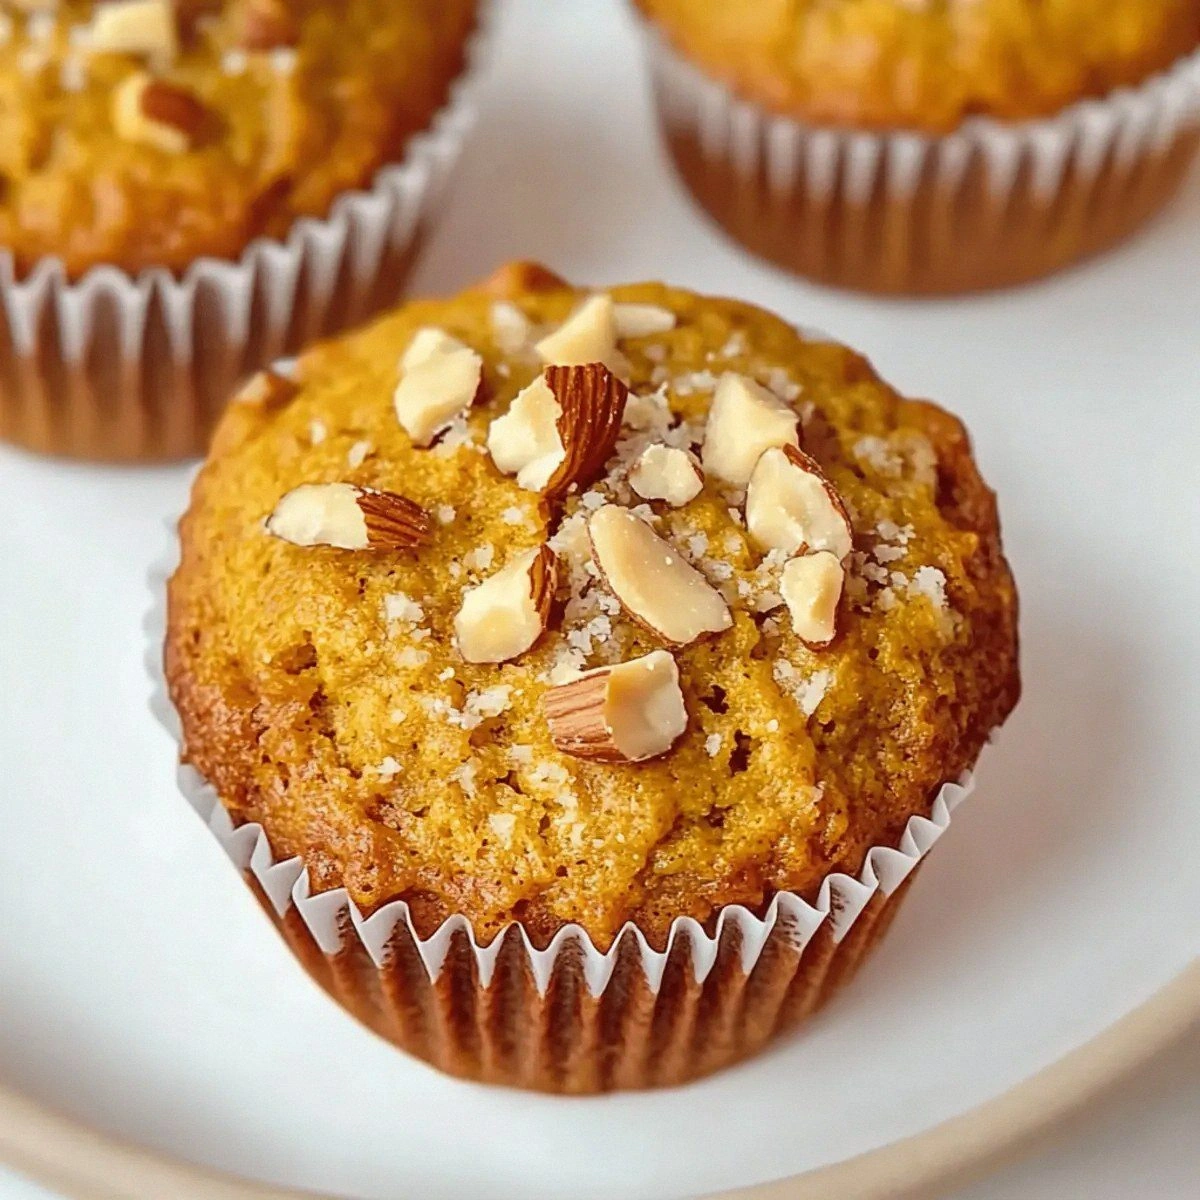
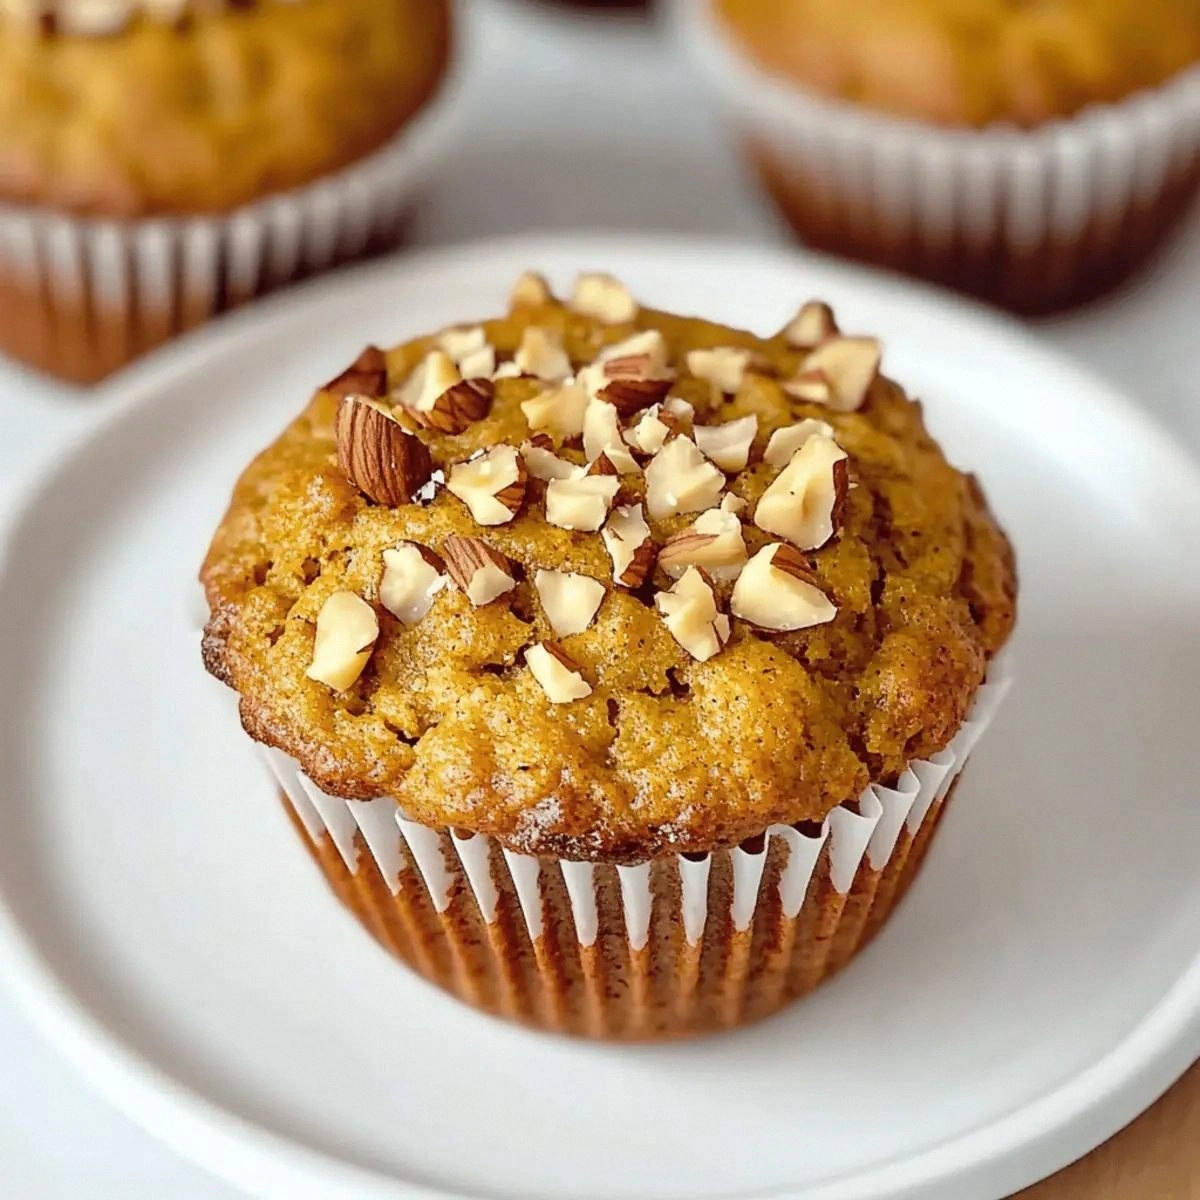
- Visual Appeal: The deep orange hue and golden tops make them Instagram‑ready, perfect for a cozy brunch spread.
- Community Praise: Friends who tried my first version begged for the recipe; this upgraded version has them lining up for seconds.
- Versatility: The base is a blank canvas for add‑ins like chocolate chips or dried cranberries, letting you customize for any season.
Inside the Ingredient List
The Flavor Base
Pureed pumpkin is the heart of these muffins, delivering that unmistakable autumn sweetness and a natural moisture that keeps the crumb tender. If you skip it, you’ll end up with a dry, bland batter that lacks the signature orange hue. I recommend using canned pumpkin puree (not pumpkin pie filling) because it’s unsweetened and pure, letting you control the sweetness. For a fresher taste, roast a small sugar pumpkin, scoop out the flesh, and blend it yourself — the flavor is unbeatable.
The Texture Crew
Unsalted butter, melted, brings a luxurious richness that coats the flour particles, ensuring the muffins stay soft and moist. Butter also helps the hazelnuts distribute evenly, giving each bite a buttery crunch. If you’re dairy‑free, swap with coconut oil; the flavor will shift slightly, but the texture remains luscious. Eggs act as the binding agent, providing structure and lift; the four large eggs give enough protein to hold the crumb together without making it rubbery.
The Unexpected Star
Coconut flour is the secret weapon here. Unlike wheat flour, it’s high in fiber and absorbs a lot of liquid, which is why the batter looks thicker than traditional muffin batter. This property keeps the muffins from becoming soggy and gives them that airy, almost cake‑like crumb. If you don’t have coconut flour, you can use almond flour, but expect a denser texture and a slightly nuttier flavor.
The Final Flourish
Roasted hazelnuts, chopped, add a toasty crunch that contrasts the soft interior, turning each bite into a delightful surprise. They also contribute a subtle buttery flavor that complements the pumpkin. If hazelnuts aren’t on hand, try toasted pecans or walnuts for a similar texture. A sprinkle of extra hazelnuts on top before baking creates a beautiful, crunchy crown that looks as good as it tastes.
Everything's prepped? Good. Let’s get into the real action, where the magic truly happens.
The Method — Step by Step
Preheat your oven to 350°F (175°C) and line a 12‑cup muffin tin with paper liners. As the oven warms, the kitchen fills with the faint scent of butter melting, a promise of the richness to come. While the oven heats, give the paper liners a quick spray of non‑stick cooking spray; this ensures the muffins release cleanly and keeps the edges perfectly smooth. I like to place the tin on the middle rack for even heat distribution, which helps the tops rise uniformly.
Kitchen Hack: If you don’t have paper liners, grease the tin well and dust it lightly with coconut flour; the muffins will still release nicely.In a large mixing bowl, whisk together the four large eggs until they’re light and frothy, about 30 seconds. You’ll hear a gentle whirr as the whisk incorporates air, which is crucial for that airy crumb. Add the melted butter and continue whisking until the mixture is glossy and fully combined. This step creates an emulsion that traps moisture, preventing the muffins from becoming dry.
Stir in the pureed pumpkin, granulated sweetener, pumpkin pie spice, and ground cinnamon. The pumpkin puree will turn the batter a deep, inviting orange, and the spices will release a fragrant aroma that fills the kitchen like a holiday market. Scrape the sides of the bowl to ensure every speck of spice is incorporated — you’ll notice the batter thickening slightly as the dry ingredients meet the wet.
In a separate bowl, whisk together the coconut flour and baking powder. Coconut flour tends to clump, so whisking it first guarantees a smooth, lump‑free mixture. This dry blend is the foundation that will absorb the wet ingredients, giving the muffins their signature softness. Once combined, set the bowl aside for a minute; the flour will start to hydrate, forming a thick, almost dough‑like consistency.
Now comes the “whisk‑then‑fold” technique: gently fold the dry coconut flour mixture into the wet pumpkin‑egg mixture using a rubber spatula. Start from the center, lifting and turning the batter over itself. This gentle motion prevents over‑mixing, which can develop too much gluten (or in this case, too much structure) and make the muffins tough. The batter should look thick but still pourable; if it seems too stiff, add a splash of milk or water.
Fold in the chopped roasted hazelnuts, distributing them evenly throughout the batter. The hazelnuts should be visible as specks of golden brown, promising that satisfying crunch in every bite. If you like extra crunch, reserve a tablespoon to sprinkle on top of each muffin before baking.
Using a ¼‑cup measuring scoop, portion the batter into the prepared muffin cups, filling each about three‑quarters full. As you scoop, you’ll notice the batter holding its shape, a sign that the coconut flour has done its job. The tops should be smooth; a gentle tap of the tin on the counter can settle any air pockets.
Slide the tin into the preheated oven and bake for 20‑25 minutes, or until the tops are golden and a toothpick inserted into the center comes out clean or with just a few moist crumbs. Around the 15‑minute mark, you’ll hear a faint “pop” as the muffins rise — that’s the moment of truth. If you like a slightly crispier top, switch the oven to broil for the last 2 minutes, watching closely to avoid burning.
Watch Out: Over‑baking will dry out the muffins; start checking at 18 minutes to ensure they stay moist.Remove the tin from the oven and let the muffins cool in the pan for five minutes. This brief rest lets the steam finish the cooking process, keeping the interior soft. After five minutes, transfer the muffins to a wire rack to cool completely; this prevents the bottoms from becoming soggy. While they cool, the kitchen will be awash with a sweet, spicy fragrance that makes you want to devour them immediately.
Serve warm, perhaps with a dollop of whipped cream or a drizzle of maple syrup if you’re feeling indulgent. The muffins are best enjoyed within a few hours, when the hazelnut crunch is at its peak and the crumb is still pillowy. I’ll be honest — I often eat them straight from the rack, still warm, and then chase them with a cup of strong coffee. That’s the perfect breakfast combo.
That’s it — you did it. But hold on, I’ve got a few more tricks that’ll take this to another level, ensuring every batch is flawless and unforgettable.
Insider Tricks for Flawless Results
The Temperature Rule Nobody Follows
Never bake muffins at a temperature higher than 350°F. Higher heat creates a rapid rise, which can cause the tops to set before the interior is fully cooked, leading to a gummy center. By keeping the oven at a moderate temperature, you allow the batter to rise gradually, resulting in an even crumb and a golden, slightly crisp edge. A friend once cranked the oven to 400°F hoping for faster results; the muffins puffed up then collapsed, turning into a dense pancake.
Why Your Nose Knows Best
Trust the scent cues. When the muffins start to emit a fragrant, toasty aroma — about 15 minutes into baking — you’re close to perfection. If the smell turns sharp or burnt, it’s a sign to pull them out immediately. This sensory checkpoint is more reliable than a timer because ovens vary, and the spices can caramelize quickly.
The 5‑Minute Rest That Changes Everything
After removing the muffins from the oven, let them sit in the tin for exactly five minutes before transferring to a rack. This short rest lets residual steam finish the cooking process, preventing the crumb from drying out. Skipping this step often results in a dry bottom, especially with coconut flour’s high absorbency. I’ve found that this pause makes the difference between “good” and “mind‑blowing.”
Hazelnut Toasting Technique
Toast the hazelnuts in a dry skillet over medium heat for 3‑4 minutes, shaking the pan frequently. The nuts will release a nutty aroma and their skins will loosen, making them easier to peel if you prefer a smoother texture. Toasted nuts deepen the flavor profile, adding a caramelized note that complements the pumpkin’s sweetness. If you skip this step, the nuts still taste great but lack that extra depth.
Moisture Balance Mastery
Because coconut flour is so absorbent, the exact moisture ratio is crucial. If the batter feels too thick, add a tablespoon of almond milk or water at a time until it reaches a thick but pourable consistency. Conversely, if it’s too runny, sprinkle a little more coconut flour, but do so sparingly to avoid a dry crumb. This balancing act ensures each muffin is soft, moist, and not overly dense.
Creative Twists and Variations
This recipe is a playground. Here are some of my favorite ways to switch things up:
Chocolate Chip Delight
Swap half of the hazelnuts for dark chocolate chips. The bittersweet chocolate pairs beautifully with the pumpkin spice, creating a decadent bite that feels like a holiday treat.
Cranberry Burst
Fold in 1/4 cup dried cranberries for a tangy pop that cuts through the sweetness. The slight tartness balances the rich butter and sweetener, making the muffins perfect for brunch.
Spiced Chai Variation
Replace the pumpkin pie spice with a chai spice blend (cardamom, ginger, cloves). This gives the muffins an exotic, warm flavor that’s perfect for cool evenings.
Nut‑Free Version
Omit the hazelnuts and substitute with toasted pumpkin seeds. You retain the crunch without the nuts, making the muffins safe for those with nut allergies while still offering texture.
Vegan Adaptation
Swap the eggs for a flax‑egg mixture (2 tbsp ground flaxseed + 6 tbsp water per egg) and use coconut oil instead of butter. The muffins stay just as moist, and the flax adds a subtle nutty note.
Storing and Bringing It Back to Life
Fridge Storage
Place the cooled muffins in an airtight container and store them in the refrigerator for up to five days. The coconut flour helps retain moisture, so they stay soft. If they start to dry out, a quick brush of melted butter before reheating revives the richness.
Freezer Friendly
Wrap each muffin individually in plastic wrap, then place them in a zip‑top freezer bag. They’ll keep for up to three months. When you’re ready to enjoy one, let it thaw at room temperature for 15 minutes, then pop it in the microwave for 20‑30 seconds.
Best Reheating Method
To bring a muffin back to its glorious softness, sprinkle a tiny splash of water on the top, cover it loosely with foil, and bake at 300°F for 5‑7 minutes. The steam generated re‑hydrates the crumb, making it taste freshly baked.