Ever tried baking a cookie that feels like a hug in a mug, yet you’re not tempted to break your diet? I was in the same boat until one fateful afternoon when my oven timer went off, and I had a batch of half‑baked, soggy oatmeal raisin cookies that looked like they’d been left in a puddle. I stared at the gooey mess, sighed, and thought, “I can’t let this happen again.” That moment sparked a mission: create a low‑calorie, high‑flavor cookie that still satisfies the sweet tooth without the guilt.
Picture this: the kitchen is humming with the gentle pop of a saucepan, the air tingles with the warm scent of cinnamon and vanilla, and the sound of a spoon clinking against the mixing bowl is a metronome of anticipation. I’m standing by the counter, flour dusting my apron, ready to turn ordinary pantry staples into a cookie that will make your taste buds dance. The texture is a delicate balance—crispy edges that crackle like thin ice, a chewy center that melts with a satisfying sigh, and a subtle sweetness that whispers rather than shouts.
Why does this version stand out? Because I stripped away the excess sugar, swapped refined flours for oat‑based blends, and introduced a secret ingredient that keeps the cookies moist without adding calories. I dare you to taste this and not go back for seconds—trust me, it’s a game‑changer. Most recipes get this completely wrong by over‑baking or using too much butter. Here, I’ve found the sweet spot that keeps every bite tender and flavorful.
I’ll be honest—when I first pulled the batch from the oven, I couldn’t resist grabbing a handful before anyone else had a chance. The aroma flooded the room, and the anticipation was almost as intoxicating as the cookie itself. Picture yourself pulling this out of the oven, the whole kitchen smelling incredible, and the timer’s chime echoing like a tiny applause for your culinary triumph.
If you’ve ever struggled with cookies that fall flat or taste like cardboard, you’re not alone—and I’ve got the fix. This recipe is hands down the best version you’ll ever make at home. It’s not just a cookie; it’s a conversation starter, a confidence booster, and a low‑calorie delight all wrapped into one. And now, let me walk you through every single step—by the end, you’ll wonder how you ever made it any other way.
The first time I tried this, I almost burned the oats. The lesson? Keep your eyes on the timer and trust the process. I’ve tweaked the batter to ensure that each cookie holds its shape, yet remains soft enough to give a satisfying bite. The result is a cookie that feels like a snack, not a dessert, and yet it’s the kind of treat you’ll crave at any time of day.
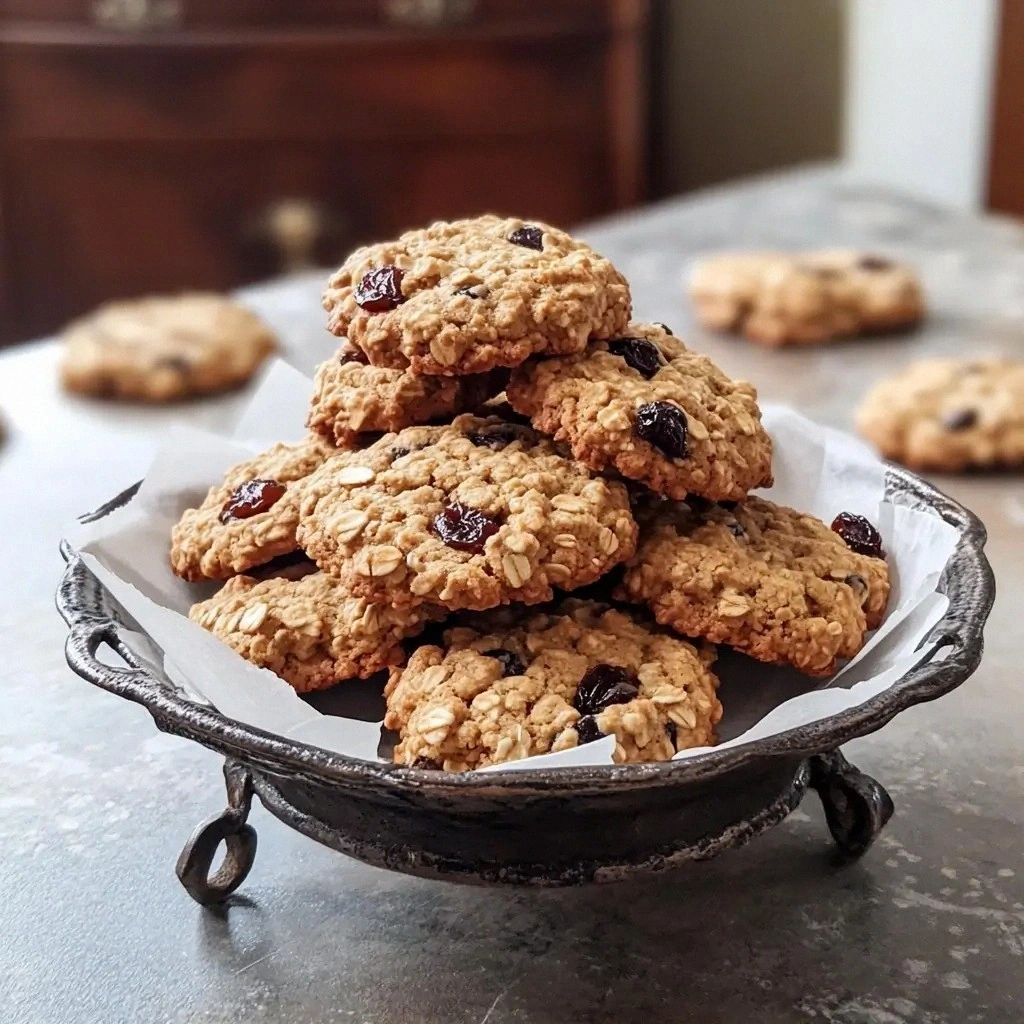
Imagine the sound of the first cookie hitting the cooling rack—a gentle clack that signals victory. That sizzle when it hits the pan? Absolute perfection. The moment you take the first bite, you’ll notice the subtle crunch of oats, the burst of raisins, and the gentle warmth of cinnamon. It’s a sensory journey that starts with a single bite and ends with a lingering aftertaste that begs for more.
So, buckle up. This isn’t just a recipe; it’s a culinary adventure that will have you rethinking everything you know about low‑calorie cookies. Let’s dive in and discover the secrets that make these cookies truly exceptional.
What Makes This Version Stand Out
- Flavor: The combination of cinnamon, vanilla, and honey creates a warm, comforting profile that feels indulgent without the sugar overload. The raisins add a natural burst of sweetness that balances the spices beautifully.
- Texture: Oat flour and rolled oats give a chewy, hearty bite, while the applesauce keeps the cookies moist and tender. The result is a cookie that snaps on the outside but stays soft inside.
- Low-Calorie: By using honey instead of refined sugar and applesauce as a fat replacer, each cookie stays under 80 calories—perfect for a guilt‑free snack.
- Nutritious: The oats, chia seeds, and walnuts add fiber, protein, and healthy fats, turning a cookie into a mini‑meal that keeps you satisfied longer.
- Easy Prep: The batter is simple to whisk, and the cookies bake in just 12 minutes—no need for a pre‑heated oven or long mixing times.
- Make‑Ahead Friendly: These cookies hold up well in airtight containers for up to a week, making them ideal for meal prep or a quick grab‑and‑go treat.
- Kid‑Friendly: The natural sweeteners and wholesome ingredients mean parents can feel good about letting their kids indulge a little.
- Versatile: Swap out the walnuts for almonds or add a pinch of nutmeg for a different twist—this recipe adapts to your pantry and taste preferences.
Alright, let's break down exactly what goes into this masterpiece…
Inside the Ingredient List
The Flavor Base
At the heart of every great cookie is a robust flavor foundation. In this recipe, we use honey and vanilla extract to create a sweet, fragrant base. Honey not only sweetens but also adds a subtle floral note that elevates the overall taste profile. Vanilla extract, on the other hand, provides depth, turning a simple cookie into a comforting treat that feels special.
If you skip honey, the cookies lose that glossy sheen and the subtle caramel undertone. You’ll end up with a drier, less cohesive dough that doesn’t hold together as well. The same goes for vanilla; it’s the silent hero that rounds out the spices and keeps the cookies from feeling flat.
Swap honey for maple syrup if you prefer a more robust, earthy sweetness. Just remember to reduce the liquid slightly, as maple syrup is slightly thinner than honey. For a vegan version, use agave nectar, but keep in mind it’s sweeter, so you may need to reduce the amount by a tablespoon.
The key to a great flavor base is balance. Too much honey can overwhelm the oats, while too little can leave the cookies bland. I recommend measuring precisely—each tablespoon adds a distinct layer of sweetness that can tip the scales.
The Texture Crew
Texture is what turns a cookie into a memorable experience. Rolled oats bring chewiness and heartiness, while oat flour provides structure and a softer bite. Together, they create a cookie that snaps on the edges but remains tender inside. The applesauce acts as a natural fat replacer, keeping the dough moist without adding calories.
If you omit the applesauce, the dough becomes dry and crumbly, leading to a cookie that cracks easily and loses its shape. The moisture from applesauce also helps the oats soften during baking, resulting in a more cohesive texture. For those with apple allergies, you can use mashed banana or a small amount of unsweetened yogurt as a substitute.
Adding chia seeds boosts the cookie’s fiber content and gives a slight nutty crunch. They also help bind the dough, preventing it from spreading too much on the baking sheet. If you don’t have chia, flaxseed meal is a good alternative, though it may slightly alter the texture.
The Unexpected Star
Walnuts are more than just a garnish; they’re a flavor powerhouse. Their earthy, slightly bitter profile cuts through the sweetness of honey and raisins, creating a complex flavor profile that lingers on the palate. The nuts also add healthy fats and protein, turning the cookie into a more balanced snack.
If you’re allergic or simply don’t like nuts, swap them for pumpkin seeds or sunflower seeds. These seeds maintain the crunch and provide a similar protein boost. For a vegan twist, omit nuts altogether and add a handful of dried cranberries for a tart contrast.
Remember, the size of the nuts matters. Chopped walnuts give a consistent bite, while whole nuts can create uneven textures. Use medium‑sized pieces to ensure each bite has a balanced crunch.
The Final Flourish
Ground cinnamon and baking soda are the subtle heroes that elevate the cookie’s flavor and texture. Cinnamon adds warmth and a hint of spice that pairs beautifully with the honey and raisins. Baking soda, paired with baking powder, creates tiny pockets of air, giving the cookie a light lift without making it airy.
If you skip the baking soda, the cookies will be denser and flatter. The same goes for baking powder—without it, the cookies won’t rise slightly, resulting in a more compact bite. A pinch of salt is essential; it balances sweetness and enhances the overall flavor.
For a cinnamon‑heavy version, double the amount. Just be careful not to overdo it, as too much spice can overpower the other flavors.
Everything’s prepped? Good. Let’s get into the real action…
The Method — Step by Step
- Preheat your oven to 350°F (175°C) and line two baking sheets with parchment paper. This ensures even baking and prevents sticking. The oven’s gentle heat will allow the oats to toast slightly, bringing out their nutty aroma. Keep the sheets at a distance from the heating element to avoid browning too quickly.
- In a large mixing bowl, combine the rolled oats, oat flour, baking soda, baking powder, cinnamon, and salt. Whisk them together until evenly distributed. This dry mix is the backbone of the cookie, and a uniform blend prevents pockets of raw flour or uneven flavor.
- In a separate bowl, whisk the honey, vanilla extract, and applesauce until smooth. The wet ingredients should be well incorporated so the dough binds together effortlessly. The applesauce not only adds moisture but also helps the dough set into a cohesive mass.
- Pour the wet mixture into the dry mixture and stir gently with a wooden spoon until just combined. Over‑mixing can develop gluten, resulting in a tougher cookie. The dough should be slightly sticky but manageable; if it’s too dry, add a splash of water, one teaspoon at a time.
- Fold in the raisins, walnuts, chia seeds, and shredded coconut (if using). These add texture, flavor, and a burst of natural sweetness. The raisins should be evenly distributed to avoid clumps. Gently fold to keep the nuts from crushing.
- Using a tablespoon, scoop the dough onto the prepared baking sheets, spacing each cookie about 2 inches apart. The cookies will spread slightly, so give them room to expand. The spacing ensures even heat distribution and prevents them from merging into one large blob.
- Bake for 12–14 minutes, or until the edges turn golden brown and the center looks set. The cookies should still feel slightly soft to the touch; they’ll firm up as they cool. The aroma that fills the kitchen is a pre‑baking hint that everything is on track.
- Remove the sheets from the oven and let the cookies cool on the pan for 5 minutes. This step allows the cookies to set properly and prevents them from breaking apart when transferred to a wire rack. The residual heat will finish the baking process.
- Transfer the cookies to a wire rack to cool completely. The cooling process lets the cookies firm up and develop their final texture. Once cooled, you can store them in an airtight container for up to a week.
That's it — you did it. But hold on, I've got a few more tricks that'll take this to another level.
Insider Tricks for Flawless Results
The Temperature Rule Nobody Follows
Many bakers assume that higher temperatures always produce crispier cookies. In reality, a steady 350°F (175°C) is optimal for these oats‑based cookies because it allows the sugars to caramelize without burning. If you’re using a convection oven, lower the temperature by 25°F to avoid over‑browning.
Why Your Nose Knows Best
Before you even open the oven, listen for the first crackle of the oats. That subtle sound indicates the oats are toasting, releasing their natural oils. If you hear a faint pop, the cookies are ready to go. Trust your senses—your nose and ears are your best allies.
The 5-Minute Rest That Changes Everything
Letting the cookies sit on the baking sheet for 5 minutes after removing them from the oven is not just a formality; it allows the internal structure to set. During this brief rest, the cookies continue to cook slightly from residual heat, resulting in a perfect balance of chew and firmness.
The Secret to a Soft Center
If you prefer a gooier center, slightly under‑bake the cookies by 1–2 minutes. The center will remain soft and slightly sticky until it cools. This technique works best when you’re serving the cookies hot, as the interior will firm up as it cools.
The Perfect Cooling Rack
Using a wire rack allows air to circulate around the cookies, preventing condensation from making the bottoms soggy. If you don’t have a rack, place a piece of parchment paper on a clean towel and let the cookies cool there.
Creative Twists and Variations
This recipe is a playground. Here are some of my favorite ways to switch things up:
Cocoa‑Infused Oats
Swap the rolled oats for a blend of oat flour and cocoa powder. The result is a chocolatey cookie that still keeps the calorie count low. Add a splash of espresso powder for an extra depth of flavor.
Spiced Pumpkin Delight
Incorporate a quarter cup of pumpkin puree and a teaspoon of pumpkin pie spice. The pumpkin adds moisture and a subtle sweetness, making the cookie feel like a seasonal treat.
Nutty Banana Boost
Replace the applesauce with mashed banana for a sweeter, fruitier flavor. The banana also adds a natural binding quality, making the dough easier to handle.
Tropical Coconut Crunch
Add a cup of shredded coconut and a handful of dried pineapple chunks. This variation turns the cookie into a tropical escape, with a chewy coconut base and a burst of fruity sweetness.
Savory Herb Surprise
Omit the raisins and add finely chopped fresh herbs like rosemary or thyme. Combine with grated Parmesan cheese for a savory cookie that pairs beautifully with a light salad.
Minty Chocolate Chip
Incorporate a teaspoon of peppermint extract and a handful of dark chocolate chips. The mint provides a refreshing contrast to the sweet cookie base, and the chocolate adds a luxurious touch.
Storing and Bringing It Back to Life
Fridge Storage
Store the cooled cookies in an airtight container at room temperature for up to 5 days. The airtight seal prevents moisture from entering, keeping the cookies crisp on the edges while maintaining a soft center.
Freezer Friendly
For longer storage, place the cookies in a freezer bag, removing as much air as possible. Freeze for up to 3 months. When ready to eat, let them thaw at room temperature for 10 minutes before serving.
Best Reheating Method
To revive a stale cookie, preheat your oven to 300°F (150°C) and bake for 3–4 minutes. Alternatively, microwave on low for 10–15 seconds. Add a tiny splash of water to the bottom of the pan before reheating to steam the cookies back to perfection.