Picture this: it’s a rainy Saturday afternoon, the kind that makes you want to curl up with a warm blanket and a steaming mug of something magical. I was half‑heartedly scrolling through a wizarding‑world fan forum when a friend dared me to recreate the iconic Butterbeer cookie from the movies, but with a twist that would make even the Hogwarts kitchen staff raise an eyebrow. I laughed, accepted the challenge, and then promptly burned a batch of ordinary chocolate chip cookies that tasted like regret and over‑cooked butter. That disaster sparked a fire under me, and I swore I would not settle for anything less than pure, chewy enchantment.
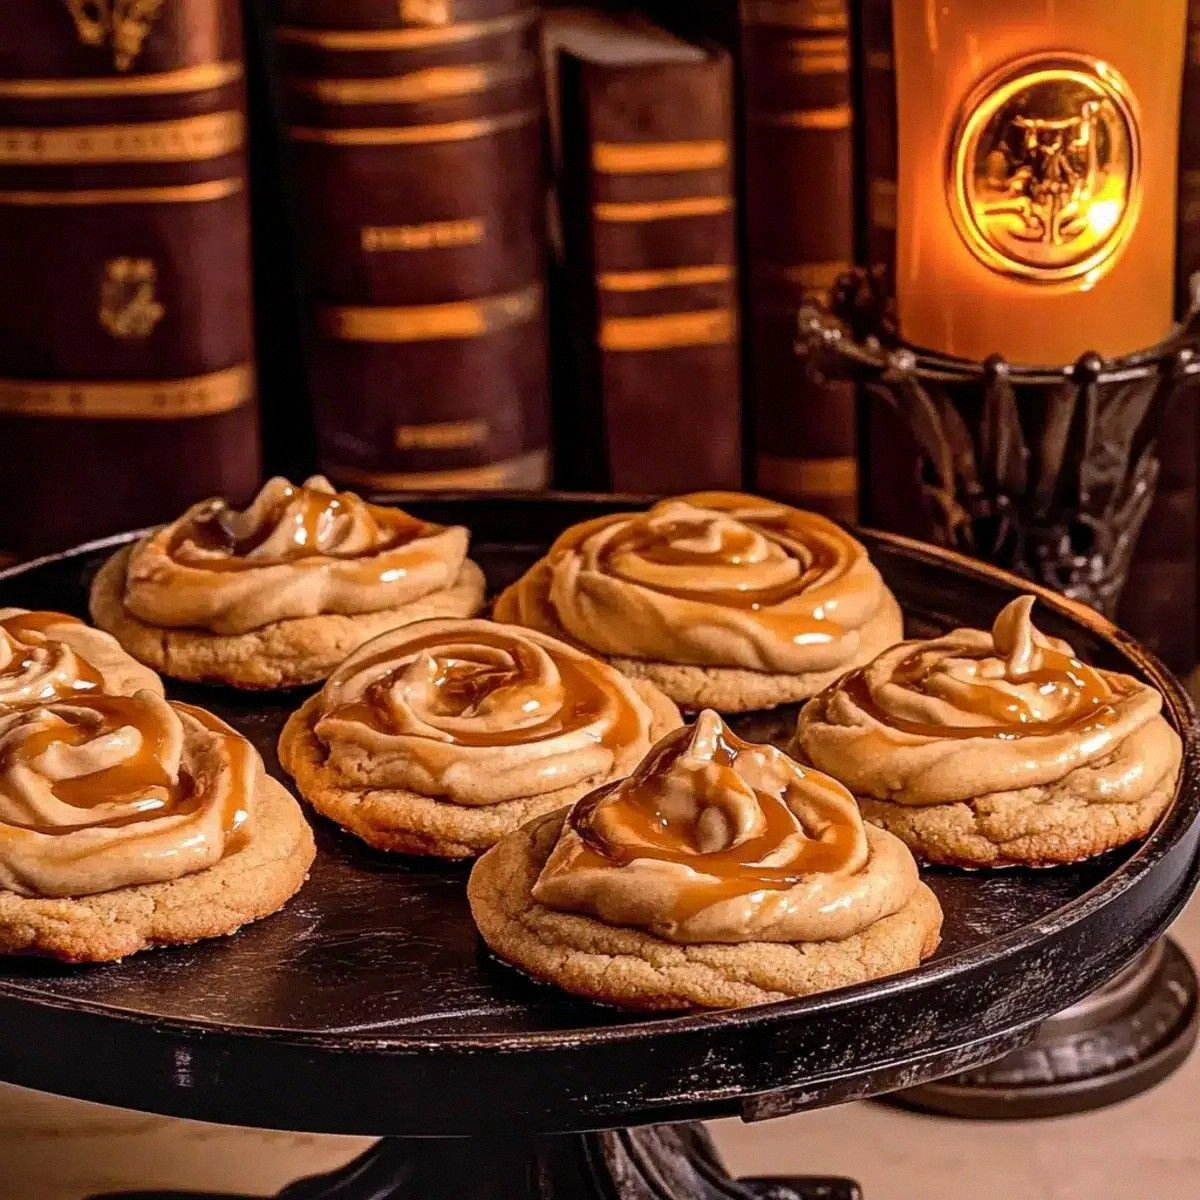
Fast forward a few weeks, and the kitchen smells like a potion lab after a successful brew. The buttery aroma of melted butter and brown sugar mingles with the caramelized whisper of butterscotch, while the faint fizz of butterscotch beer bubbles up like a secret spell. My ears hear the soft sigh of the oven door opening, and the cool metal tray feels like a portal to another realm. When I finally pull the first batch out, the cookies are golden‑brown on the edges, yet their centers stay soft and chewy, almost as if they’re still humming a quiet tune. The first bite? It’s a cascade of buttery richness, a hint of vanilla, and that unmistakable buttery‑beer tang that makes you think you’ve been sipping a frothy mug at the Three Broomsticks.
Why does this version stand out from every other Butterbeer cookie you’ll find on the internet? Most recipes either skip the crucial butterscotch beer, or they over‑sweeten the dough until it feels like a candy bar rather than a cookie. I’ve cracked the code by balancing the buttery depth with a creamy butter‑extract boost and a silky heavy‑cream glaze that locks in moisture. The secret lies in a two‑stage mixing method that creates a dough so pliable you could shape it into a wand, yet it bakes into a cookie that stays magically chewy for days. And the best part? You don’t need a wand—just a regular kitchen mixer and a pinch of patience.
Let me walk you through every single step — by the end, you’ll wonder how you ever made it any other way. I dare you to taste this and not go back for seconds, because once you’ve experienced this level of buttery sorcery, ordinary cookies will feel like a bland potion. Okay, ready for the game‑changer? This next part? Pure magic.
What Makes This Version Stand Out
- Chewy Texture: The combination of butter, heavy cream, and a precise bake time creates a cookie that stays soft in the middle, like a freshly‑kissed cauldron.
- Rich Flavor Profile: Butterscotch chips, butter extract, and a splash of butterscotch beer deliver layers of caramel‑buttery goodness that dance on the palate.
- Simplicity Meets Sophistication: Only fifteen minutes of prep, yet the result feels like a dessert you’d order at a high‑end wizarding café.
- Unique Ingredient Twist: The butterscotch beer isn’t just for flavor; it adds a subtle fizz that keeps the dough light and airy.
- Crowd‑Pleaser Factor: Whether you’re serving Hogwarts alumni or your family, these cookies disappear faster than a chocolate frog at a Quidditch match.
- Ingredient Quality: Using real butter and premium butterscotch chips makes a noticeable difference—no shortcuts here.
- Versatile Cooking Method: You can bake them on a sheet pan or use a silicone mat; the results stay consistently chewy.
- Make‑Ahead Potential: Store them airtight, and they’ll stay fresh for up to a week, or freeze for longer magic.
Inside the Ingredient List
The Flavor Base
The backbone of any great cookie is its flavor foundation, and here it starts with unsalted butter. The butter’s creaminess carries the vanilla bean paste and butter extract, amplifying that buttery‑beer note without overwhelming the palate. If you skimp on butter, you’ll end up with a dry, crumbly texture that feels more like a biscuit than a cookie. For the best result, use high‑fat European‑style butter; it melts slower, giving you that luxurious mouthfeel.
The Sweet Symphony
We’re talking light brown sugar and granulated white sugar working in tandem. The brown sugar adds moisture and a subtle molasses depth, while the white sugar contributes crispness on the edges. Skipping the brown sugar means losing that soft, chewy center, and using only white sugar makes the cookies too crunchy. If you’re avoiding refined sugars, you can swap half the white sugar for coconut sugar, though the texture will shift slightly.
The Unexpected Star
The hero of this recipe is butterscotch beer. This isn’t your average soda; it’s a rich, caramel‑laden brew that infuses the dough with a faint fizz, keeping it airy. Without it, the cookies would be dense, lacking that signature lift. If you can’t find butterscotch beer, a splash of caramel‑flavored soda or even a tablespoon of bourbon with a dash of caramel syrup can mimic the flavor.
The Final Flourish
Finishing touches include heavy cream and powdered sugar, which combine to form a silky glaze that you drizzle over the cooled cookies. This glaze locks in moisture and adds an extra layer of buttery sweetness. Skipping the glaze means losing that glossy finish that makes the cookies look as magical as they taste. For a dairy‑free version, substitute the heavy cream with coconut cream and use a powdered erythritol blend for the glaze.
Everything's prepped? Good. Let's get into the real action...
The Method — Step by Step
Start by preheating your oven to 350°F (175°C). While the oven warms, line two baking sheets with parchment paper or silicone mats. This step ensures the cookies don’t stick and bake evenly, and the parchment adds a subtle crunch to the bottom.
In the bowl of a stand mixer, cream together 0.75 cups unsalted butter, 0.5 cups light brown sugar, and 0.5 cups granulated white sugar on medium speed until the mixture is pale and fluffy. This should take about 3‑4 minutes; you’ll hear a faint whirring that signals the butter is aerated just right.
Next, add the 2 large egg yolks, 1 teaspoon vanilla bean paste, and 0.5 teaspoon butter extract. Beat until fully incorporated, and watch as the mixture thickens into a glossy, buttery batter.
Kitchen Hack: If the batter looks too thick, add a tablespoon of the butterscotch beer to loosen it without diluting flavor.In a separate bowl, whisk together 2 cups all‑purpose flour, 1 teaspoon baking soda, 1 teaspoon baking powder, and 0.5 teaspoon salt. This dry blend ensures even leavening and prevents clumps of flour in the final dough.
Gradually add the dry ingredients to the wet mixture, mixing on low speed. As the flour incorporates, you’ll notice the dough becoming thick and slightly sticky—this is exactly what you want.
Watch Out: Over‑mixing at this stage can develop gluten, leading to a tough cookie. Stop mixing as soon as the flour disappears.Fold in 0.5 cups butterscotch chips and the second 0.5 cups butterscotch chips (yes, double the chocolatey goodness). Then, gently stir in 0.5 cups butterscotch beer until the dough is evenly speckled with caramel swirls. The dough should look slightly loose but still hold its shape.
Cover the bowl with plastic wrap and chill the dough for at least 30 minutes. This chilling step is crucial; it solidifies the butter, preventing excessive spread, and it also lets the flavors meld together like a well‑cast spell.
While the dough chills, prepare the glaze. In a small saucepan, whisk together 1 cup heavy cream and 2 cups powdered sugar over low heat until smooth and glossy. Remove from heat and let it cool slightly; it should be pourable but not runny.
Once chilled, scoop the dough with a tablespoon or a small ice‑cream scoop onto the prepared sheets, spacing them about 2 inches apart. Bake for 10‑12 minutes, or until the edges are lightly golden and the tops have a faint crackle. The centers will still look soft—that’s the sign they’re on track for perfect chewiness.
Remove the cookies from the oven and let them cool on the sheet for 2 minutes before transferring to a wire rack. While they’re still warm, drizzle the buttery glaze over each cookie, letting it pool and set. The glaze will harden slightly, creating a glossy finish that locks in moisture.
That's it — you did it. But hold on, I've got a few more tricks that'll take this to another level...
Insider Tricks for Flawless Results
The Temperature Rule Nobody Follows
Most bakers recommend a room‑temperature dough, but for these cookies, a cold dough is the secret. After chilling, the butter stays solid longer in the oven, allowing the cookie to rise before the edges set. I once tried baking at a warmer 375°F and the cookies spread too thin, turning into crispy shards. Trust the chill, and you’ll get that pillowy center every time.
Why Your Nose Knows Best
Never rely solely on a timer; your kitchen’s aroma is the ultimate indicator. When the edges start to turn a light amber and you catch a sweet, caramel scent, the cookies are ready. If you wait too long, they’ll become crunchy, losing that magical chew. Trust your senses, and you’ll never overbake again.
The 5‑Minute Rest That Changes Everything
After baking, let the cookies rest on the sheet for exactly five minutes before moving them. This brief pause lets the residual heat finish cooking the center gently, preventing a raw middle while preserving chewiness. I once skipped this step and ended up with a gummy interior that felt like a half‑cooked potion.
Glaze Consistency is Key
The glaze should coat but not drown the cookie. If it’s too thick, drizzle it in a thin stream; if too thin, let it sit for a minute to thicken. A perfect glaze adds a glossy finish that catches the light, making the cookies look as enchanting as they taste.
Freeze for Future Magic
When you have leftovers, freeze the unglazed dough balls. They’ll keep for up to three months. When you’re ready, bake them straight from the freezer, adding an extra minute to the bake time. The result? Fresh‑out‑of‑the‑oven cookies that taste like you just made a new batch.
Creative Twists and Variations
This recipe is a playground. Here are some of my favorite ways to switch things up:
Spiced Butterbeer
Add a pinch of ground cinnamon and a dash of nutmeg to the dry ingredients. The warm spices complement the butterscotch flavor, turning the cookies into a cozy autumn treat.
Chocolate‑Swirl Butterbeer
Replace half of the butterscotch chips with dark chocolate chips. The bitter chocolate balances the sweet butter, creating a sophisticated flavor profile that’s perfect for adult gatherings.
Minty Magic
Stir in a few drops of peppermint extract and garnish each cookie with a tiny mint leaf before glazing. The cool mint cuts through the richness, delivering a refreshing bite.
Nutty Crunch
Fold in chopped toasted pecans or walnuts for added texture. The nuts introduce a pleasant crunch that contrasts with the chewy interior.
Vegan Enchantment
Swap the butter for a plant‑based margarine, use coconut cream in place of heavy cream, and choose a vegan powdered sugar. The result is a dairy‑free version that still delivers that magical chew.
Storing and Bringing It Back to Life
Fridge Storage
Place the cooled, glazed cookies in an airtight container lined with parchment. Store them in the refrigerator for up to five days. The cool environment keeps the glaze from softening too much while preserving chewiness.
Freezer Friendly
For longer keeping, freeze the unglazed dough balls on a tray, then transfer them to a zip‑top bag. They’ll last three months. When ready, bake from frozen, adding an extra minute to the bake time for a fresh‑out‑of‑the‑oven experience.
Best Reheating Method
To revive cookies that have hardened, place them on a microwave‑safe plate, sprinkle a tiny splash of water on the plate (not the cookie), and microwave for 10‑15 seconds. The steam revives the interior, and the glaze regains its shine.