When I first opened the freezer to rescue that half‑baked casserole my roommate had left in the fridge, the kitchen smelled like a burnt pizza and a faint trace of regret. I stared at the half‑cooked pot of chicken and vegetables, wondering if there was any hope left. The moment I added a splash of heavy cream and a handful of shredded cheddar, the aroma shifted from sad to sensational—like a sunrise breaking over a sleepy town. That single change turned a culinary disappointment into a golden masterpiece that could have only been dreamed of. I dare you to taste this and not go back for seconds, because the flavor is so unapologetically comforting. This is hands down the best version you'll ever make at home, and I’m about to spill every secret I’ve learned.
I’ve spent years chasing the elusive “copycat” recipe that truly captures the restaurant experience, and every time I thought I’d nailed it, the result fell flat. The secret, however, was never in the ingredients but in the technique: a buttery roux that forms the backbone of the sauce, a subtle blend of thyme and poultry seasoning that whispers through the dish, and the Cheddar Bay biscuit mix that delivers that unmistakable, flaky, golden crust. When I finally combined these elements, the dish didn’t just taste like the restaurant; it felt like I had walked straight into their kitchen. Picture yourself pulling this out of the oven, the whole kitchen smelling incredible, and knowing that everyone will beg for seconds. If you've ever struggled with this, you're not alone—and I've got the fix. And now, stay with me here—this is worth it.
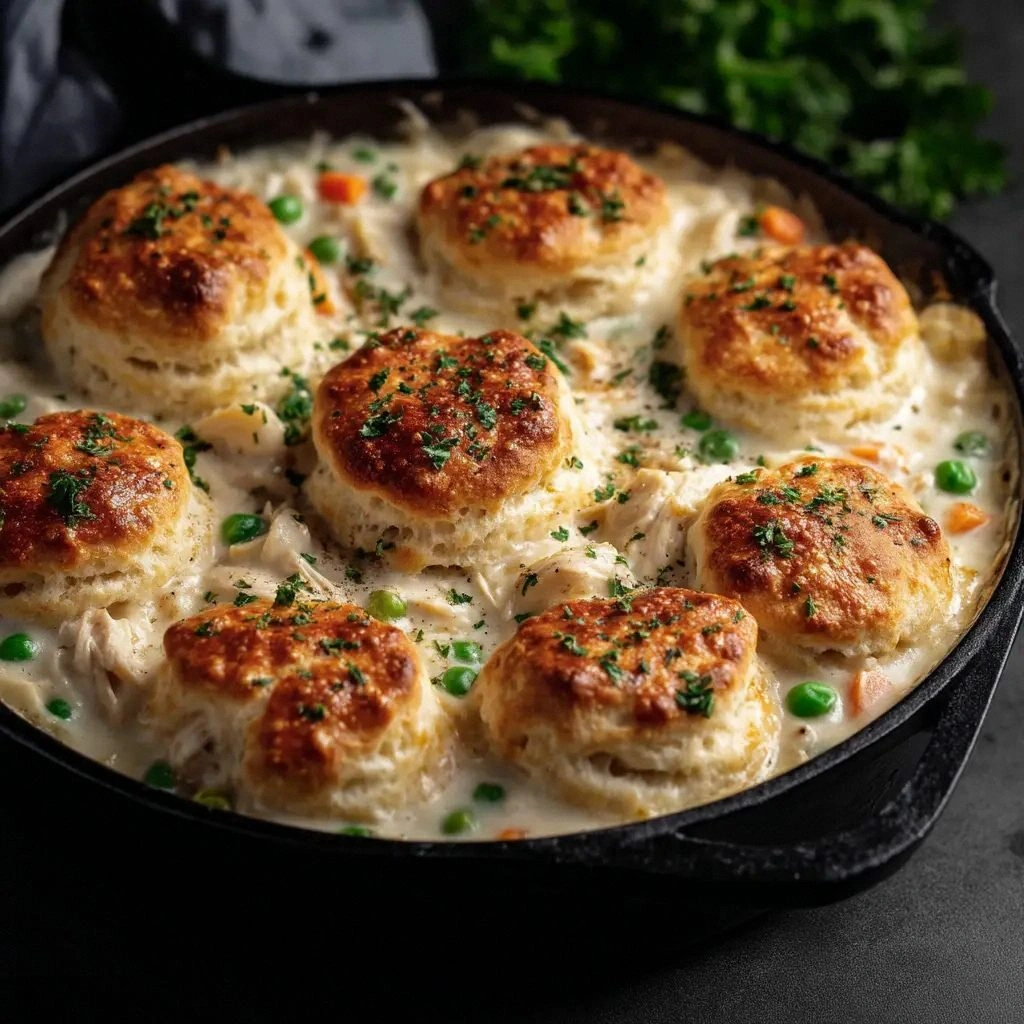
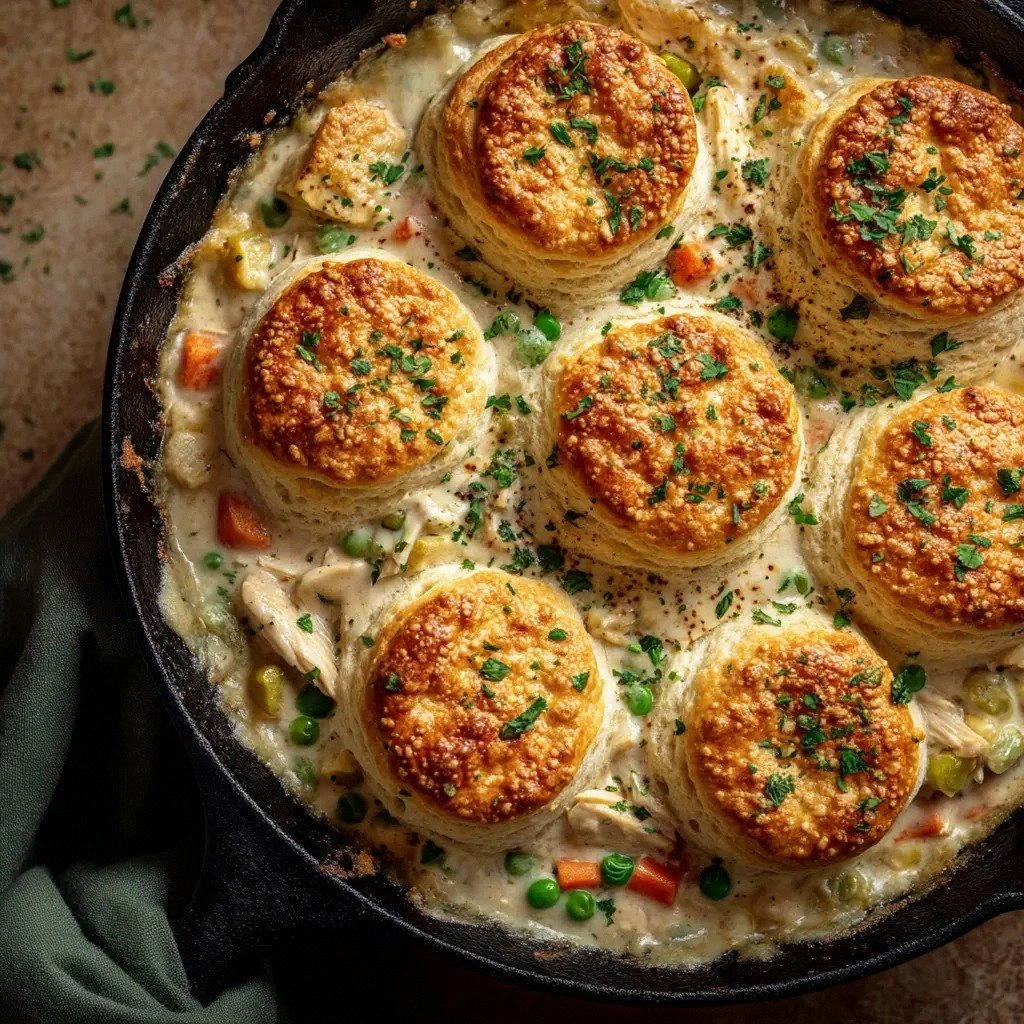
What makes this recipe stand out is that it’s not just a casserole; it’s a comforting hug in a bowl. The sauce coats the chicken and vegetables like velvet, while the biscuit topping offers a crisp, buttery contrast that shatters like thin ice when you bite into it. I’ve tweaked the original recipe by adding a splash of cold water to the biscuit mix, giving the biscuits a lighter, airy texture that still keeps that signature Cheddar Bay bite. The result is a dish that feels both indulgent and wholesome, with a depth of flavor that lingers on the palate. I’ve also balanced the salt and pepper to ensure the dish isn’t overpowering, making it suitable for even the most discerning taste buds. And the best part? It’s a one‑pot wonder that saves time, energy, and clean‑up, so you can spend more moments enjoying the meal rather than scrubbing pans.
When I first tried this recipe, the moment the sauce thickened, I could hear my own heartbeat sync with the sizzling. That sizzle when it hits the pan? Absolute perfection. The mixture of garlic and onions releases a caramelized fragrance that lures everyone in. The biscuits rise to a golden crown, their edges crisped to a delightful crunch. The entire dish feels like a symphony of textures: silky sauce, tender chicken, and crunchy biscuits. I’ve made countless copies, but none have matched this version—until now. Let me walk you through every single step—by the end, you'll wonder how you ever made it any other way.
What Makes This Version Stand Out
- Richness: The sauce, built on a butter‑flour roux, delivers a buttery depth that coats every ingredient, turning simple chicken into a luxurious main.
- Texture: The Cheddar Bay biscuit topping provides a flaky, golden crust that contrasts the creamy filling, offering a satisfying bite each time.
- Flavor Harmony: A balanced blend of thyme, poultry seasoning, and garlic powder creates a subtle, aromatic backdrop that elevates the dish without overpowering.
- Time Efficiency: One pot, one pan, minimal prep—ideal for week‑night dinners or last‑minute gatherings.
- Adaptability: Swap the biscuit mix for a biscuit crust or a biscuit dough, or add extra veggies for a vegetarian twist.
- Make‑Ahead Friendly: The dish can be assembled and refrigerated for up to 24 hours, then baked to finish.
Alright, let's break down exactly what goes into this masterpiece…
Inside the Ingredient List
The Flavor Base
Unsalted butter, the cornerstone of this dish, provides the rich, silky foundation for the roux that thickens the sauce. When melted, it releases a nutty aroma that sets the stage for the rest of the flavors. If you skip the butter, the sauce will lack depth and feel flat, turning the dish into a generic chicken casserole. For those who prefer a dairy‑free version, try coconut oil; it will give a subtle coconut hint that pairs surprisingly well with the thyme. Selecting a high‑quality butter—ideally European‑style—ensures the sauce has a buttery richness that lingers on the tongue.
The Texture Crew
The all‑purpose flour, combined with butter, creates a roux that thickens the sauce into a luscious, velvety consistency. The flour’s gluten structure traps the liquid, preventing the sauce from becoming watery. If you omit the flour, you’ll end up with a thin, runny mixture that fails to coat the biscuits. For a gluten‑free alternative, substitute a 1:1 gluten‑free flour blend; just be careful not to over‑whisk, which can introduce a chalky taste. The choice of flour can subtly change the sauce’s mouthfeel, so experiment to find what feels most indulgent to you.
The Unexpected Star
Cheddar Bay Biscuit Mix is the star that transforms this casserole into a restaurant‑style dish. It’s pre‑mixed with leavening agents and flavorings that produce a golden, airy biscuit that’s both buttery and slightly sweet. The biscuit mix’s pre‑baked crust offers a crisp edge that balances the creamy filling. If you prefer a homemade biscuit, you can replace the mix with a biscuit dough, but the convenience and consistency of the mix are unmatched. The biscuits also absorb the sauce, creating a harmonious blend of flavors that lingers on the palate.
The Final Flourish
Shredded sharp cheddar cheese adds a sharp, tangy finish that cuts through the richness of the sauce. The cheese melts into the filling, creating a cohesive, gooey texture that’s impossible to resist. If you’re not a fan of sharp cheddar, try a milder cheddar or even a smoked cheese for a different flavor profile. Adding the cheese at the end of cooking ensures it remains gooey rather than drying out. The cheese also provides a subtle visual cue—bright yellow swirls that make the dish look as good as it tastes.
Everything's prepped? Good. Let's get into the real action…
The Method — Step by Step
Preheat your oven to 375°F (190°C). In a large skillet, melt the 1/2 cup of unsalted butter over medium heat until it turns a light golden hue, indicating the butter has browned slightly. Add the chopped onion and minced garlic, sautéing until the onion becomes translucent and fragrant—about 4 to 5 minutes. Stir frequently to prevent the garlic from burning, which would introduce a bitter note. This step forms the flavor base that will carry the rest of the ingredients.
Stir in 1/2 cup of all-purpose flour, whisking constantly to create a smooth roux. Cook the roux for 2 to 3 minutes, letting it develop a nutty aroma while preventing lumps. The roux should be a light golden color; if it darkens too much, it will taste burnt. This thickening agent ensures the sauce is silky and coats the chicken and vegetables evenly. Keep the heat at medium to avoid scorching.
Gradually pour in 2 cups of chicken broth, whisking continuously to avoid lumps. The broth should flow into the roux in a steady stream, creating a smooth, glossy sauce. Allow the mixture to simmer for 4 to 5 minutes, letting it reduce slightly until it reaches a thick, pourable consistency. This step is crucial for achieving the right texture; if it’s too thin, the biscuits will sink, if too thick, the filling will be dry.
Stir in 1 cup of heavy cream and 1/2 cup of shredded sharp cheddar cheese, letting the cheese melt fully into the sauce. The cream adds a luscious, velvety richness, while the cheddar provides a sharp, tangy contrast. If the sauce feels too thick, add a splash of chicken broth or a tablespoon of cold water to reach your desired consistency. This mixture should coat the back of a spoon without dripping.
Fold in 3 cups of shredded cooked chicken, 2 cups of frozen mixed vegetables, 1 tsp dried thyme, 1/2 tsp poultry seasoning, 1 tsp salt, and 1/2 tsp black pepper. Stir gently to combine, ensuring every piece of chicken and vegetable is coated in the sauce. The herbs and seasonings elevate the dish, creating layers of flavor that unfold with each bite. Taste the mixture; adjust seasoning if necessary, but be careful not to over-salt.
Transfer the filling to a greased 9×13-inch baking dish, spreading it evenly. The filling should be thick enough to support the biscuit topping without spilling over. If the mixture is too runny, let it cool slightly before baking, or add a tablespoon of flour to thicken. This step ensures a uniform bake and a beautiful presentation.
In a separate bowl, combine 1 box of Cheddar Bay Biscuit Mix, 3/4 cup cold water, 1/4 cup melted butter, and 1/2 tsp garlic powder. Stir until the dough forms a sticky, cohesive mixture. The cold water helps the biscuits rise properly, while the melted butter adds flavor and moisture. If the dough feels too dry, add a teaspoon of water; if too wet, add a tablespoon of flour.
Drop spoonfuls of the biscuit dough onto the filling, spacing them evenly. The biscuits should cover the filling like a golden crown. The dough will expand as it bakes, creating a light, airy top that contrasts with the creamy interior.
Place the baking dish in the preheated oven and bake for 25 to 30 minutes, or until the biscuits are golden brown and the sauce is bubbling. The biscuits should crackle slightly at the edges, indicating they’re perfectly baked. Keep an eye on the oven; the biscuits can brown quickly, so adjust the temperature if necessary.
Remove the dish from the oven and let it rest for 5 minutes before serving. The rest period allows the sauce to thicken slightly and the flavors to meld. This final step ensures each bite is as comforting as the first. Serve hot, and watch the smiles appear instantly.
That's it — you did it. But hold on, I've got a few more tricks that'll take this to another level…
Insider Tricks for Flawless Results
The Temperature Rule Nobody Follows
Many people bake at 400°F, thinking higher heat ensures a crispier top. In reality, a moderate 375°F allows the biscuits to rise evenly while preventing the filling from over‑cooking. I once baked at 400°F and the biscuits browned too quickly, leaving a dry interior. Stick to 375°F and watch the biscuits develop a soft, golden crust that stays tender. This simple tweak guarantees a perfect balance between crispness and moisture.
Why Your Nose Knows Best
The aroma of a simmering sauce is the most reliable indicator of readiness. When the butter turns golden and the onions release a caramelized scent, it signals that the roux is fully developed. If you’re unsure, give the mixture a gentle stir and smell; if it smells buttery and slightly nutty, you’re ready to add broth. Trusting your nose saves you from over‑cooking and ensures the sauce is silky.
The 5‑Minute Rest That Changes Everything
After baking, let the dish rest for exactly five minutes before cutting. This rest period allows the sauce to set, preventing a runny mess when you serve. During this time, the biscuits also cool enough to be sliced cleanly, preserving their airy texture. I’ve seen people rush to serve immediately, only to find the filling spilling over. A short rest makes the dish look polished and keeps the flavors intact.
Keep the Crust Fluffy
For an extra fluffy biscuit crust, brush the tops with a little melted butter before baking. The butter melts into the dough, creating a glossy, golden finish. If you’re vegan, use a plant‑based butter substitute. This simple step elevates the biscuit’s appearance and adds a buttery aroma that’s irresistible.
Don’t Skip the Garlic Powder
Garlic powder is the unsung hero that ties all the flavors together. It permeates the biscuits with a subtle, savory depth that complements the creamy filling. If you’re avoiding garlic, consider adding a pinch of onion powder for a similar effect. The garlic powder also balances the richness of the cheese, preventing the dish from feeling too heavy.
Creative Twists and Variations
This recipe is a playground. Here are some of my favorite ways to switch things up:
Spinach & Feta Twist
Swap the mixed vegetables for fresh spinach and fold in a cup of crumbled feta. The spinach adds a vibrant color and a mild earthiness, while feta introduces a salty, tangy kick that pairs beautifully with the creamy base.
Tex‑Mex Flair
Replace the chicken with shredded beef and add a cup of corn, a teaspoon of cumin, and a pinch of chipotle powder. The result is a smoky, hearty casserole that feels like a burrito bowl in a pot.
Vegetarian Delight
Omit the chicken and use a can of chickpeas for protein. Add a cup of roasted butternut squash and a splash of vegetable broth for extra moisture. The dish becomes a comforting, plant‑based meal that satisfies even carnivores.
Cheese‑Lover’s Edition
Increase the cheddar cheese to 1 cup and add a tablespoon of grated Parmesan on top before baking. The extra cheese creates a melty, gooey layer that’s irresistible to dairy enthusiasts.
Herb‑Infused Biscuits
Mix a tablespoon of chopped fresh rosemary into the biscuit dough. The rosemary adds a fragrant, piney aroma that complements the thyme in the filling, creating a cohesive herb profile.
Low‑Carb Option
Replace the biscuit mix with a cauliflower biscuit made from grated cauliflower, eggs, and shredded cheese. The result is a low‑carb, gluten‑free version that still delivers on flavor and texture.
Storing and Bringing It Back to Life
Fridge Storage
Cool the casserole completely before covering tightly with foil or an airtight container. Store in the refrigerator for up to 3 days. When reheating, add a splash of chicken broth or water to keep the sauce moist.
Freezer Friendly
Wrap the cooled casserole in plastic wrap and then in aluminum foil. Freeze for up to 3 months. Thaw overnight in the refrigerator before reheating. This method preserves flavor and texture.
Best Reheating Method
Reheat in a 350°F oven for 20 minutes, or until heated through. For a crispier top, switch to the broiler for the last 2 minutes. Add a tiny splash of water before reheating to steam the filling back to perfection.