Why you'll love this recipe
- 30‑minute sweet fix for any craving
- Crowd‑pleaser with eye‑catching pink hue
- Make‑ahead friendly, store up to five days
- Kid‑approved soft center, mild chocolate flavor
- Freezer‑friendly for stash‑ready treats
I first baked these on a rainy Thursday when my teenage son begged for something “fancy but quick.” The kitchen smelled of cocoa and vanilla as the pink dough spread across the tray, and the sight of the colors brightened the gloom. When we bit into the warm cookies, the soft center melted in his mouth, and his grin convinced me these would become a family staple. A few weeks later, I served them at a friend’s baby shower, arranging them on a pastel platter beside fresh strawberries. The pink hue caught everyone’s eye, and the frosting added that classic tang that made the tiny guests’ parents swoon. Since then, they’ve earned a permanent spot in my weekly bake‑list.
The story
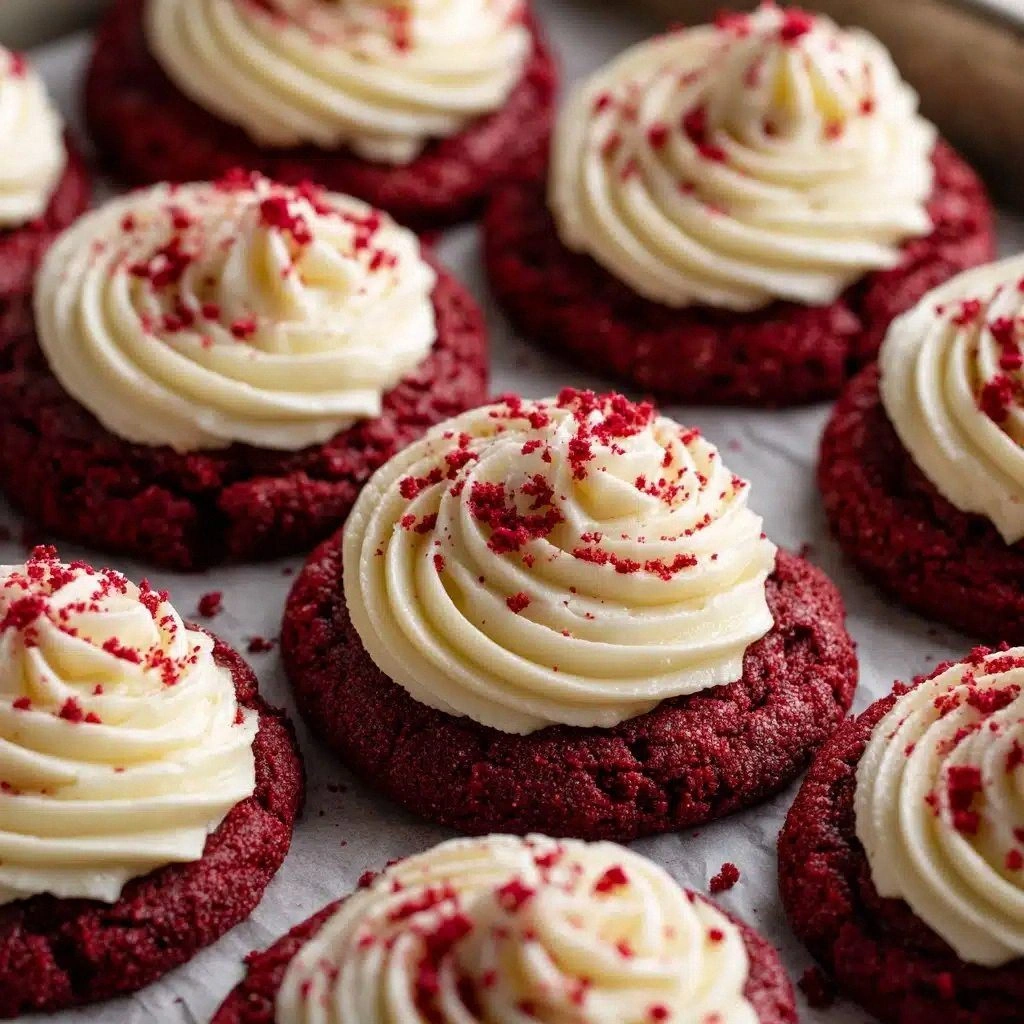
The moment the timer dings, a swirl of pink‑streaked aroma—rich cocoa, buttery vanilla, and a whisper of red food coloring—fills the kitchen, making your mouth water before the first bite. You can almost taste the soft, cake‑like crumb as the cookies sit on the cooling rack, their edges just barely golden.
I first discovered these cookies during a rainy Saturday bake‑off with my niece, who begged for something that looked like a cupcake but could be eaten with her tiny hands. When the first batch emerged, her eyes lit up at the vivid hue, and the instant smile she gave me convinced me this was a keeper. Since then, they've become my go‑to treat for birthday parties and late‑night cravings alike.
What sets this version apart is the delicate balance of creaming butter and sugars before folding in the flour, which creates a tender, cake‑like texture rather than a dense cookie. A modest splash of red food coloring gives a festive pop without overwhelming the flavor, and the optional white chocolate chips add pockets of creamy sweetness that melt into the crumb.
On the palate, you’ll first notice the buttery richness, followed by a subtle cocoa depth that whispers of classic red velvet cake. The sweet vanilla and a hint of tang from the optional cream cheese frosting round out the flavor, while the soft interior contrasts with a barely‑crisp edge, delivering a satisfying bite every time.
These pink beauties shine on a dessert platter beside fresh berries, or you can sandwich two with a dollop of frosting for an indulgent mini‑sandwich. They’re perfect for a casual Friday night snack, a potluck centerpiece, or a make‑ahead treat that stays fresh throughout the week.
Don’t let the elegant appearance intimidate you—this recipe is straightforward, with only a few steps and a total time under thirty minutes. The key is to stop mixing as soon as the flour disappears, ensuring a light, airy crumb that rivals any bakery’s red velvet cupcake.
I’ve baked this batch four times, and each time my family polished them off in minutes; even my grandma, who’s skeptical of anything pink, declared them “the best little cakes she’s ever tasted.” So grab your parchment, preheat the oven, and let’s get baking.
Why This Recipe Works
- Creaming butter and sugars aerates the dough, creating a cake‑like crumb.
- A modest amount of baking soda provides gentle lift without spreading too much.
- Folding in white chocolate chips after mixing prevents over‑development of gluten, keeping texture tender.
Ingredient notes & substitutions
unsalted butter
Provides richness and helps trap air for a cake‑like crumb.
red food coloring
Gives the signature pink hue without altering flavor.
unsweetened cocoa powder
Adds deep chocolate notes while keeping the cookie light.
white chocolate chips
Creates sweet, creamy pockets that melt into the crumb.
cream cheese frosting
Adds a tangy, creamy finish that mimics classic cupcake frosting.
Equipment you'll need
Ingredients
- 1/2 cup unsalted butter, softened
- 3/4 cup granulated sugar
- 1/4 cup brown sugar, packed
- 1 large egg
- 1 tsp vanilla extract
- 1 tbsp red food coloring
- 1 1/2 cups all-purpose flour
- 1/4 cup unsweetened cocoa powder
- 1/2 tsp baking soda
- 1/4 tsp salt
- 1/2 cup white chocolate chips
- Cream cheese frosting (optional for topping)
Before You Start
- Let butter soften 30 minutes
- Preheat oven to 350°F
- Line baking sheet with parchment
- Measure dry ingredients in a bowl
- Set egg to room temperature
Instructions
- 1Step 1
Preheat the oven to 350°F (175°C) and line a baking sheet with parchment paper.
- 2Step 2
In a large mixing bowl, cream together the butter, granulated sugar, and brown sugar until light and fluffy.
- 3Step 3
Beat in the egg, vanilla extract, and red food coloring until smooth.
- 4Step 4
In a separate bowl, whisk together the flour, cocoa powder, baking soda, and salt.
- 5Step 5
Gradually add the dry ingredients to the wet mixture and mix until fully combined. Fold in white chocolate chips if using.
- 6Step 6
Scoop tablespoon-sized portions of dough onto the prepared baking sheet. Bake for 8–10 minutes until the edges are set and centers are soft.
- 7Step 7
Allow to cool for 5 minutes on the pan before transferring to a wire rack. Top with cream cheese frosting if desired.
Pro tips
Don’t over‑mix the dough
Mix only until flour disappears; extra mixing toughens the cookie.
Chill dough briefly
A 10‑minute chill helps the cookies keep their shape on the sheet.
Use room‑temp egg
Room‑temperature egg incorporates more evenly, giving a smoother batter.
Add food coloring gradually
Start with a few drops; you can always deepen the hue later.
Watch edges for doneness
When the edges are set and lightly golden, the centers will finish as they cool.
Cool on wire rack
This prevents steam from making the bottoms soggy.
Fold chips gently
Incorporate white chocolate chips after mixing to avoid over‑developing gluten.
Variations to try
Gluten‑Free Version
Swap all‑purpose flour for a 1‑to‑1 gluten‑free blend; the texture stays tender.
Vegan Swap
Use coconut oil instead of butter, a flax‑egg replacer, and dairy‑free white chocolate.
Holiday Peppermint Twist
Add ½ teaspoon peppermint extract and crush candy‑cane pieces into the batter.
Mini Cupcake Cookie Bites
Shape dough into bite‑size balls and bake for 6‑7 minutes for a party snack.
Serving Suggestions
Troubleshooting
Cookies spread too much
Chill the dough 10 minutes before baking and avoid over‑creaming the butter.
Centers are dry
Reduce bake time by a minute and ensure the oven temperature is accurate.
Frosting slides off
Let cookies cool completely before frosting; add a pinch of powdered sugar to the frosting for stability.
Color is pale
Add a few more drops of food coloring; remember the hue deepens slightly during baking.
Storage & make-ahead
Refrigerator
Store in an airtight container; keep for up to 5 days.
Freezer
Freeze in a zip‑top bag for up to 2 months; thaw at room temperature before serving.
Best way to reheat
Warm in a 300°F oven for 5 minutes to revive softness.
Make-ahead
Bake cookies ahead and frost just before serving; dough can be chilled up to 24 hrs.
Ingredients
- 1/2 cup unsalted butter, softened
- 3/4 cup granulated sugar
- 1/4 cup brown sugar, packed
- 1 large egg
- 1 tsp vanilla extract
- 1 tbsp red food coloring
- 1 1/2 cups all-purpose flour
- 1/4 cup unsweetened cocoa powder
- 1/2 tsp baking soda
- 1/4 tsp salt
- 1/2 cup white chocolate chips
- Cream cheese frosting (optional for topping)
Instructions
- 1Preheat the oven to 350°F (175°C) and line a baking sheet with parchment paper.
- 2In a large mixing bowl, cream together the butter, granulated sugar, and brown sugar until light and fluffy.
- 3Beat in the egg, vanilla extract, and red food coloring until smooth.
- 4In a separate bowl, whisk together the flour, cocoa powder, baking soda, and salt.
- 5Gradually add the dry ingredients to the wet mixture and mix until fully combined. Fold in white chocolate chips if using.
- 6Scoop tablespoon-sized portions of dough onto the prepared baking sheet. Bake for 8–10 minutes until the edges are set and centers are soft.
- 7Allow to cool for 5 minutes on the pan before transferring to a wire rack. Top with cream cheese frosting if desired.