The first time I tried to rescue a batch of overcooked carrots and a stubborn batch of rutabagas, I ended up with a mush that tasted like burnt toast. I was halfway through the dinner rush when I realized my skillet had turned into a sad, soggy mess. That night, I promised myself that I would never again let the humble root vegetable be a kitchen liability. Fast forward, and this recipe is the culinary equivalent of a superhero cape for your pantry staples.
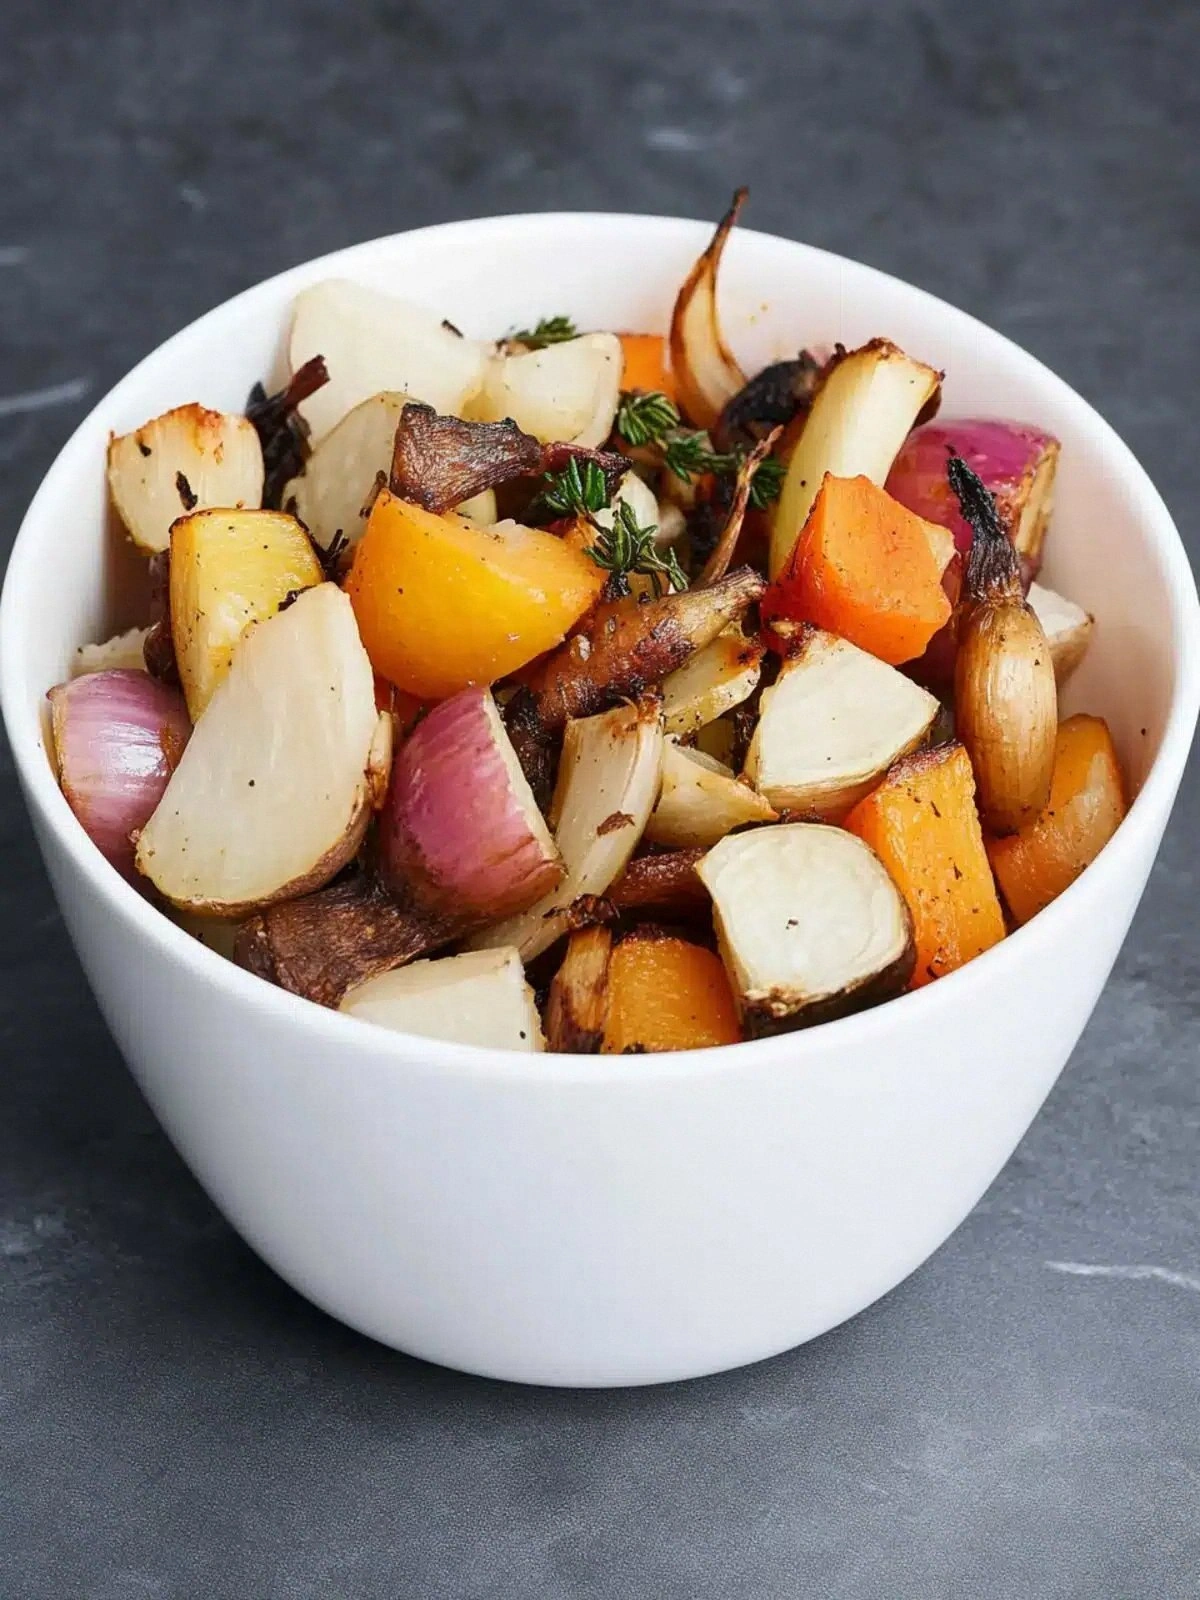
Picture this: a hot oven preheated to 425°F, a tray of colorful root vegetables glistening with olive oil, and the intoxicating scent of rosemary and thyme wafting through the kitchen. The sound of the vegetables crackling as they roast is like a percussion section building to a crescendo. The moment you lift the lid, a cloud of caramelized steam envelopes the room, and the colors shift from dull to golden amber.
I dare you to taste this and not go back for seconds. That is the bold claim I make, and it’s not hyperbole. The combination of sweet potatoes and parsnips with the earthy depth of rutabagas creates a flavor profile that is both comforting and adventurous. The butter and olive oil mingle to form a silky coating that clings to each bite like velvet.
If you've ever struggled to get root vegetables to crisp up, you're not alone—and I've got the fix. The secret is a high heat roast paired with a brief toss in the oven to expose the surfaces. The result? Crispy edges that shatter like thin ice, while the interior remains tender and juicy.
Picture yourself pulling this out of the oven, the whole kitchen smelling incredible, and a plate of perfectly roasted vegetables waiting to be served. The anticipation is almost as delicious as the dish itself. Let me walk you through every single step, and by the end, you'll wonder how you ever made it any other way.
What Makes This Version Stand Out
This recipe is a game-changer because it balances sweet, savory, and aromatic elements in a single, cohesive dish. The use of a diverse root vegetable mix ensures that each bite offers a different texture and flavor profile. By roasting at a high temperature, we achieve a caramelized exterior that locks in moisture. The herb blend is meticulously chosen to complement rather than overpower the natural sweetness of the roots. It’s also a crowd-pleaser, perfect for family dinners or a side dish at a dinner party. And because the ingredients are all pantry staples, you can whip this up on a weekday with minimal prep.
- Flavor: The layered seasoning creates a depth that feels like a full-bodied wine, with subtle hints of earth and spice.
- Texture: Crispy edges contrast with a buttery, melt-in-your-mouth interior, making each bite a sensory delight.
- Simplicity: No fancy equipment or obscure ingredients—just a few herbs and a good oven.
- Uniqueness: The combination of rutabagas and pearl onions gives it a twist that most roasted root recipes lack.
- Crowd Reaction: Guests rave about the “wow” factor and the comforting, homey taste.
- Ingredient Quality: Fresh, firm roots are essential; look for firm skins and no soft spots.
- Cooking Method: High-heat roasting ensures caramelization without overcooking.
- Make‑Ahead Potential: Prepare and roast ahead; reheat in the oven to restore crispness.
Alright, let's break down exactly what goes into this masterpiece…
Inside the Ingredient List
Before we dive into the cooking process, let’s dissect the lineup of ingredients that make this dish sing. Each component plays a specific role, whether it’s providing sweetness, depth, or a textural contrast. Understanding why each ingredient matters will help you adapt the recipe to what you have on hand. If you’re short on one item, there are practical swaps that preserve the flavor profile. The key is to keep the balance of sweet, savory, and aromatic elements intact.
The Flavor Base
The combination of rosemary, tarragon, sage, and thyme is the aromatic backbone. Rosemary adds a piney, resinous note that grounds the sweetness of the root vegetables. Tarragon contributes a subtle anise flavor that brightens the dish. Sage brings a warm, earthy undertone, while thyme offers a mild, floral hint. Together, these herbs create a fragrant bouquet that permeates each bite.
The Texture Crew
Root vegetables like carrots, sweet potatoes, and rutabagas offer a firm bite that turns tender when roasted. Pearl onions add a burst of sweetness and a delicate crunch when they blister. Shallots provide a mild, slightly sweet flavor that complements the earthiness of the roots. Butter and olive oil act as a binding agent, ensuring the vegetables stay moist while achieving a crisp exterior.
The Unexpected Star
Parsnips are often overlooked but bring a subtle nutty sweetness that pairs beautifully with the other roots. Their slightly peppery flavor adds a layer of complexity. When roasted, parsnips develop a caramelized crust that contrasts with their soft interior. This subtle twist elevates the dish from ordinary to extraordinary.
The Final Flourish
The finishing touch of a light sprinkle of freshly cracked pepper adds a hint of heat that wakes up the palate. The final drizzle of olive oil before serving adds a glossy sheen and a burst of richness. A pinch of salt enhances all the flavors without masking them. Together, these finishing touches ensure the dish feels complete and balanced.
Everything's prepped? Good. Let's get into the real action…
The Method — Step by Step
We’re about to transform a pile of root vegetables into a dish that will have everyone asking for seconds. The process is straightforward, but each step is crucial for achieving the perfect balance of caramelization and tenderness. Keep an eye on the timer, and don’t be tempted to check too often—this is where patience pays off.
- Preheat the oven to 425°F (220°C). Line a large baking sheet with parchment paper to prevent sticking. Arrange a single layer of all vegetables on the sheet, ensuring they are not crowded. This setup allows the heat to circulate and crisp the edges. Let the tray sit at room temperature for 5 minutes to prevent steaming.
- In a small bowl, whisk together the butter, olive oil, salt, and pepper until the butter is melted. Pour this mixture over the vegetables, tossing gently to coat evenly. The fat will help the herbs adhere to the surface and promote caramelization. Make sure every bite has a touch of this flavorful glaze.
- Sprinkle the rosemary, tarragon, sage, and thyme over the coated vegetables. Toss again to distribute the herbs uniformly. The herbs will release their oils as they roast, infusing the dish with aroma. This step is where the dish starts to smell like a summer garden.
- Roast the vegetables in the preheated oven for 25 minutes. Halfway through, flip them with a spatula to ensure even browning. Watch for the edges to develop a golden brown crust; this indicates the caramelization is happening. The interior should still feel slightly firm—overcooking will turn them mushy.
- After 25 minutes, add the pearl onions and shallots to the tray. These smaller veggies need less time to soften, so adding them later keeps them from becoming soggy. Toss everything once more to mix the flavors. The onions will blister slightly, adding a sweet, caramelized bite.
- Return the tray to the oven for an additional 10 minutes. The onions should be translucent and the roots tender. The final 10 minutes are critical for achieving a crisp exterior without drying out the interior. Keep an eye on the color; you’re looking for a deep amber hue.
- Remove the tray from the oven and let the vegetables rest for 5 minutes. Resting allows the steam to redistribute, keeping the interior moist. The residual heat will finish cooking the root veggies to perfection. This pause also lets the flavors meld together.
- Transfer the roasted vegetables to a serving dish. Garnish with a few fresh thyme leaves for a pop of color and aroma. Serve immediately while the edges are still crisp. The dish is best enjoyed hot, but it also holds up well for a short period.
- If you’re preparing ahead, store the roasted vegetables in an airtight container in the refrigerator for up to 3 days. Reheat in a preheated oven at 350°F (175°C) for 10 minutes to restore crispness. Add a splash of water before reheating to keep the vegetables from drying out.
That's it — you did it. But hold on, I've got a few more tricks that'll take this to another level…
Insider Tricks for Flawless Results
Even seasoned cooks can stumble on the fine line between perfectly roasted and overdone. These insider tricks are the secret sauce that elevates a good dish to greatness. They’re simple to implement but make a noticeable difference in flavor, texture, and presentation. Apply them consistently, and you’ll see the transformation in every batch.
The Temperature Rule Nobody Follows
Many people roast at a lower temperature, which leads to steaming rather than caramelization. By setting the oven to 425°F, you give the sugars enough heat to brown quickly. This high heat also creates a crisp crust that locks in moisture. Keep the tray in the center of the oven for even heat distribution.
Why Your Nose Knows Best
Trust the aroma as a reliable indicator of doneness. When the vegetables emit a sweet, nutty scent, they’re ready. If you smell a faint, raw sweetness, give them a few more minutes. The scent changes from green to caramelized as the sugars break down.
The 5-Minute Rest That Changes Everything
Resting the vegetables after roasting allows the steam to redistribute, preventing the interior from becoming dry. It also gives the flavors time to settle and meld. Skipping this step often results in a less cohesive taste. A quick 5-minute rest is worth the pause.
Even Heat Distribution
Place the baking sheet on a middle rack for even heat. Avoid the top rack, which can cause the tops to burn before the interiors are cooked. Rotate the tray halfway through for uniform browning. This simple tweak saves the dish from uneven cooking.
The Secret of the Herb Blend
Fresh herbs bring a brighter flavor than dried. If you only have dried, use a quarter of the amount and add a splash of fresh herbs at the end. The fresh herbs release their oils in the final minutes, adding a fresh burst of aroma. This tweak ensures the dish feels alive and vibrant.
Apply these tricks, and you'll notice that each bite is more harmonious. The flavors will feel layered, and the textures will dance on your palate. This is the difference between a good roast and a memorable one.
Creative Twists and Variations
This recipe is a playground. Here are some of my favorite ways to switch things up: swap the herbs for a different flavor profile, adjust the sweetness level, or add a protein to turn it into a main dish. Experimenting keeps the dish fresh and allows you to tailor it to any occasion. Each variation offers a distinct taste experience that will surprise and delight.
Maple Glazed Root Medley
Replace half the olive oil with a splash of maple syrup for a sweet, caramelized glaze. The syrup adds depth and a subtle molasses undertone. Pair it with a sprinkle of cinnamon for an autumnal twist. This variation works beautifully as a side for Thanksgiving or a cozy fall dinner.
Spicy Cajun Root Blend
Add a tablespoon of Cajun seasoning to the herb mix for a fiery kick. The heat pairs well with the natural sweetness of the roots. Finish with a squeeze of lime for brightness. This version is perfect for a summer barbecue or a spicy dinner party.
Mediterranean Herb Roast
Swap rosemary, tarragon, sage, and thyme for oregano, basil, and parsley. Add a splash of lemon zest before roasting for a citrusy note. Drizzle with a bit of extra virgin olive oil after roasting. This Mediterranean twist pairs nicely with grilled fish or chicken.
Herb‑Infused Butter Finish
After roasting, melt a tablespoon of butter and stir in fresh herbs. Drizzle this butter over the vegetables for a glossy, buttery finish. The butter’s richness balances the earthiness of the roots. It’s a simple upgrade that feels indulgent.
Root Vegetable Skewers
Cube the vegetables and thread them onto skewers. Grill them over medium heat, brushing with the herb‑oil mixture. The charred edges add a smoky flavor that complements the natural sweetness. Serve with a yogurt dip for a light appetizer.
Feel free to mix and match these ideas. The beauty of roasted root vegetables is that they adapt to almost any flavor profile you’re in the mood for.
Storing and Bringing It Back to Life
The good news is that this dish keeps well and can be revived with a few simple steps. Proper storage preserves flavor and texture, ensuring you can enjoy it later without losing the quality you just cooked. The following guidelines will help you maintain the integrity of the roasted roots.
Fridge Storage
Transfer the cooled vegetables to an airtight container. Store in the refrigerator for up to 3 days. The cold environment slows down enzymatic activity, preserving freshness. Keep the container on a middle shelf to avoid temperature fluctuations.
Freezer Friendly
For longer storage, place the roasted vegetables in a freezer bag and press out excess air. Freeze for up to 2 months. Thaw in the refrigerator overnight before reheating. Freezing can slightly soften the texture, so a quick oven finish restores crispness.
Best Reheating Method
Reheat in a preheated oven at 350°F (175°C) for 10 minutes. Add a splash of water before reheating to create steam and prevent drying out. The heat will revive the caramelized crust while keeping the interior moist. Serve immediately for the best experience.