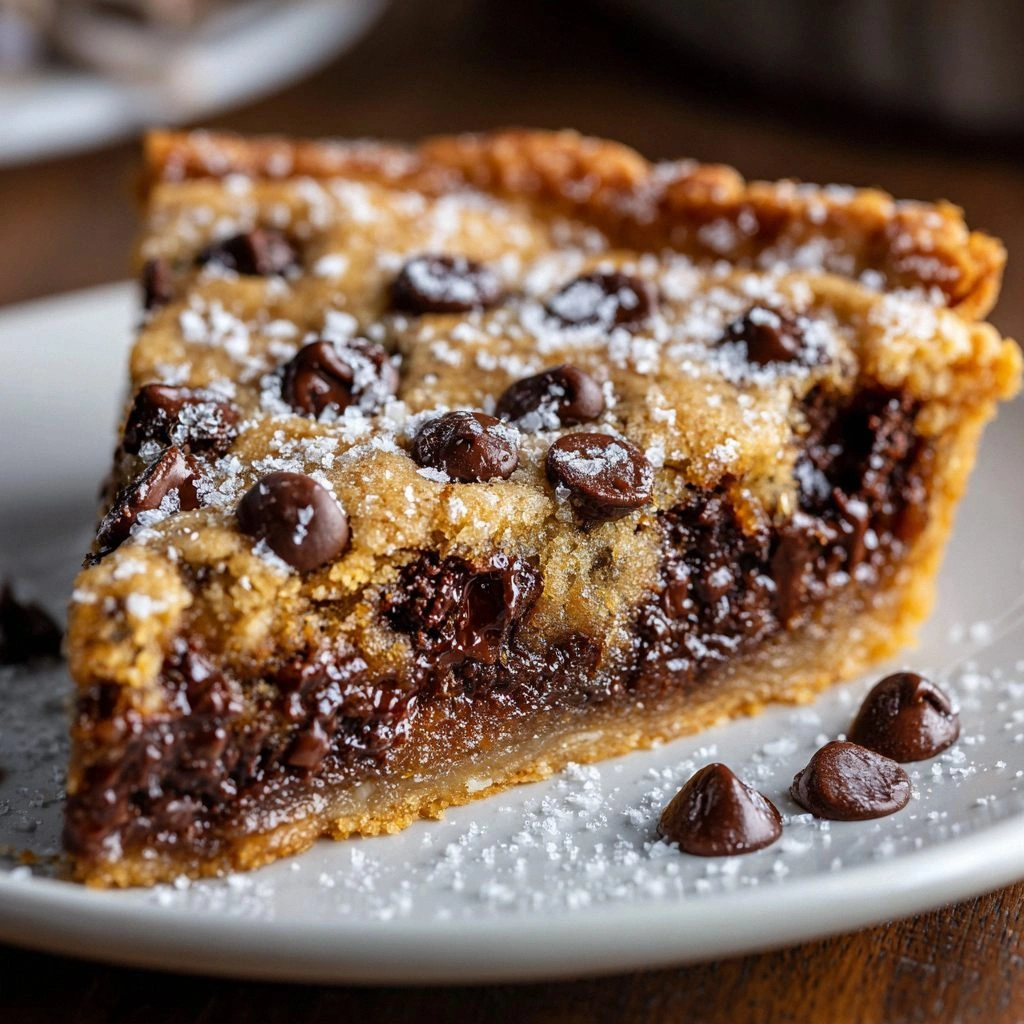
It started on a blustery December afternoon when the kitchen lights flickered like fireflies and I was scrambling to salvage a ruined lasagna that had turned into a soggy, flavorless mess. I stared at the steaming pot, feeling the sting of disappointment, when a friend texted, “Try a spinach dip with breadsticks. It’s a lifesaver.” That single line was the spark that turned my culinary frustration into a mission. I set the oven to 375°F, grabbed a can of refrigerated breadstick dough, and imagined a dish that would turn my kitchen disaster into a triumph.
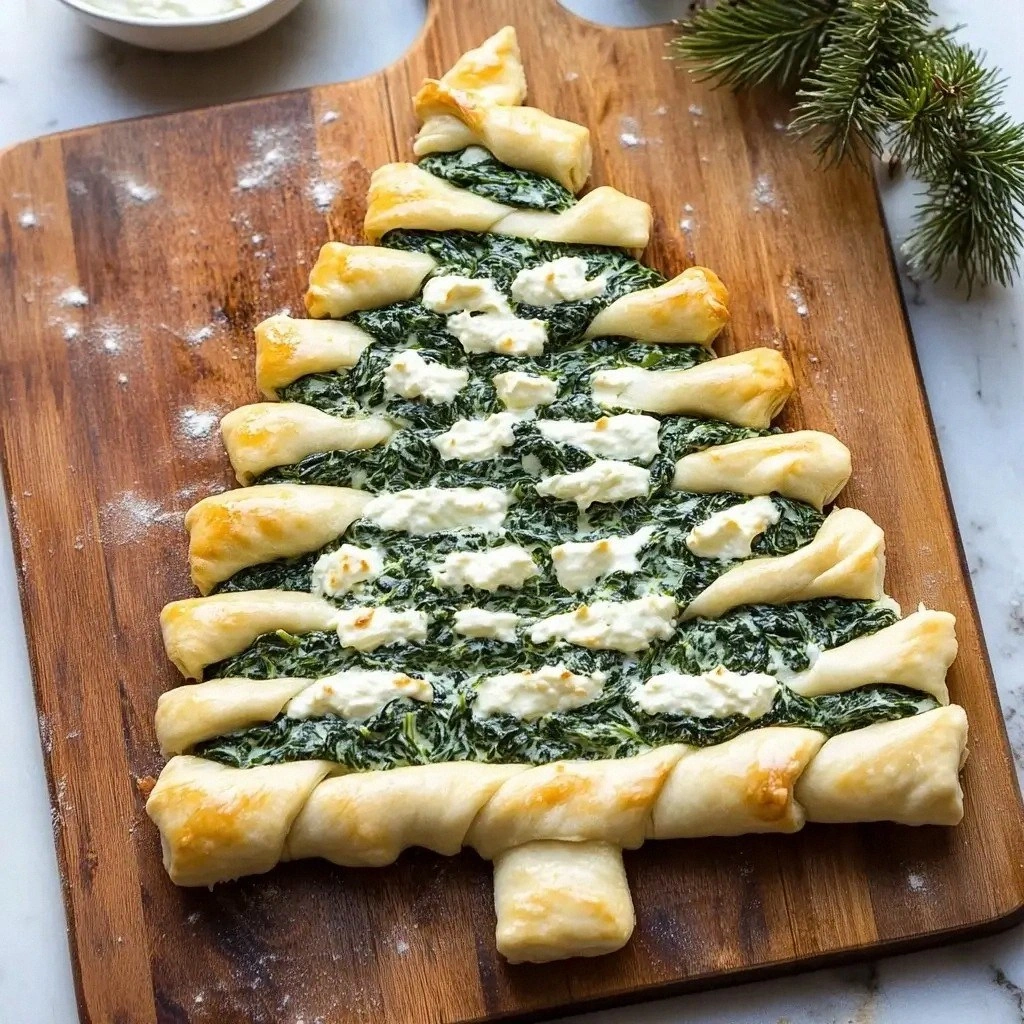
The first thing that caught my eye was the bright green swirl of fresh spinach, its leaves glistening under the kitchen lamp like emerald fire. The scent of garlic powder and onion powder rose, mingling with the buttery aroma of the breadsticks as they browned. I could hear the subtle sizzle as the dough hit the pan, a sound that promised crisp edges and a golden crust. The texture was a comforting blend of gooey cream cheese and shredded mozzarella, while the spinach added a fresh, earthy bite that balanced the richness. My mouth watered at the thought of a dip that would coat the breadsticks like velvet, each bite a burst of creamy, savory delight.
What makes this version stand out is that it’s not just a dip; it’s a statement. I dared you to taste this and not go back for seconds, because the flavors are so layered they feel like a holiday symphony. I’ll be honest — I ate half the batch before anyone else got to try it, and I still felt like I was just getting started. Most recipes get this completely wrong by overcooking the spinach or under-seasoning the cheese. Here, the spinach is folded in just before baking, preserving its bright color and crunch, while the seasoning is balanced to let the cheese shine without overpowering the greens. Picture yourself pulling this out of the oven, the whole kitchen smelling incredible, and knowing you’ve just created the best version you’ll ever make at home.
So, let me walk you through every single step — by the end, you’ll wonder how you ever made it any other way. From the moment you open the can of breadstick dough to the final golden finish, each step is designed to bring out the best in each ingredient. I’ll share a few micro-challenges and kitchen hacks that will elevate the flavor profile and texture. Get ready for a recipe that’s as playful as it is delicious, and as simple as it is unforgettable.
What Makes This Version Stand Out
- Flavor Depth: The combination of cream cheese, mozzarella, and sour cream creates a creamy, tangy base that’s balanced by the subtle heat of garlic and onion powders. This harmony of flavors turns a simple dip into a gourmet experience.
- Texture Contrast: The breadsticks provide a satisfying crunch that contrasts with the silky interior. The spinach adds a slight bite, preventing the dish from feeling too heavy.
- Ease of Preparation: Using refrigerated breadstick dough eliminates the need to roll out dough from scratch, saving time while still delivering a bakery-quality result.
- Ingredient Quality: Fresh spinach and high‑quality cheeses elevate the dish, ensuring each bite is packed with authentic taste.
- Make‑Ahead Friendly: This dip can be assembled a day ahead, refrigerated, and baked just before serving, making it perfect for holiday gatherings.
- Versatile Presentation: Serve it as a party appetizer, a side for a holiday feast, or a snack for movie night. Its bright green color and festive shape make it a natural fit for any occasion.
- Minimal Cleanup: The breadstick dough is non‑stick, and the single baking sheet means only one pan to wash.
Inside the Ingredient List
The Flavor Base
Cream cheese and sour cream form the creamy foundation of this dip. The cream cheese brings a rich, velvety texture, while the sour cream adds a subtle tang that brightens the overall flavor profile. Together, they create a sauce that coats the breadsticks like velvet, ensuring each bite is moist and indulgent. Skipping either would result in a thinner, less satisfying dip.
The Texture Crew
Shredded mozzarella cheese is the star of the texture crew. Its meltiness adds a gooey layer that locks in the flavors, while the shredded form allows it to distribute evenly across the breadsticks. If you prefer a sharper cheese, you can substitute part of the mozzarella with provolone or cheddar for a different melt and taste.
The Unexpected Star
Fresh spinach is more than just a garnish. It provides a vibrant color, a slight earthy bite, and a boost of vitamins. The key is to fold it in at the right moment so that it retains its bright green hue and a bit of crunch. If you can’t find fresh spinach, frozen spinach can work, but be sure to squeeze out excess moisture first.
The Final Flourish
Olive oil is brushed lightly over the breadsticks before baking. This step creates a crisp, golden crust and adds a subtle fruity note that complements the cheese. A pinch of salt and pepper rounds out the flavor, ensuring the dip is seasoned to perfection. If you’re watching sodium, reduce the salt to a pinch and rely on the cheeses for umami.
Everything's prepped? Good. Let's get into the real action and bring these flavors together.
The Method — Step by Step
- Preheat your oven to 375°F (190°C). Line a rimmed baking sheet with parchment paper to prevent sticking. This step ensures an even bake and a clean sheet to work with. I always keep the sheet ready, so I don’t waste time waiting for parchment to lay flat.
- Open the can of refrigerated breadstick dough and lay it flat on a clean surface. Use a rolling pin to roll the dough to a uniform thickness of about 1/4 inch. The dough should be pliable but not too soft; if it’s too sticky, dust it lightly with flour.
- Using a sharp knife or pizza cutter, cut the dough into 12 equal triangles. The size should be small enough to fit on the baking sheet without touching each other. This helps each breadstick bake evenly and prevents them from sticking together.
- Brush each breadstick lightly with olive oil, then sprinkle a pinch of salt and pepper. The oil will help the dough brown to a golden finish while the seasoning enhances the flavor profile. A light brush is enough; you don’t want the breadsticks to become greasy.
- Arrange the breadsticks on the prepared baking sheet in a single layer, spacing them evenly. This ensures that each piece gets the same amount of heat and browning. Bake for 12–15 minutes until they’re golden brown and crisp.
- While the breadsticks bake, combine the cream cheese, mozzarella, sour cream, garlic powder, onion powder, and a pinch of salt in a medium bowl. Use a handheld mixer or a whisk to blend until smooth. The mixture should be thick enough to hold its shape but still spreadable.
- Remove the breadsticks from the oven and let them cool for 2 minutes. Then, using a small spoon or a piping bag, dollop or pipe the cheese mixture onto each breadstick. The cheese should sit on top, forming a small mound that will melt into the dough.
- Return the breadsticks to the oven for an additional 5 minutes. This second bake allows the cheese to melt into the dough, creating a cohesive flavor while keeping the edges crisp. The aroma will fill the kitchen, making your guests’ mouths water even before the first bite.
- Once baked, remove the breadsticks from the oven and let them cool on a rack for 5 minutes. The cheese will set slightly, making it easier to handle. Serve warm, accompanied by a side of marinara or a simple green salad for a complete appetizer.
That's it — you did it. But hold on, I've got a few more tricks that'll take this to another level. From adjusting the cheese blend to customizing the toppings, these tips will help you personalize the dish for any crowd.
Insider Tricks for Flawless Results
The Temperature Rule Nobody Follows
Many people bake breadsticks at a high temperature, but this can cause the dough to brown too quickly while the cheese remains undercooked. Baking at 375°F gives a balanced heat that ensures the breadsticks crisp up without burning the cheese. I’ve found that a slightly lower temperature, around 365°F, works wonders if you’re using a convection oven, as it prevents the tops from over‑browning.
Why Your Nose Knows Best
The aroma of a well‑baked dip is a reliable indicator of readiness. When the cheese starts to bubble and the edges of the breadsticks turn a golden amber, it’s time to pull them out. A friend once skipped the final 5 minutes and the cheese was still raw; the result was a soggy mess that didn’t hold its shape.
The 5‑Minute Rest That Changes Everything
Letting the breadsticks rest on a rack for 5 minutes after baking allows the cheese to set into the dough, preventing it from sliding off when served. This simple step also lets the flavors meld, giving the dip a deeper, more cohesive taste. I’ve seen this trick turn a good dip into a memorable one.
Use a Piping Bag for Precision
Piping the cheese mixture onto the breadsticks ensures even distribution and a neat presentation. If you don’t have a piping bag, a plastic bag with a tiny hole works just as well. This method keeps the portions consistent, which is especially important when serving a crowd.
Add a Touch of Heat
For a subtle kick, sprinkle a pinch of crushed red pepper flakes over the cheese before the final bake. The heat will mingle with the creamy base, adding a layer of complexity that diners will appreciate. If you’re serving kids, keep the amount minimal.
Creative Twists and Variations
This recipe is a playground. Here are some of my favorite ways to switch things up:
Smoky Chipotle Twist
Add 1 teaspoon of chipotle powder to the cheese mixture for a smoky heat. The chipotle pairs nicely with the creamy base, giving the dip a Southwestern flair. Serve with tortilla chips for a different dipping experience.
Mediterranean Medley
Stir in 2 tablespoons of chopped sun‑dried tomatoes and a pinch of dried oregano. The sun‑dried tomatoes add a sweet, umami burst, while oregano brings a fragrant herbal note. This variation is perfect for a brunch or a light lunch.
Caramelized Onion Delight
Replace the onion powder with 1/4 cup of caramelized onions. The sweetness of the onions balances the richness of the cheeses and adds depth to the dip. A quick sauté on the stove can achieve this in under 10 minutes.
Cheddar‑Crunch Variation
Swap half of the mozzarella for sharp cheddar. The cheddar adds a tangy sharpness that cuts through the creaminess. Top the breadsticks with a sprinkle of chopped chives for an extra pop of color.
Herb‑Infused Green Dip
Blend fresh basil, parsley, and dill into the cheese mixture. The herbs give the dip a vibrant, garden‑fresh flavor that pairs beautifully with the spinach. This version is especially refreshing for a summer gathering.
Breakfast Breakfast Variation
Add a beaten egg to the cheese mixture and bake until the egg is set. Serve the breadsticks with a side of fresh fruit or a drizzle of honey for a sweet‑savory breakfast treat.
Storing and Bringing It Back to Life
Fridge Storage
Wrap the cooled breadsticks tightly in plastic wrap and store them in the refrigerator for up to 3 days. When you’re ready to serve, reheat them in a 350°F oven for 5 minutes to restore their crispness. The cheese will remain creamy, and the dough will regain its golden color.
Freezer Friendly
Place the cooled breadsticks on a parchment‑lined tray and freeze for up to 2 weeks. Once frozen, transfer them to a resealable bag. To reheat, bake at 350°F for 10 minutes. The texture remains excellent, and the flavors stay intact.
Best Reheating Method
Add a tiny splash of water to the baking sheet before reheating. This creates steam, keeping the breadsticks moist and preventing them from drying out. The cheese will melt evenly, and the dough will stay tender.