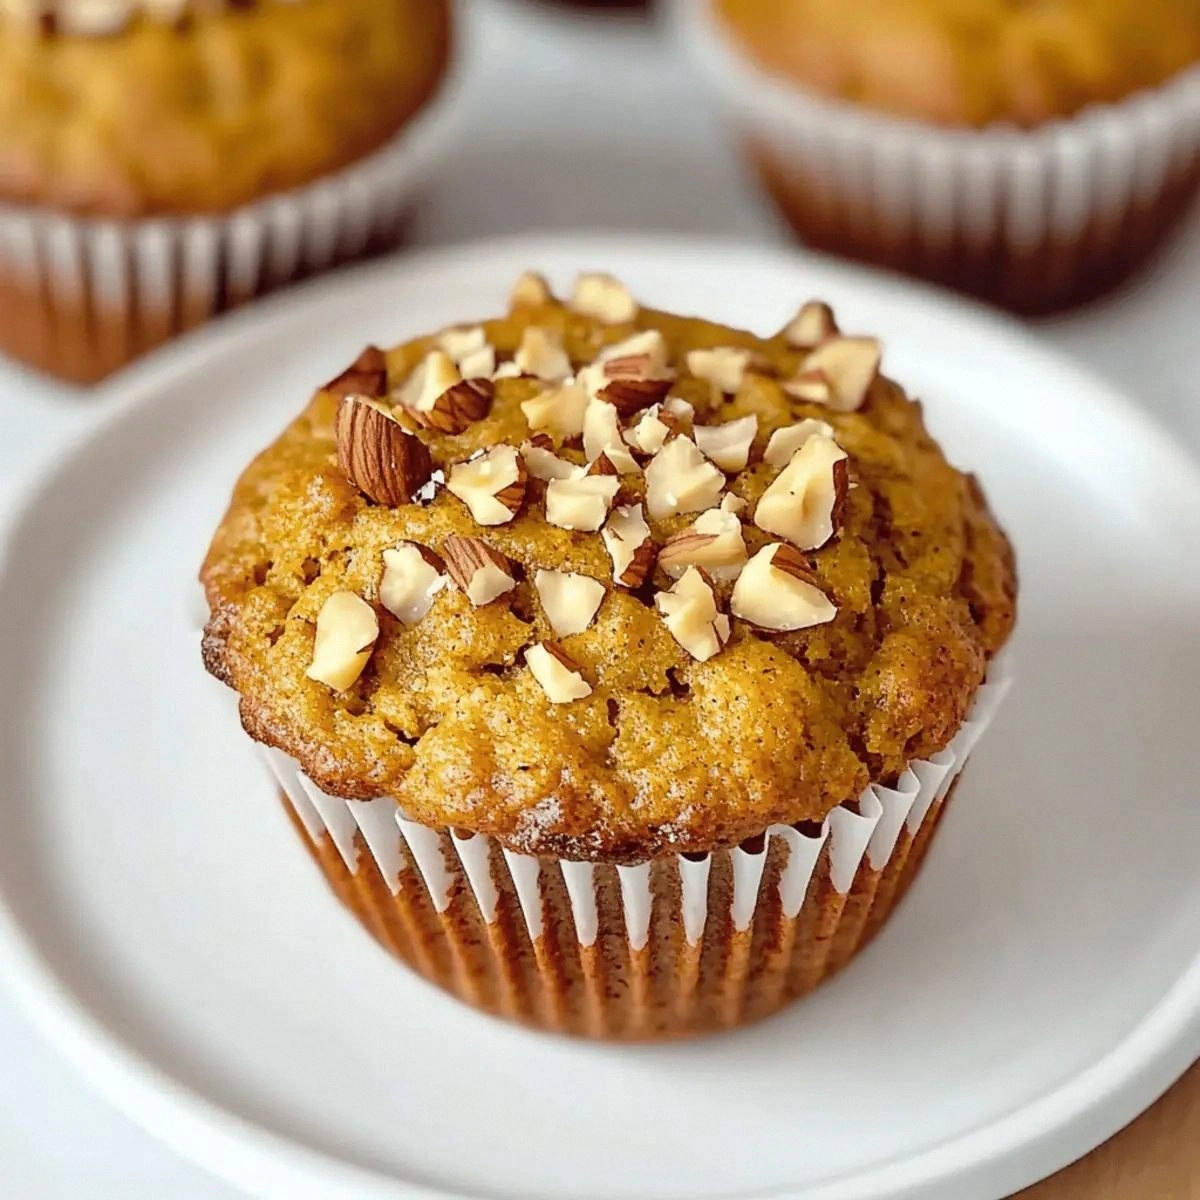
Picture this: it's December 23rd, you're halfway through wrapping gifts, the tree lights are twinkling, and suddenly it hits you like a snowball to the face—you completely forgot to make something magical for the cookie exchange tomorrow. Panic sets in, your hands are covered in tape residue, and the thought of wrestling with finicky royal icing makes you want to hide under the tree skirt. Been there, done that, ate the entire batch of shame-cookies while ugly-crying to Hallmark movies. But here's where the story changes: last year, in that exact moment of desperation, I stumbled upon what I now call the Christmas miracle that saves my holiday sanity every single December.
What started as a frantic pantry raid turned into the most requested treat of my entire life—truffles so silky they make velvet feel like sandpaper, packed with flavors that taste like someone bottled up every cozy Christmas memory and rolled it into bite-sized spheres of joy. I'm talking about Christmas truffles that are so ridiculously easy, so absurdly impressive, that you'll find yourself making them in July just to relive the magic. The first time I served these, my notoriously picky nephew declared them "better than Xbox"—and this kid once cried because his mashed potatoes touched his peas.
Here's the kicker: while everyone else is slaving over hot stoves, monitoring candy thermometers like they're performing heart surgery, you'll be casually rolling these beauties between commercials of your favorite holiday special. No special equipment, no culinary degree required, no stress-induced gray hairs. Just pure, unadulterated Christmas magic that tastes like someone distilled the essence of twinkling lights, crackling fires, and that moment when "All I Want for Christmas is You" comes on the radio into edible form.
Let me walk you through every single step—by the end, you'll wonder how you ever survived a holiday season without these little spheres of Christmas cheer in your arsenal. Trust me, once you see how the creamy white chocolate base melts on your tongue while crunchy peppermint pieces dance between your teeth, creating a texture symphony that would make even the Grinch's heart grow three sizes, you'll understand why I now make triple batches and still run out before New Year's.
What Makes This Version Stand Out
Speed Demon: From pantry to party platter in under 45 minutes, including the mandatory "quality control" tasting session. While your neighbor is still trying to get their butter to room temperature, you'll be dusting these with cocoa powder like a culinary wizard. I once timed myself during a commercial break of The Santa Clause and had a full batch cooling before Tim Allen even got his Santa suit.
Texture Paradise: We're talking about a center so smooth it makes Greek yogurt feel like gravel, studded with just enough textural surprises to keep your palate dancing. The contrast between the velvety chocolate coating and the occasional crunch of crushed candy cane creates a mouthfeel that serious food bloggers would call "texturally transcendent"—I call it Christmas magic that makes your eyes roll back in your head.
Flavor Explosion: Unlike those sad, one-note chocolate truffles that taste like disappointment and cocoa powder, these babies deliver a complex flavor journey. The white chocolate base gets a personality transplant with real vanilla bean, a whisper of orange zest, and the perfect amount of peppermint that tastes like fresh snow feels on your tongue. It's like someone took all the best parts of Christmas and condensed them into sphere form.
Foolproof Formula: I've made these with a toddler hanging off my leg, a dog barking at the delivery driver, and my mother-in-law asking if I've gained weight—all simultaneously. If you can operate a microwave without setting off the smoke detector, you can master these truffles. The recipe is so forgiving, it practically holds your hand through the process.
Make-Ahead Marvel: These actually improve with age, developing deeper flavors as they hang out in your fridge. Make them Sunday, serve them Saturday, and watch people assume you spent all week in some European chocolate academy. The flavor development is so dramatic, I actually prefer them on day three—if they last that long, which brings me to my next point.
Addictive Factor: Fair warning: these disappear faster than free samples at Costco. I've witnessed grown adults engage in actual physical altercations over the last truffle. One friend hid them in her vegetable crisper because she knew her family would never look there—genius level protection strategy right there.
Inside the Ingredient List
The Flavor Base
The star of our show is premium white chocolate—not those sad, waxy chips that taste like plastic had a baby with sugar. I'm talking about the good stuff that actually contains cocoa butter and melts into liquid gold. The difference between grocery store white chocolate and quality white chocolate is like comparing a flip phone to the latest iPhone—they might share a name, but they're not even playing in the same league. When heated properly, quality white chocolate transforms into a silky canvas that carries our holiday flavors like Santa's sleigh carries presents.
Heavy cream isn't just heavy cream here—it's the magical binding agent that transforms chocolate from solid bar to truffle-worthy filling. The fat content matters more than you think; too lean and your truffles will weep like someone watching a Hallmark commercial, too rich and they become greasy blobs that sit in your stomach like holiday regret. Look for cream with at least 36% milk fat, but not the ultra-pasteurized stuff that tastes like it was processed in a chemistry lab.
The Texture Crew
Butter might seem redundant when you're already using cream, but here's where science gets delicious. The butter adds stability and that luxurious mouthfeel that makes people close their eyes when they taste these. Use unsalted European-style butter with its higher fat content—your truffles will set firmer and taste richer than your uncle's investment portfolio. Room temperature butter incorporates smoothly, preventing those dreaded little butter pockets that taste like you dropped your truffle on the kitchen floor.
Pure vanilla extract is non-negotiable—none of that imitation stuff that tastes like it was made in a high school chemistry class. Real vanilla adds complexity and depth that makes people ask "what's that amazing flavor?" It's the difference between a flat, one-dimensional truffle and one that tastes like it has secrets to tell. Splurge on Madagascar vanilla if you can find it; the flavor is so intoxicating, you'll want to dab it behind your ears.
The Unexpected Star
Orange zest might seem like an odd addition to a Christmas truffle, but trust me on this one. That tiny hit of citrus brightens all the other flavors, cutting through the richness like a ray of sunshine through December clouds. Use a microplane grater and only the orange part of the peel—the white pith tastes like bitter disappointment and will ruin your entire batch. The zest should smell like you just peeled an orange in a Christmas tree lot, fresh and alive.
Peppermint extract is where most recipes go horribly wrong, turning truffles into toothpaste balls that taste like you accidentally brushed your teeth with candy. We're using just enough to whisper "Christmas" without screaming "I just ate an entire candy cane factory." The key is restraint—start with less than you think you need, taste, and add more if necessary. You can always add more, but you can't un-mint your truffles.
The Final Flourish
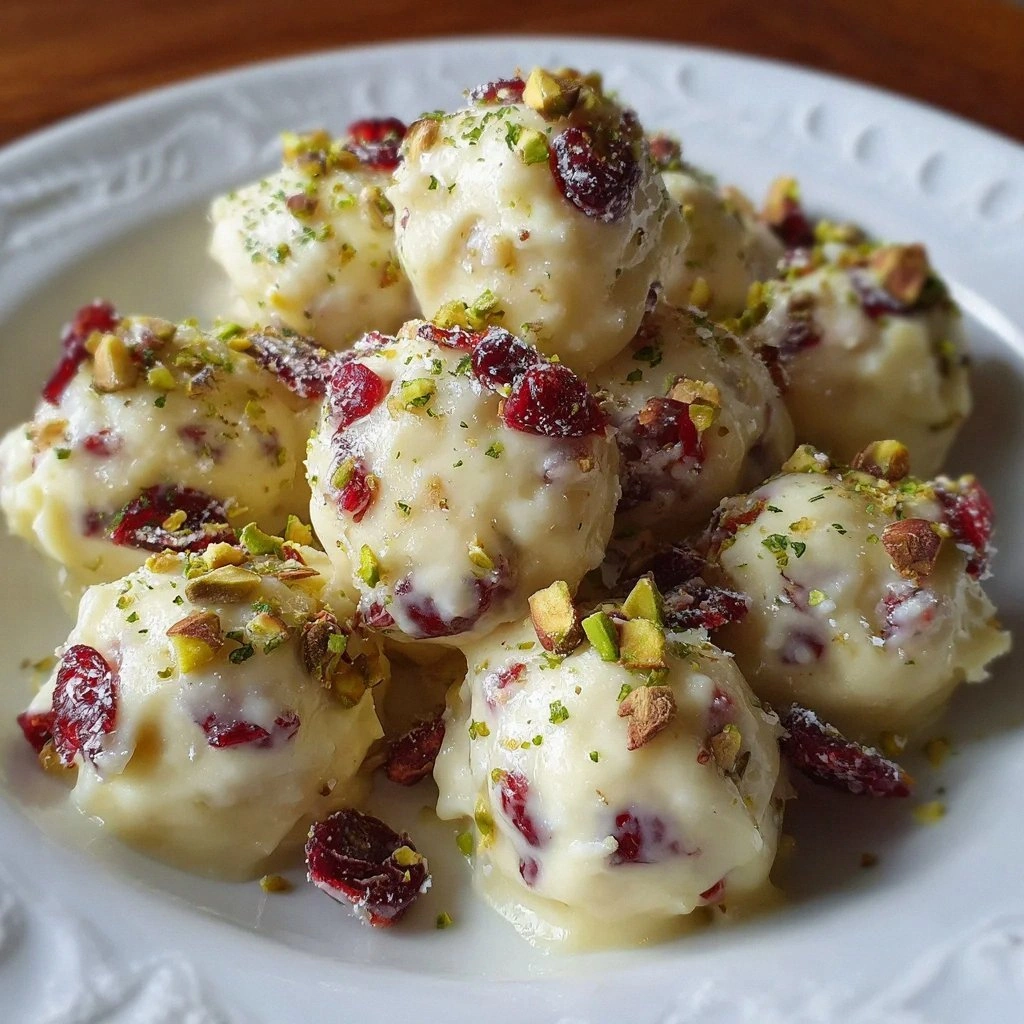
Crushed candy canes provide that satisfying crunch and visual appeal that makes these look like they came from a fancy chocolate shop. The trick is crushing them to the right size—too big and they stab the roof of your mouth, too small and they dissolve into pink dust. I put them in a zip-top bag and whale on them with a rolling pin like I'm working out holiday frustrations. The pieces should be about the size of coarse sea salt, with some bigger bits for textural interest.
Everything's prepped? Good. Let's get into the real action...
The Method — Step by Step
- Start by chopping your white chocolate into uniform pieces about the size of your thumbnail. This isn't the time for heroics with a dull knife—use a sharp chef's knife and channel your inner Gordon Ramsay, minus the screaming. The pieces should be roughly the same size so they melt evenly, preventing some from burning while others remain stubbornly solid. Place these chocolate chunks in a heatproof bowl that makes you feel like a serious chocolatier, even if you're still wearing your pajama pants with the hole in them.
- In a small saucepan, heat the heavy cream until it just begins to simmer—look for tiny bubbles forming around the edges like a jacuzzi for ants. This is not the time to check Instagram; cream goes from perfect to volcanic overflow in about thirty seconds. When you see those bubbles, immediately remove it from heat and pour it over your waiting chocolate. The hot cream should cover all the chocolate like a cozy blanket, and you'll watch as the chocolate begins to melt from the outside in, like magic happening in slow motion.
- Now comes the part that makes you feel like you're conducting a chocolate symphony: let the cream and chocolate sit undisturbed for exactly two minutes. Set a timer, walk away, resist the urge to poke it with a spoon. During this time, the chocolate is melting from the heat of the cream, creating the foundation of your truffle filling. When the timer dings, grab a whisk and start stirring from the center out, watching as the mixture transforms from separated liquid and solid into glossy, unified ganache.
- Add your butter, vanilla, orange zest, and peppermint extract to the chocolate mixture while it's still warm enough to melt the butter but not so hot it cooks off the delicate flavors. The butter should slide in like it owns the place, melting into the chocolate and adding that luxurious richness that separates amateur truffles from professional ones. Stir until everything is incorporated and the mixture looks like liquid velvet, glossy and smooth enough to make you want to dive in face-first. The orange zest should distribute evenly, creating tiny flavor bombs throughout your truffles.
- Press plastic wrap directly onto the surface of your ganache—no shortcuts here, every inch needs to be covered like the chocolate is going into witness protection. This prevents a skin from forming that would create lumpy, unappetizing bits in your smooth truffles. Refrigerate for at least two hours, or until the mixture is firm enough to scoop and hold its shape. I usually make this the night before and let it chill overnight, because morning truffle-making feels like Christmas itself.
- When your ganache is properly chilled and firm, it's time for the fun part that makes you feel like you're in a chocolate factory. Use a small cookie scoop or melon baller to portion out uniform pieces—about one tablespoon each for bite-sized truffles that won't leave you in a sugar coma. Roll each portion quickly between your palms, working fast so the heat from your hands doesn't melt the chocolate. The truffles should be roughly spherical but don't stress about perfection—rustic charm is part of their appeal.
- Now for the grand finale: roll your shaped truffles in your crushed candy canes, pressing gently so the pieces adhere to the surface. The candy cane pieces should stick to the slight tackiness of the chocolate, creating a festive coating that looks like Christmas exploded in the best possible way. Work in batches, rolling about six truffles at a time before the candy cane pieces lose their sticking power. Arrange them on a parchment-lined tray like you're curating an art installation of holiday joy.
- Return your finished truffles to the refrigerator for another 30 minutes to set completely, during which time you should absolutely lick the ganache spoon and feel zero shame about it. This final chill ensures they hold their shape when served and develops the flavors even further. When you're ready to serve, let them sit at room temperature for about 10 minutes—the difference between cold and slightly-warmed truffles is like the difference between a good kiss and a great one.
That's it—you did it. But hold on, I've got a few more tricks that'll take this to another level...
Insider Tricks for Flawless Results
The Temperature Rule Nobody Follows
Here's where most home cooks go wrong: they think chocolate is like that friend who says they're fine when they're clearly not—chocolate needs to be treated with respect and attention. Your ganache should never get above 90°F when you're working with it, or the cocoa butter will separate and create those ugly white streaks that make your truffles look like they're growing mold. Use a kitchen thermometer like you're checking a baby's bathwater, and if it feels warm to the touch, it's too warm. Room temperature in chocolate work means about 68-72°F, not the 78°F your thermostat is set to because you're trying to save on heating bills.
Why Your Nose Knows Best
Your sense of smell is your most valuable tool when making these truffles, more reliable than any timer or thermometer. When the cream is properly heated, it should smell sweet and dairy-rich, not scalded and angry. The chocolate should smell like you're walking into a chocolate shop in Brussels, not like you left a Hershey's bar on your dashboard in August. If anything smells off or burnt, start over—chocolate has no forgiveness for overheating, and your truffles will taste like disappointment and regret.
The 5-Minute Rest That Changes Everything
Before you roll your chilled ganache into truffles, let it sit at room temperature for exactly five minutes. This brief rest allows the chocolate to soften just enough that it won't crack when you roll it, but not so long that it becomes a melty mess on your hands. Think of it as the chocolate equivalent of letting meat rest after cooking—it redistributes the temperature and makes the texture uniform throughout. Skip this step and you'll end up with truffles that look like they were made by someone having a seizure.
The Rolling Technique That Prevents Blob Truffles
Here's the secret to perfectly round truffles: use cold hands and work fast, like you're defusing a bomb in an action movie. Wash your hands in cold water before you start, and keep a bowl of ice water nearby for quick hand-chilling breaks. The chocolate should roll between your palms for no more than three seconds—any longer and your body heat starts melting the surface, creating misshapen blobs that look like they were made by someone with a serious tremor. If your hands start to feel warm, take a break and chill them again.
The Storage Mistake That Ruins Texture
Never, ever store your finished truffles in the same container as anything with strong odors—chocolate absorbs odors like a gossip absorbs secrets. That container of peppermint bark next to your garlic-roasted nuts? Congratulations, you've just created the world's worst flavor combination. Chocolate needs to be stored in an odor-free environment, preferably in a container that's only used for chocolate. I learned this the hard way when my truffles started tasting like the leftover Chinese food they were stored next to—nothing says "Merry Christmas" quite like kung pao truffle surprise.
Creative Twists and Variations
This recipe is a playground. Here are some of my favorite ways to switch things up:
The Espresso Express
Replace the peppermint extract with 1 teaspoon of instant espresso powder dissolved in 1/2 teaspoon of hot water. The coffee flavor deepens the chocolate notes and creates truffles that taste like your favorite coffee shop got drunk on Christmas spirit. Roll them in crushed espresso beans mixed with cocoa powder for a sophisticated adult version that pairs perfectly with after-dinner drinks. Warning: these are so good, they've been known to cause family members to hide them from each other like they're protecting state secrets.
The Spiced Orange Dream
Add 1/4 teaspoon each of ground cinnamon and cardamom to your ganache, and replace the peppermint with orange oil for truffles that taste like Christmas morning in Morocco. The warm spices create depth that makes people ask "what's that amazing flavor?" while they reach for their third truffle. Roll these in a mixture of cocoa powder and finely ground cinnamon for a sophisticated finish that looks like they came from a Parisian chocolatier rather than your kitchen.
The Adult-Only Version
Replace 2 tablespoons of the cream with your favorite Irish cream, bourbon, or rum for truffles that taste like Christmas got tipsy. The alcohol adds complexity and prevents the truffles from becoming too sweet, creating a more sophisticated flavor profile that adults will appreciate. These are perfect for holiday parties where you want to serve something special without breaking out the good wine. Just remember to label them clearly—nothing ruins a kid's Christmas like accidentally eating boozy truffles.
The Vegan Victory
Substitute coconut cream for heavy cream and use vegan white chocolate for a plant-based version that's so good, even dairy-lovers will beg for the recipe. The coconut adds a tropical note that makes these taste like Christmas on a beach somewhere wonderful. Roll them in toasted coconut flakes mixed with the candy cane pieces for a textural experience that's like a symphony in your mouth. Even my most carnivorous friends prefer this version to the original.
The Nutty Professor
Add 1/2 cup of very finely chopped toasted almonds or hazelnuts to your ganache for truffles with crunch and depth. The nuts should be chopped so fine they're almost powder, adding texture without overwhelming the smooth chocolate. Roll the finished truffles in more finely chopped nuts mixed with cocoa powder for a sophisticated finish that looks like something from a fancy chocolate shop. These keep longer than the original version because the nuts help absorb excess moisture.
The Salted Caramel Swirl
Drizzle each truffle with a tiny bit of salted caramel before the final candy cane coating for a sweet-salty combination that's completely addictive. The salt enhances all the other flavors and prevents the truffles from being cloyingly sweet. Make sure your caramel is thick enough to stay put but thin enough to drizzle—warmed store-bought works perfectly if you're not feeling ambitious enough to make your own.
Storing and Bringing It Back to Life
Fridge Storage
Store your finished truffles in an airtight container in the refrigerator for up to two weeks, though honestly they've never lasted more than three days in my house. Separate layers with parchment paper to prevent them from sticking together and losing their beautiful candy cane coating. The cold will help them maintain their shape and prevent the candy cane pieces from becoming sticky and weeping pink tears all over your beautiful truffles. If they develop any white streaks or spots, don't panic—this is just cocoa butter bloom, not mold, and while it affects appearance, it doesn't change the taste.
Freezer Friendly
These truffles freeze beautifully for up to three months, making them perfect for holiday prep in October when you're feeling ambitious. Freeze them on a parchment-lined tray first, then transfer to freezer bags once they're solid—this prevents them from sticking together like chocolate bumper cars. Thaw them in the refrigerator overnight, then let them sit at room temperature for 10 minutes before serving to restore their perfect texture. The candy cane pieces might lose a bit of their crunch after freezing, but they'll still taste like Christmas magic.
Best Reheating Method
If your truffles have been in the refrigerator and taste too cold and firm, let them sit at room temperature for 5-10 minutes before serving. This brief rest allows the flavors to bloom and the texture to soften to that perfect melt-in-your-mouth consistency. Never microwave them—unless you want chocolate soup, which actually sounds pretty amazing now that I think about it. If they've been frozen, the overnight refrigerator thaw is crucial; trying to rush this process results in truffles that sweat and weep like they're watching a sad movie.