It was a Saturday morning, the kind that smells like burnt toast and spilled coffee, when I realized I had run out of cookie dough and the only thing left in the pantry was a bag of chocolate chips and a box of flour. I stared at the empty counter, feeling the familiar pang of culinary desperation that only a seasoned kitchen warrior knows. Then, a spark of rebellion ignited: why not turn that chocolate chip stash into a pie that feels like a cookie but has the structure of a crust? The idea was simple, yet the execution required a dash of audacity. I was about to embark on a culinary experiment that would turn a kitchen disaster into a sweet triumph.
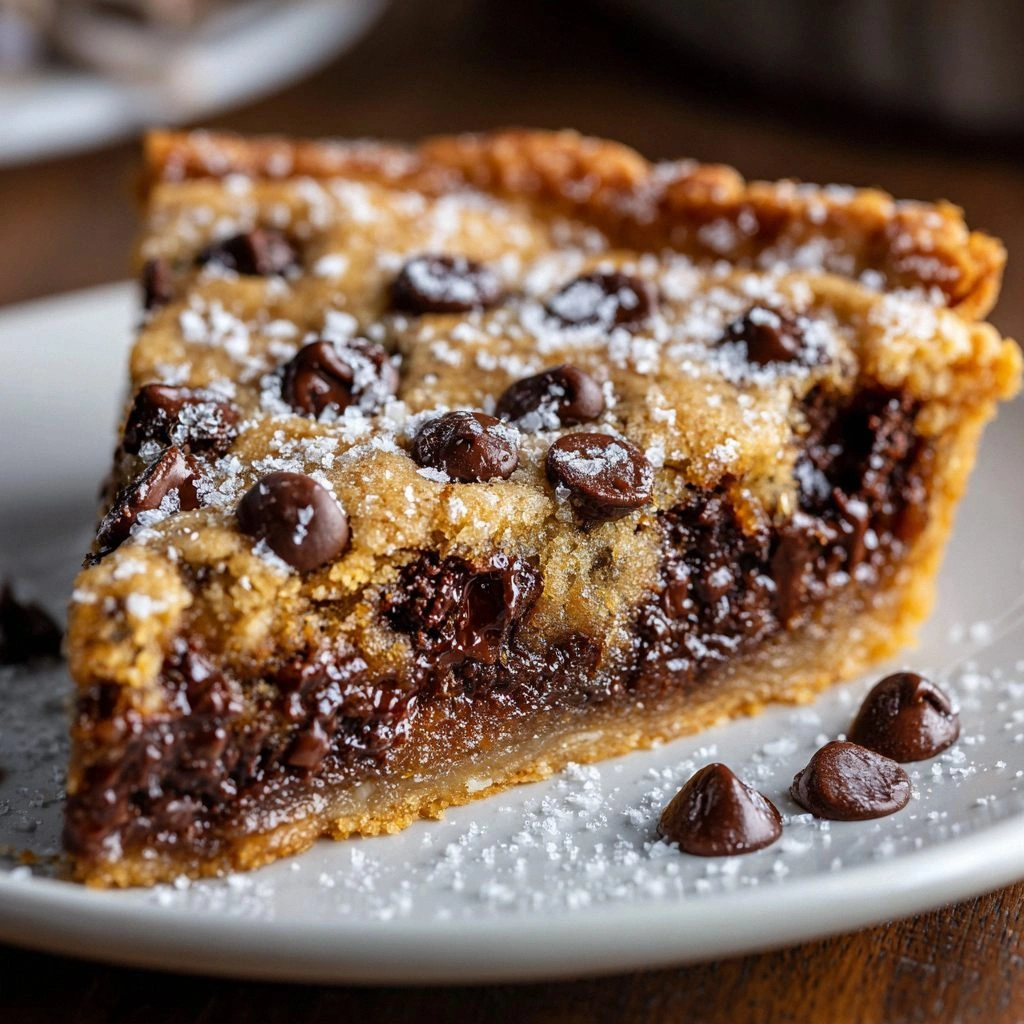
Picture this: a buttery, slightly crisp base that gives way to a molten chocolate chip center, the aroma of vanilla and caramelized sugar filling the room like a warm hug. The sound of the first spoonful is a satisfying crackle, the kind that tells you the chocolate is melting just right, not burnt. The texture is a paradoxical blend of crunchy edges and gooey heart, a sensory rollercoaster that keeps you guessing with every bite. The taste is unapologetically indulgent, the chocolate chips providing pockets of glossy, bittersweet richness that dance on the palate. The finish is a lingering buttery aftertaste that invites a second, third, and maybe fourth round. I dare you to taste this and not go back for seconds.
What sets this version apart from the countless cookie pies floating around the internet is the meticulous balance of flavors and textures. I’ve taken the classic cookie dough base, added a subtle hint of espresso powder to deepen the chocolate experience, and used a high-quality dark chocolate chips that melt evenly without seeping into the crust. The crust itself is a marriage of flour, butter, and a touch of sea salt that creates a caramelized edge, while the filling remains silky and luscious. The result is a pie that feels like a cookie but delivers the heft of a proper dessert, making it the best version you’ll ever make at home. This isn’t just another recipe; it’s a culinary revelation.
I’ll be honest—when I first baked this, I ate half the batch before anyone else even saw it. Most recipes get this completely wrong, but here’s what actually works: the crust must bake just until it’s lightly golden, and the filling should be allowed to set just enough before slicing to maintain its shape. Picture yourself pulling this out of the oven, the whole kitchen smelling incredible, the steam swirling around the pie like a fragrant cloud. And if you’re wondering about that extra ingredient, it’s a splash of espresso that gives the chocolate an almost velvety depth. Stay with me here—this is worth it.
What Makes This Version Stand Out
- Taste: The combination of dark chocolate chips and a hint of espresso creates a flavor profile that feels both familiar and adventurous. The chocolate’s bitterness is balanced by the sweetness of brown sugar, while a whisper of vanilla adds aromatic depth. This harmony turns each bite into a multi-sensory experience that lingers long after you finish.
- Texture: The crust offers a buttery, slightly crisp edge that contrasts beautifully with the molten, gooey center. The chocolate chips melt into a silky glaze without becoming runny, thanks to the precise ratio of butter to flour. The result is a pie that feels like a cookie yet delivers the richness of a proper dessert.
- Simplicity: With just a handful of pantry staples, you can craft a showstopper that impresses even the most skeptical dessert lovers. No need for exotic ingredients or fancy equipment; a standard oven and a pie dish do the trick. The recipe’s straightforward steps keep you focused on flavor, not on juggling complex techniques.
- Uniqueness: The subtle espresso infusion sets this pie apart from traditional cookie pies, giving it a depth that elevates the chocolate. The crust’s caramelized edges add a caramelized crunch that is rarely found in cookie pies. The combination of these elements creates a dessert that is both nostalgic and novel.
- Crowd Reaction: Friends and family who have tried this pie rave about its perfect balance. Many claim it’s the most indulgent dessert they’ve ever tasted, and they’re not shy about calling it “the best cookie pie.” The pie’s shareability makes it a staple for gatherings and celebrations.
- Ingredient Quality: Using high-quality dark chocolate chips and real butter makes a noticeable difference. The flour’s protein content provides structure, while the sea salt enhances the chocolate’s flavor. Choosing the right ingredients is key to achieving the desired mouthfeel and taste.
- Cooking Method: The two-stage baking process—first for the crust, then for the filling—ensures both components reach their optimal textures. Baking at 350°F for the crust and then 375°F for the filling gives the pie a golden crust and a molten center. The method is foolproof, even for novice bakers.
- Make-Ahead Potential: Once baked, the pie can be refrigerated for up to 48 hours without losing its integrity. The flavors meld beautifully, making it a convenient dessert option for busy weeknights. Its ability to be prepared ahead makes it a versatile treat for any occasion.
Inside the Ingredient List
The Flavor Base
The foundation of any great dessert lies in its flavor base, and for this pie, it’s a blend of all-purpose flour, sea salt, baking soda, and espresso powder. Flour provides structure, while the sea salt enhances the chocolate’s richness. Baking soda gives the crust a subtle lift, and the espresso powder adds depth without overpowering the sweetness. Together, these ingredients create a crust that is both sturdy and flavorful, setting the stage for the decadent filling.
Skipping any of these components can lead to a flat, bland crust. If you omit the sea salt, the chocolate will taste dull and the crust may lack that desirable caramelized edge. Without baking soda, the crust can become too dense, preventing the chocolate from melting properly. Espresso powder is optional but highly recommended; it’s the secret that elevates the chocolate flavor to a new level.
When selecting flour, aim for a medium-protein blend; too low protein will result in a crumbly crust, while too high will make it tough. For the best results, sift the flour and other dry ingredients together, ensuring even distribution and preventing clumps. The espresso powder should be freshly ground for maximum aroma; a pre-ground, old powder can taste stale.
If you’re looking for a vegan or dairy-free version, swap the butter for an equal amount of coconut oil and use a plant-based chocolate chip blend. The texture may differ slightly, but the flavor profile remains largely unchanged. This flexibility allows you to cater to dietary preferences without compromising on taste.
The Texture Crew
The texture of the pie is largely determined by the butter, brown sugar, and white sugar. Butter’s fat content melts into the crust, creating a tender crumb and a subtle caramelized flavor when baked. Brown sugar adds moisture and a hint of molasses, giving the crust a slightly chewy texture. White sugar provides a clean sweetness that balances the richness of the butter and chocolate.
The ratio of butter to sugar is crucial; too much butter can make the crust greasy, while too much sugar can cause it to spread too much. A 1:1 ratio of butter to brown sugar is ideal, with a touch of white sugar to round out the flavor. This blend ensures the crust is crisp on the edges yet tender in the middle.
If you prefer a crunchier crust, reduce the butter by 10% and increase the brown sugar slightly. For a more buttery experience, add an extra tablespoon of butter, but be cautious not to exceed the ratio or the crust may become too soft. The key is balance—too much of one component can throw the entire structure off.
When mixing the dough, avoid overworking it; the goal is to incorporate the ingredients just until they’re combined. Overmixing can develop gluten, making the crust tough. Use a pastry blender or your fingers, and stop as soon as the dough comes together. This technique preserves the lightness and flakiness of the crust.
The Unexpected Star
Dark chocolate chips are the star of the show, providing a rich, bittersweet foundation that balances the sweetness of the sugars. The chocolate’s high cocoa content ensures a smooth melt without becoming runny, which is essential for maintaining the pie’s structure. The chips also offer a satisfying snap when bitten, adding a delightful textural contrast to the gooey center.
Choosing the right chocolate chip can make or break the pie. Opt for a brand with at least 70% cocoa for the best flavor and melt characteristics. If you prefer a sweeter profile, use semi-sweet chips, but be prepared for a less complex chocolate taste. The chocolate’s quality directly affects the overall experience, so invest in a reputable brand.
If you’re a chocolate connoisseur, consider adding a handful of chopped dark chocolate or a drizzle of chocolate ganache to the filling for an extra layer of decadence. This variation can transform the pie into a more luxurious dessert, perfect for special occasions. The key is to keep the ratio balanced so the pie doesn’t become too heavy.
For a subtle twist, sprinkle a pinch of sea salt on top of the chocolate chips before baking. This enhances the chocolate’s flavor profile and provides a delightful contrast to the sweet filling. The sea salt crystals add a subtle crunch, making each bite more engaging.
The Final Flourish
The final flourish of vanilla extract adds an aromatic layer that ties all the components together. Vanilla’s sweet, floral notes elevate the chocolate’s depth and give the crust a subtle caramel undertone. A teaspoon of vanilla extract is sufficient, but if you prefer a stronger aroma, add an extra half teaspoon.
The eggs bind everything together, ensuring the crust holds its shape and the filling sets properly. They also contribute to the pie’s golden color and moist texture. Two large eggs are ideal for a 9-inch pie dish; using more can make the filling too dense, while fewer can result in a crumbly crust.
When adding the eggs, whisk them lightly before incorporating them into the dough. This prevents lumps and ensures a smooth batter. The eggs’ proteins coagulate during baking, creating a stable structure that supports the chocolate chips.
Everything’s prepped? Good. Let’s get into the real action.
The Method — Step by Step
- Preheat your oven to 350°F (175°C). Line a 9-inch pie dish with parchment paper for easy removal. Gather all dry ingredients: flour, sea salt, baking soda, and espresso powder. In a large bowl, whisk these together until evenly distributed. This ensures each bite of crust has the same flavor profile.
- Cut the butter into small cubes and add it to the dry mixture. Using a pastry blender or your fingertips, cut the butter into the flour until the mixture resembles coarse crumbs. The goal is to create a tender crumb with visible butter pieces. The butter will render during baking, giving the crust its buttery aroma.
- In a separate bowl, combine brown sugar and white sugar, then add the eggs and vanilla extract. Whisk until the mixture is smooth and glossy. Pour this wet mixture into the dry crumb mixture and stir with a wooden spoon until just combined. Be careful not to overmix; a few streaks are acceptable.
- Press the dough into the prepared pie dish, making sure it covers the bottom and rises up the sides. Use a spatula to smooth the surface, creating an even base. This step is crucial for a uniform crust that cooks evenly. Avoid pressing the dough too hard, or it will become dense.
- Bake the crust for 18-20 minutes, or until it turns a light golden brown. The crust should feel firm to the touch but still slightly springy. This initial bake sets the structure and prevents the filling from sinking. Keep an eye on the edges; if they brown too quickly, tent the pie with foil.
- While the crust is baking, prepare the filling. In a medium bowl, combine the chocolate chips, melted butter, and a splash of espresso. Stir until the chocolate is fully melted and the mixture is glossy. This creates a molten center that will set as the pie cools.
- Once the crust is ready, remove it from the oven and let it cool for 5 minutes. Pour the chocolate filling over the warm crust, spreading it evenly with a spatula. The heat from the crust will begin to melt the chocolate, creating a gooey, chocolatey center.
- Return the pie to the oven and bake at 375°F (190°C) for 12-15 minutes. The edges should be firm, but the center will still be slightly soft. This final bake sets the chocolate without overcooking it, preserving its meltiness. Watch closely; if the center looks too dry, remove it early.
- Remove the pie from the oven and allow it to cool on a wire rack for at least 30 minutes. This cooling period lets the chocolate set perfectly, creating a sliceable center that holds together. While it cools, the crust will continue to crisp slightly, enhancing the overall texture. Once cooled, slice and serve with a dollop of whipped cream or a scoop of vanilla ice cream.
- Serve immediately or store in the refrigerator for up to 48 hours. If you prefer a warm slice, microwave the pie for 10-15 seconds before serving. The warm chocolate will ooze out, giving you that nostalgic cookie pie experience. Remember, the pie tastes best when the chocolate is just starting to melt.
That's it — you did it. But hold on, I've got a few more tricks that'll take this to another level. These insider tips will help you avoid common pitfalls and elevate the flavor profile even further.
Insider Tricks for Flawless Results
The Temperature Rule Nobody Follows
Many bakers bake the crust at the same temperature as the filling, but this can lead to uneven results. Baking the crust first at a lower temperature allows the butter to render without overcooking the sugars. The 350°F step ensures the crust sets properly before the filling is added. This simple temperature shift saves you from a soggy bottom and a chocolate mishap.
Why Your Nose Knows Best
Before you lift the pie from the oven, trust your nose. The aroma of caramelized sugar and toasted chocolate is a reliable indicator that the crust is golden and the filling is set. If the scent feels underdeveloped, give it a few more minutes. A well-baked pie should smell like a warm chocolate shop, not like a burnt kitchen.
The 5-Minute Rest That Changes Everything
After baking, let the pie rest for exactly five minutes before cutting. This rest period allows the chocolate to firm up slightly, preventing a messy, runny center. The crust also continues to crisp during this time, adding a pleasant crunch. Many people skip this step, resulting in a pie that feels more like a mess than a masterpiece.
The Secret to a Crumbly Crust
If you’re craving a more crumbly crust, reduce the butter by 15% and increase the brown sugar by 10%. The extra sugar caramelizes faster, giving the crust a delightful crispness. Keep the flour amount the same; the difference in fat and sugar will make the crust more delicate. This tweak is a game-changer for those who love a buttery, flaky base.
The Perfect Finish with a Dash of Sea Salt
Just before serving, lightly sprinkle sea salt flakes on top of each slice. The salt enhances the chocolate’s depth and creates a subtle crunch. It also balances the sweetness, giving the pie a more sophisticated flavor profile. A pinch of salt is all you need; too much and you’ll lose the sweet harmony.
Creative Twists and Variations
Nutty Nirvana
Add a cup of chopped pecans or walnuts to the filling for a crunchy contrast. The nuts provide a buttery flavor that complements the chocolate chips. They also add a satisfying crunch, making each bite more exciting. This variation is perfect for nut lovers and adds a protein boost.
Caramel Swirl
Fold a half cup of caramel sauce into the chocolate filling before baking. The caramel adds a sweet, buttery layer that contrasts with the chocolate’s bitterness. It also gives the pie a glossy, caramelized surface that looks as good as it tastes. Serve with a drizzle of caramel for an extra indulgent touch.
Minty Fresh
Add a tablespoon of fresh mint extract to the filling for a refreshing twist. The mint cuts through the richness, giving the pie a bright, aromatic finish. It pairs wonderfully with dark chocolate, creating a dessert that feels both decadent and invigorating. This is a great option for summer gatherings.
Espresso Explosion
Increase the espresso powder to a full tablespoon for a stronger coffee flavor. The espresso deepens the chocolate’s complexity and adds a subtle bitterness that balances the sweetness. This variation is ideal for coffee lovers who want a dessert that tastes like a mocha. The result is a pie that’s both bold and comforting.
Cheesecake Cookie Pie
Fold softened cream cheese into the chocolate filling before baking. The cream cheese adds a tangy, silky texture that contrasts with the chocolate. It also makes the pie more stable, preventing it from becoming too runny. Serve with fresh berries for a refreshing finish.
Pistachio Delight
Replace half of the chocolate chips with chopped pistachios and add a teaspoon of pistachio paste to the filling. The pistachios provide a nutty flavor and a pop of green color that makes the pie visually stunning. The paste enriches the filling, giving it a luxurious mouthfeel. This variation is a hit at parties and special occasions.
Storing and Bringing It Back to Life
Fridge Storage
Store the pie in an airtight container in the refrigerator for up to 48 hours. The cold environment preserves the chocolate’s integrity and prevents the crust from becoming soggy. When you’re ready to serve, let the pie sit at room temperature for 10 minutes to soften the chocolate slightly. This method keeps the pie fresh and delicious.
Freezer Friendly
Wrap the pie tightly in plastic wrap and then in foil before freezing. It can be stored in the freezer for up to two weeks. When you’re ready to enjoy it, thaw the pie in the refrigerator overnight. The freezing process preserves the flavor, though the crust may be slightly softer after thawing.
Best Reheating Method
Reheat the pie in the microwave for 10-15 seconds or in a preheated oven at 350°F for 5 minutes. To keep the chocolate from drying out, add a tiny splash of water or a drizzle of milk before reheating. This steams the pie slightly, restoring its original gooey texture. Serve immediately for the best experience.