It was a Friday night, the kind of evening where the kitchen feels like a battleground and you’re armed with a handful of pantry staples that have somehow survived the apocalypse of your fridge. I was chasing that elusive chocolate craving, the one that whispers from the back of your mind after a long day, demanding a sweet fix that feels indulgent yet guilt‑free. I pulled out rolled oats, peanut butter, a splash of honey, and a generous dusting of cocoa powder. I tossed them together, hoping for a quick treat, only to find myself staring at a sticky, soggy mess that looked more like a science experiment gone wrong.
I stared at the pan, the scent of toasted oats mingling with the nutty aroma of peanut butter, and I thought, “Why is this so hard to get right?” That night, I turned my frustration into a mission: to craft a no‑bake chocolate peanut butter crunch bar that would satisfy the sweet tooth while keeping the calories in check. I imagined the perfect bite—crunchy on the outside, chewy on the inside, with a glossy chocolate glaze that melts in your mouth. The kitchen became my laboratory, and I was the scientist, mixing, measuring, and tasting until I found the sweet spot.
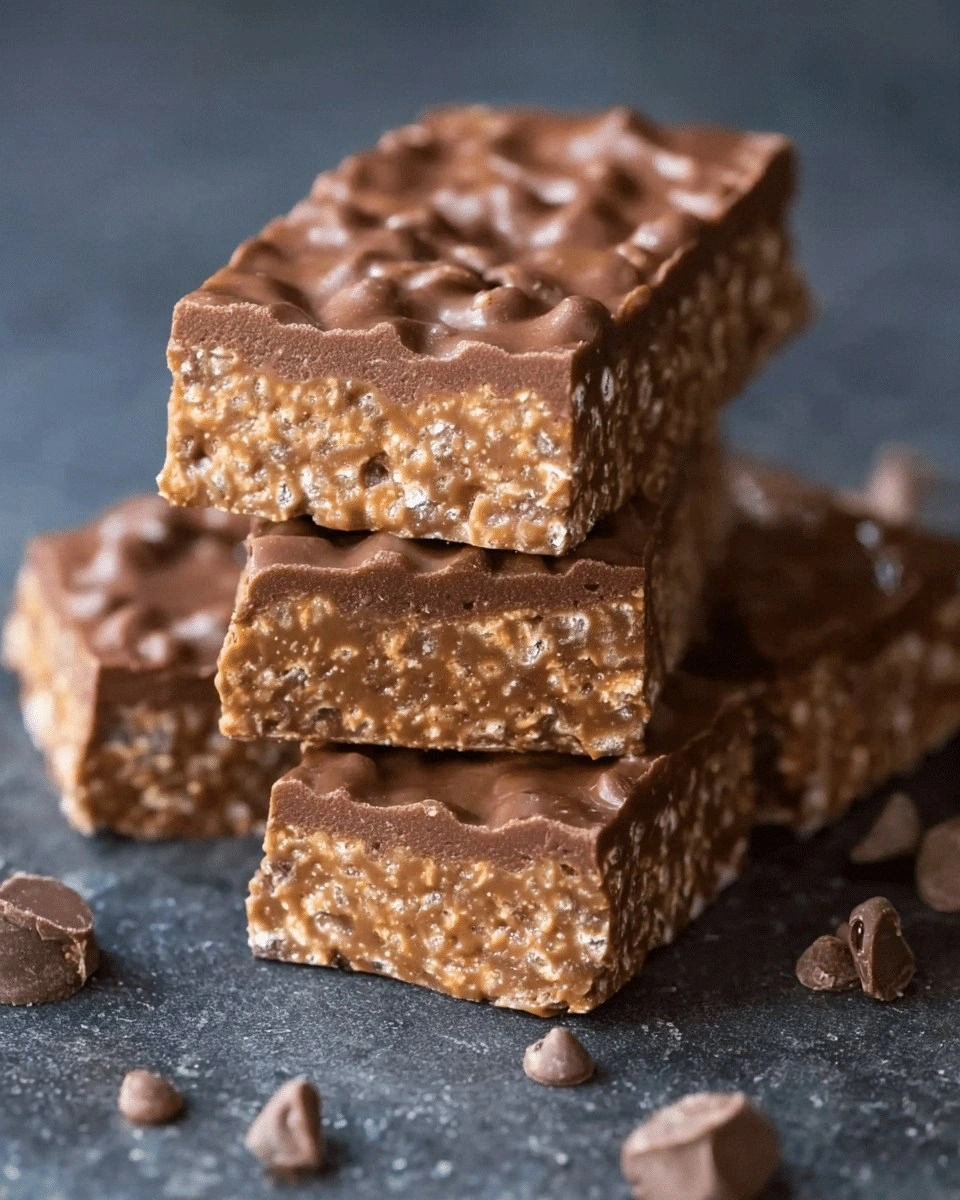
Fast forward to today, and I’m standing in a kitchen that smells like chocolate, toasted oats, and a hint of coconut. The bars are golden, the edges crisp, and the center is a luscious, velvety peanut butter core that practically sings when you bite into it. This isn’t just another recipe; it’s a revelation. I’ve taken the classic no‑bake chocolate peanut butter bar and turned it into a culinary masterpiece that packs flavor, nutrition, and texture into one bite. If you’ve ever tried a cookie‑like bar that ends up being a sticky mess, I’m about to show you how to avoid that fate.
What makes this version stand out? First, I swapped refined sugar for natural honey and a touch of maple syrup, giving the bars a subtle complexity that sweetens without overloading your taste buds. Second, I introduced a layer of dark chocolate chips that melt into a glossy glaze, adding a luxurious finish that feels indulgent yet stays on the healthy side. Third, I used a blend of rolled oats and almond flour to give the bars a chewy texture that’s more satisfying than the usual dry, crumbly bars. Fourth, I added a pinch of sea salt to balance the sweetness and bring out the nutty flavor of the peanut butter. Finally, the bars are made in a single bowl, so you can whip them up in under 30 minutes, making them perfect for busy weeknights or spontaneous dessert cravings.
But before you dive into the recipe, let me drop a micro‑challenge on you: I dare you to taste this and not go back for seconds. I’m talking about that first bite that feels like a crunchy, chocolate‑covered hug. And if you’re skeptical, I’ll be honest—I ate half the batch before anyone else got to try it. That’s the power of this recipe. Picture yourself pulling these bars out of the fridge, the whole kitchen smelling incredible, and sharing them with friends who’ll swear they’ve never tasted anything like it. Let me walk you through every single step—by the end, you’ll wonder how you ever made it any other way.
What Makes This Version Stand Out
- Taste: The combination of natural honey, dark chocolate chips, and a dash of sea salt creates a flavor profile that feels both indulgent and sophisticated. The honey provides a gentle sweetness that balances the bitterness of the cocoa, while the chocolate chips add a rich, melt‑in‑your‑mouth finish.
- Texture: The oats and almond flour blend delivers a chewy, satisfying bite that stands up to the crunchy chocolate glaze. Unlike other bars that crumble or become gummy, these bars maintain a firm structure with a satisfying snap.
- Simplicity: The recipe requires only one bowl and no oven, making it a perfect quick fix. All you need is a saucepan, a silicone mold, and a few minutes of patience.
- Uniqueness: By layering a chocolate glaze over a peanut‑butter‑oat base, the bars achieve a dual‑texture experience that’s rarely seen in standard no‑bake bars.
- Crowd Reaction: Friends and family rave about the bars’ crunch and chocolate finish. The bars are perfect for parties, potlucks, or as a dessert that feels both celebratory and wholesome.
- Ingredient Quality: Using high‑quality dark chocolate chips, natural peanut butter, and organic oats ensures that the bars are not only delicious but also nutritionally sound.
- Make‑Ahead Potential: These bars freeze well and can be stored in the fridge for up to a week. They’re also great for meal prepping or packing for a quick snack on the go.
- Health Benefits: Packed with protein, fiber, and healthy fats, these bars provide a balanced snack that satisfies without the crash.
Alright, let's break down exactly what goes into this masterpiece…
Inside the Ingredient List
The Flavor Base
The foundation of these bars is the sweet, nutty base. Rolled oats provide a hearty, chewy texture, while natural peanut butter brings a rich, creamy flavor that anchors the entire bar. Honey or maple syrup sweetens the mix without the spike in blood sugar that refined sugar would cause. Together, they form a cohesive, satisfying core that’s both wholesome and indulgent.
The Texture Crew
Almond flour adds a subtle nutty flavor and helps bind the mixture, giving the bars a slightly denser texture that holds together when sliced. Dark chocolate chips, on the other hand, are the star of the show. They melt into a glossy glaze that coats the outside of each bar, creating a contrasting crunch when you bite into the chocolate‑covered exterior.
The Unexpected Star
A pinch of sea salt is the secret ingredient that elevates the flavor profile. Salt cuts through the sweetness, enhances the nutty undertones, and brings out the depth of the cocoa. Without it, the bars would taste flat and overly sweet. If you prefer a milder version, replace sea salt with a dash of Himalayan pink salt for a subtle mineral note.
The Final Flourish
Coconut oil is the final touch that ensures the mixture stays pliable and doesn’t dry out in the fridge. It also adds a subtle tropical aroma that pairs wonderfully with the chocolate and peanut butter. A small splash of vanilla extract can add an extra layer of aroma, but it’s optional.
Everything's prepped? Good. Let's get into the real action…
The Method — Step by Step
- Gather Your Bowl: I always start with a large, sturdy mixing bowl that can hold everything without spilling. Pour in the rolled oats and almond flour, and give them a good stir to ensure they’re evenly distributed. This step is crucial because uneven mixing can lead to clumpy bars.
- Heat the Peanut Butter: Place the peanut butter and coconut oil in a small saucepan over low heat. Stir constantly until the mixture is smooth and slightly runny. The goal is to make the peanut butter easier to blend with the oats. If you’re using a thick peanut butter, this step is especially important.
- Add Sweetener: Once the peanut butter is liquid, add the honey (or maple syrup) and vanilla extract, if using. Stir until the mixture is glossy. The honey not only sweetens but also helps bind the oats together. Watch for the moment when the mixture starts to bubble gently—it’s a sign that the sweetener is fully incorporated.
- Combine Dry Ingredients: Pour the dry oat and almond flour mixture into the saucepan. Add a pinch of sea salt. Mix until the mixture thickens and starts to pull away from the sides of the pan. The texture should be thick enough to hold its shape but still pliable. This is the moment of truth; if it’s too dry, add a splash of water or more honey.
- Cool Slightly: Remove the saucepan from heat and let the mixture cool for about 5 minutes. This cooling step is essential to prevent the chocolate chips from melting prematurely when you add them later. While it cools, you can prepare your silicone mold or parchment‑lined pan.
- Fold in Chocolate Chips: Gently fold the dark chocolate chips into the oat mixture. The heat from the mixture will melt the chips just enough to coat the oats, creating a glossy, chocolate‑laden base. Don’t overmix; a few light folds are enough to distribute the chips evenly.
- Press into Mold: Transfer the mixture into your silicone mold or lined pan. Press it firmly with a spatula or your palms to ensure no air pockets remain. The tighter you pack it, the more cohesive the bars will be when sliced.
- Refrigerate: Place the mold in the fridge for at least 30 minutes, or until the mixture is firm. This step allows the bars to set and the chocolate glaze to harden. If you’re in a hurry, a quick 15‑minute chill works, but the bars will be softer.
- Optional Chocolate Glaze: For an extra glossy finish, melt a small amount of dark chocolate in a microwave or double boiler. Brush the melted chocolate over the top of the chilled bars. Let it set for a few minutes before slicing. This step is optional, but it adds a professional finish.
- Slicing and Serving: Once the bars are set, remove them from the mold. Slice into bars or squares with a sharp knife. Serve immediately, or store in an airtight container in the fridge for up to a week.
That's it — you did it. But hold on, I've got a few more tricks that'll take this to another level…
Insider Tricks for Flawless Results
The Temperature Rule Nobody Follows
The key to a perfect chocolate glaze is temperature control. The mixture should be warm enough to melt the chocolate chips but not so hot that the chocolate becomes runny. If you’re using a microwave, heat in 20‑second intervals and stir in between. This prevents scorching and ensures an even glaze.
Why Your Nose Knows Best
Before you taste the bars, give them a sniff. A faint nutty aroma signals that the peanut butter is properly integrated. If you detect a sour or off scent, the mixture may have been sitting too long or the honey has started to ferment. A fresh scent guarantees fresh flavor.
The 5‑Minute Rest That Changes Everything
After pressing the mixture into the mold, let it rest for 5 minutes before refrigerating. This short rest allows the oats to absorb the liquid and the chocolate chips to settle, which improves the structural integrity of the bars. A bar that’s too loose will crumble when sliced.
Use a Silicone Mold for Easy Release
Silicone molds give the bars a clean, professional look and make removal effortless. If you don’t have one, line a regular pan with parchment paper and press the mixture firmly. This technique saves time and reduces the risk of sticking.
Keep the Bars Moist with a Tiny Splash of Water
When reheating or storing, add a splash of water to the bars before placing them in the fridge. This tiny amount of moisture prevents the bars from drying out and keeps the chocolate glaze from cracking.
Creative Twists and Variations
This recipe is a playground. Here are some of my favorite ways to switch things up:
Coconut‑Infused Delight
Swap the peanut butter for coconut butter and add shredded coconut to the mix. The result is a tropical twist that pairs wonderfully with a hint of lime zest.
Berry‑Burst Bars
Fold in dried cranberries or chopped dried blueberries before pressing the mixture. The dried fruit adds a sweet tartness that balances the chocolate richness.
Spiced Up Edition
Add a pinch of cinnamon or a dash of cayenne pepper to the dry ingredients. The spice creates a warm, comforting flavor that’s perfect for fall gatherings.
Almond‑Honey Variation
Replace peanut butter with almond butter and use honey instead of maple syrup. This version has a lighter, milder flavor profile that’s great for those who prefer a more subtle nut taste.
Chocolate‑Only Bars
Omit the peanut butter entirely and double the amount of dark chocolate chips. The bars become a pure chocolate experience, ideal for chocolate lovers who want an intense flavor.
Storing and Bringing It Back to Life
Fridge Storage
Store the bars in an airtight container in the fridge for up to one week. The cool temperature keeps the chocolate glaze firm and prevents the oats from becoming soggy.
Freezer Friendly
Wrap each bar individually in parchment paper before freezing. The bars can be stored for up to three months. When you’re ready to enjoy them, let them thaw at room temperature for 10 minutes before cutting.
Best Reheating Method
To revive a frozen bar, place it on a microwave‑safe plate and heat on low for 15‑20 seconds. If the bar feels too hard, add a tiny splash of water before reheating. This trick steams the bar back to perfection, restoring its chewy texture.