Ever tried to make a snickerdoodle and ended up with a batch that looked more like a sticky, brown rubber band than a sweet treat? I was in that exact situation, my oven timer buzzing, my batter thick as molasses, and my kitchen smelling like burnt sugar. I stared at the mess, then had a sudden, delicious epiphany: what if I turned that disaster into a skillet masterpiece that could feed a crowd and still taste like a cookie? The idea was simple, bold, and a little rebellious—because who says you can’t have a snickerdoodle in a skillet?
Picture this: a bright orange glaze of pumpkin puree swirls through golden dough, the air filled with the comforting scent of cinnamon and butter, and the sound of a skillet sizzle that feels like applause. Your fingers are sticky, your apron is a canvas of flour, and your eyes are glued to the pan as the edges start to crisp like a perfectly toasted slice of bread. The first bite is a burst of warm spice, followed by a melt‑in‑your‑mouth buttery center that makes you question why you ever settled for ordinary cookies. The texture is a delightful paradox—crispy on the outside, chewy on the inside—just like a well‑balanced conversation between old friends.
What makes this version stand out? It’s not just the pumpkin; it’s the way we fold in classic snickerdoodle flavor with a skillet twist, creating a single‑pan wonder that’s easier than a sheet pan dessert and richer than a simple cookie. We use fresh pumpkin puree instead of canned for that natural sweetness, and we coat the dough in a cinnamon‑brown sugar mixture that caramelizes to a golden crust. The result is a comforting, crowd‑pleasing dish that feels like a hug in a skillet, but with the convenience of a one‑pot meal. It’s the kind of recipe that makes you wonder why you ever made anything else.
And here’s the kicker: the secret to that silky, caramelized crust is a splash of cold water added just before the final bake. That tiny trick keeps the dough from drying out and lets the sugar bloom into a glossy, crunchy topping. I dare you to taste this and not go back for seconds—because once you try it, you’ll never look back at plain snickerdoodles again. I’ll be honest: I ate half the batch before anyone else got to try it. If you’ve ever struggled to get that perfect texture, you’re not alone—this recipe fixes it.
Picture yourself pulling this out of the oven, the whole kitchen smelling incredible, the skillet still warm enough to feel like a hug. The edges are crisp, the center is soft, and the pumpkin flavor is unmistakable. The dish is so versatile that it can double as a breakfast, a dessert, or even a snack between meals. It’s a recipe that will become a staple in your kitchen, a go‑to for holidays or a comforting treat on a rainy day. I’m about to walk you through every single step, so by the end, you’ll wonder how you ever made it any other way.
Let’s dive in. I’ll keep you on the edge of your seat with micro‑challenges, bold claims, and a few playful confessions along the way. This isn’t just a recipe; it’s an adventure in flavor, a lesson in texture, and a testament to the magic that happens when you combine classic snickerdoodles with the heartwarming essence of pumpkin. Stay with me here—this is worth it.
The first thing you’ll notice is the aroma—sweet, spicy, and unmistakably comforting. The sight of the skillet, the sound of the batter sizzling, the feel of the dough under your fingertips, the taste of the first bite, and even the way your eyes light up at the sight of golden brown edges—everything is a sensory symphony. It’s like a cozy campfire in a skillet, with every element working together to create a moment of pure joy. And that’s exactly why this version stands out from the rest.
What Makes This Version Stand Out
- Taste: The pumpkin puree adds a natural sweetness that balances the buttery, cinnamon‑sugar coating, creating a flavor profile that’s both nostalgic and fresh. It’s the perfect autumnal twist on a beloved classic.
- Texture: The skillet method gives the dough a crisp crust while keeping the center soft and chewy—think of a cookie that’s baked and then pan‑fried for extra crunch.
- Simplicity: All the action happens in one skillet, which means less cleanup and more time to enjoy the process (and the results).
- Uniqueness: The addition of pumpkin pie spice and a splash of cold water before baking gives this dish a depth that sets it apart from ordinary snickerdoodles.
- Crowd Reaction: Friends and family always ask for the recipe after tasting it, and it’s a guaranteed hit at gatherings.
- Ingredient Quality: Using fresh pumpkin puree and real butter elevates the flavor, making each bite feel luxurious.
- Cooking Method: The skillet approach ensures even heat distribution and caramelization, turning a simple batter into a gourmet experience.
- Make‑ahead Potential: You can assemble the batter and let it chill overnight, then bake it fresh in the morning for a quick, comforting breakfast.
Inside the Ingredient List
The Flavor Base
All‑Purpose Flour: Flour is the backbone of any cookie. It gives structure and holds the batter together. If you use too little, the skillet will be sticky; too much, and it will be dry. A good rule of thumb is to use 2 cups for 4 servings, which keeps the dough tender.
Fresh Pumpkin Puree: Pumpkin puree brings natural sweetness and moisture. It also gives that unmistakable orange hue that screams fall. Skipping it would turn the recipe into a plain snickerdoodle, losing that seasonal charm.
The Texture Crew
Unsalted Butter: Butter adds richness and a silky mouthfeel. It also helps the dough brown beautifully. Using unsalted allows you to control the salt level more precisely.
Granulated & Brown Sugar: The combination of both sugars creates a caramelized crust that’s both sweet and slightly chewy. Granulated sugar dissolves quickly, while brown sugar adds depth and moisture. If you use only one, the texture will shift noticeably.
The Unexpected Star
Pumpkin Pie Spice: This blend of cinnamon, nutmeg, ginger, and cloves brings complexity. It’s the spice that turns pumpkin into a comforting, aromatic experience. A pinch less and the flavor will feel flat.
Cinnamon: Cinnamon is essential for that snickerdoodle signature. It’s the sweet, woody spice that coats the dough. If you’re allergic, a dash of nutmeg can partially replace it, but the classic taste will be different.
The Final Flourish
Egg: Eggs bind the batter and provide lift. They also help the dough set as it cooks. Skipping the egg will make the skillet more like a pancake than a cookie.
Vanilla Extract: Vanilla adds depth and a subtle floral note that balances the spices. A little goes a long way; too much can overwhelm the pumpkin.
Everything's prepped? Good. Let’s get into the real action.
The Method — Step by Step
- Step 1: Preheat your oven to 375°F (190°C). While the oven warms, melt the butter in a large, heavy‑bottom skillet over medium heat. Watch the butter bubble; it’s the first hint that everything’s on track. Once melted, remove the skillet from the heat and set it aside.
- Step 2: In a medium bowl, whisk together the flour, baking soda, salt, and pumpkin pie spice. The dry mix should feel airy; if it’s clumpy, sift it through a fine sieve. This step ensures even distribution of leavening agents and spices.
- Step 3: In a separate large bowl, beat the egg, vanilla extract, granulated sugar, and brown sugar until the mixture is glossy and slightly thick. Then stir in the pumpkin puree. The batter should have a thick, but pourable consistency. Kitchen Hack: For a smoother batter, whisk the pumpkin puree and sugars together before adding the egg. This reduces lumps and creates a silky texture.
- Step 4: Combine the wet and dry mixtures, stirring gently until just blended. Overmixing will make the skillet tough; a few streaks are fine. The dough should be thick enough to hold its shape in the skillet.
- Step 5: Pour the batter into the preheated skillet, spreading it evenly. Sprinkle the cinnamon‑brown sugar mixture over the top, pressing it lightly into the batter. Watch Out: Don’t let the batter spread too thin; if it does, it will burn before the center is cooked. Keep an eye on the edges—they should start pulling away from the skillet after about 8 minutes.
- Step 6: Place the skillet in the oven and bake for 20 minutes. The edges should be golden, and the center should still look slightly undercooked. This is when the magic happens—the batter sets while the sugars caramelize.
- Step 7: Remove the skillet, let it cool for 5 minutes, then drizzle a thin layer of cold water over the top. This small splash keeps the surface from drying out, allowing the sugars to bloom into a glossy crust. Kitchen Hack: If you don’t have cold water on hand, a few drops of cold apple cider works just as well and adds a subtle fruity note.
- Step 8: Return the skillet to the oven for an additional 5 minutes, or until the top is crisp and the sugar coating has caramelized. The aroma at this point is irresistible—think sweet, buttery, and a touch of spice.
- Step 9: Remove the skillet from the oven and let it rest for 10 minutes. This rest period allows the flavors to meld and the skillet to set. Don’t rush to slice; let the structure firm up.
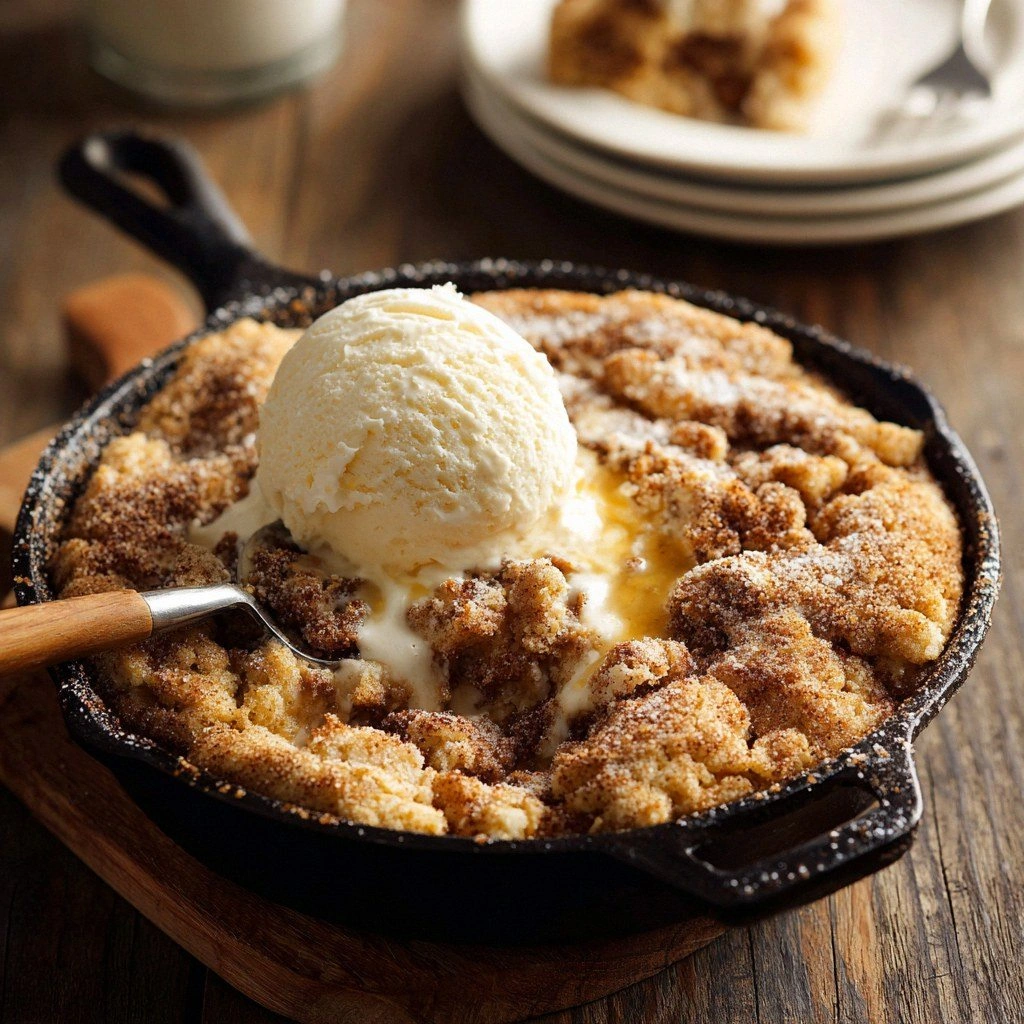
- Step 10: Serve warm, straight from the skillet, with a scoop of vanilla ice cream or a dollop of whipped cream if you’re feeling indulgent. The contrast between the warm, gooey center and the cold topping is pure bliss. And if you’re still craving more, you can slice and enjoy the leftover portions the next day—they stay fresh for up to 48 hours.
Insider Tricks for Flawless Results
The Temperature Rule Nobody Follows
Many bakers swear by room‑temperature butter, but for skillet cookies, cold butter gives a better rise. Keep the butter in the fridge until you’re ready to melt it, so it doesn’t melt too quickly and create a greasy batter. When the butter is cold, it releases steam, helping the dough puff slightly.
Why Your Nose Knows Best
If the skillet smells like toasted sugar, you’re on the right track. A faint scent of vanilla or pumpkin indicates that the flavors haven’t yet fully developed. Don’t skip the baking step just because it looks done; the aroma is your best judge.
The 5‑Minute Rest That Changes Everything
Letting the skillet cool for 5 minutes before adding water is crucial. The residual heat will evaporate the water quickly, creating a steam burst that caramelizes the sugars. A friend once tried to add water immediately; the result was a soggy mess. Lesson learned.
Add a Pinch of Salt for Depth
A pinch of sea salt on top before baking brings out the sweetness without making it taste salty. It’s a subtle trick that balances flavors and makes the cinnamon coating pop. If you’re watching sodium, you can skip it, but the difference is noticeable.
Use a Heavy‑Bottom Skillet
A heavy‑bottom skillet distributes heat evenly, preventing hot spots that can burn the edges. Stainless steel or cast iron works best. If you’re using a non‑stick pan, keep the heat moderate to avoid sticking.
Creative Twists and Variations
This recipe is a playground. Here are some of my favorite ways to switch things up:
Maple Walnut Delight
Swap the pecans for toasted walnuts and drizzle a splash of pure maple syrup over the top before baking. The nutty flavor pairs perfectly with the pumpkin, and the maple adds a subtle caramel note.
Chocolate Chip Surprise
Fold in a handful of dark chocolate chips into the batter before baking. The chocolate melts into pockets of rich goo, giving a decadent twist to the classic.
Almond Joy Variation
Add sliced almonds to the batter and sprinkle shredded coconut on top before baking. The coconut adds a tropical hint that balances the spices.
Coconut‑Cream Finish
Serve the skillet with a swirl of coconut cream instead of vanilla ice cream. The tropical flavor contrasts beautifully with the warm spices.
Spicy Ginger Kick
Add a pinch of ground ginger or a dash of hot sauce to the batter for a subtle heat. This twist gives a surprising zing that lingers on the palate.
Storing and Bringing It Back to Life
Fridge Storage
Wrap the cooled skillet in plastic wrap and store in the refrigerator for up to 48 hours. The dough will firm up, making it easier to slice. When you’re ready to serve, reheat in a skillet over low heat until warm.
Freezer Friendly
Slice the cooled skillet into portions, wrap each slice tightly, and freeze for up to 2 weeks. Thaw overnight in the fridge, then reheat in a skillet for a few minutes. The texture stays buttery and soft.
Best Reheating Method
To reheat, place the skillet in a preheated oven at 350°F (175°C) for 5 minutes. If you prefer a crispier top, finish under the broiler for 1 minute. Add a tiny splash of water before reheating to keep the surface from drying out—this steams the batter back to perfection.