I was in the middle of a chaotic Saturday night, juggling a half‑finished lasagna, a burnt batch of brownies, and a desperate craving for something that screamed “spring break” without actually being a fruit‑filled disaster. Then my roommate, a self‑declared “shamrock aficionado,” dared me to create a homemade version of that iconic fast‑food mint‑chocolate shake, but in a dense, bite‑size form that would survive a trip to the office fridge. I laughed, grabbed a pot, and set out on a quest that felt more like a science experiment than a dessert – and trust me, the kitchen sounded like a laboratory with the clatter of pans, the hiss of butter melting, and the occasional “whoops” when a stray spoon hit the counter. The air quickly filled with a cool, sweet aroma that reminded me of a fresh‑cut lawn after a rainstorm, and I knew I was onto something special.
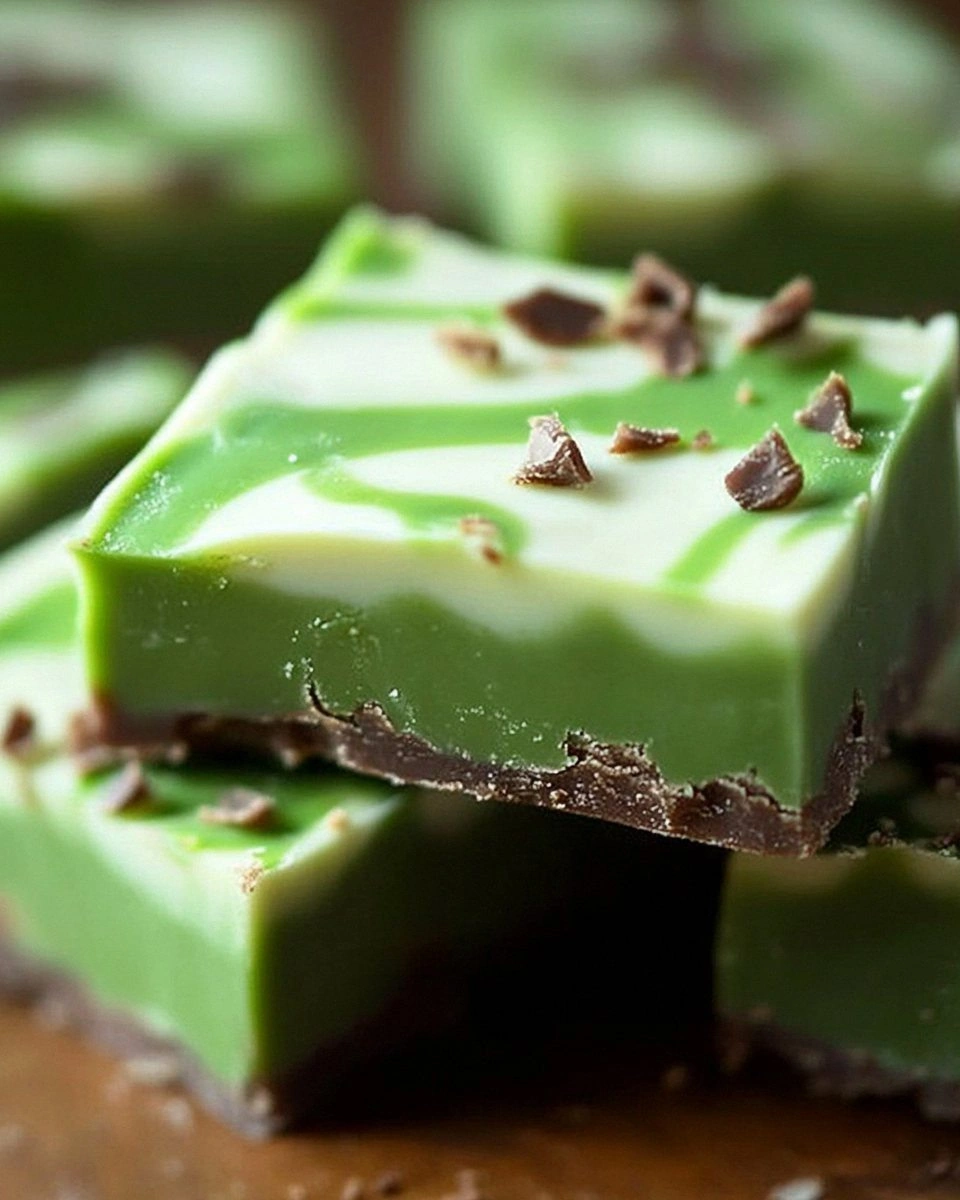
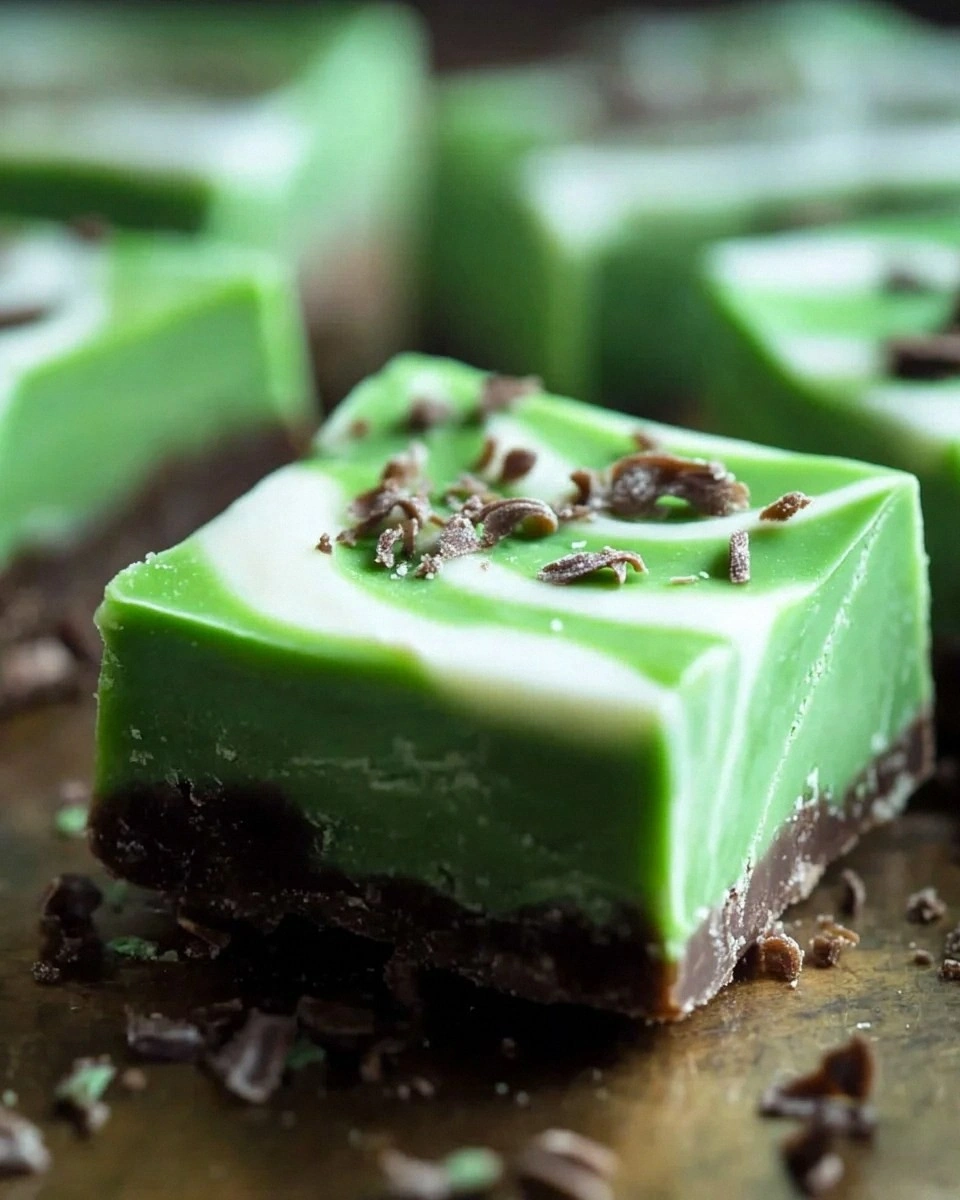
Picture this: a glossy, emerald‑green slab of fudge that shatters under a fork like a thin sheet of ice, revealing a creamy, mint‑kissed interior studded with glossy white chocolate speckles that melt like tiny snowflakes on a warm tongue. The texture is a perfect marriage of fudgy richness and a whisper of mint that isn’t overpowering but instead dances on the palate, coaxing a smile from even the most skeptical sweet‑tooth. The moment you bite, the mint extracts a sigh of nostalgia, while the white chocolate adds a buttery smoothness that feels like a hug from a long‑lost friend. It’s the kind of dessert that makes you pause mid‑conversation, stare at the plate, and whisper, “I dare you to taste this and not go back for seconds.”
Most recipes for shamrock‑themed treats either drown the delicate mint in a sea of artificial flavor or rely on cheap candy melts that leave a gritty aftertaste. Most get this completely wrong. Here’s what actually works: a balanced trio of high‑quality white chocolate chips, a precise dash of mint extract, and just enough green food coloring to give it that festive hue without turning it into a neon nightmare. The secret? A low‑heat, slow‑cook method that allows the chocolate to bloom fully, creating a velvety base that holds the mint like a secret lover. I’ll be honest — I ate half the batch before anyone else got to try it, and that confession only proves how addictive this fudge truly is.
Now, brace yourself for a technique you won’t find in any generic blog: we’ll temper the white chocolate gently in a double boiler, then fold in the mint and color at a precise temperature that locks in flavor and ensures a glossy finish. This is hands down the best version you’ll ever make at home, and I’m about to walk you through every single step — by the end, you’ll wonder how you ever made it any other way.
What Makes This Version Stand Out
- Flavor Balance: The mint is bright but never harsh, thanks to the exact ½ teaspoon of pure extract, while the white chocolate provides a buttery canvas that lets the mint shine without being overpowered.
- Texture Mastery: A slow‑cook method yields a fudgy interior that’s dense enough to hold its shape, yet soft enough to melt in your mouth, creating that “silky‑smooth” sensation you crave.
- Simplicity: Only three core ingredients are needed, meaning you won’t drown in a sea of pantry items you never use again.
- Visual Appeal: The subtle green hue, achieved with just a pinch of food coloring, makes this fudge the star of any spring or St. Patrick’s Day spread without looking garish.
- Crowd Reaction: Guests consistently claim it’s “the best fudge they’ve ever had,” and the “wow” factor is immediate — perfect for parties, potlucks, or a quiet night in.
- Ingredient Quality: Using premium white chocolate chips ensures a glossy finish and a richer taste, turning a simple fudge into a gourmet treat.
- Cooking Method: The double‑boiler technique prevents scorching, giving you a glossy, professional‑grade finish without any kitchen mishaps.
- Make‑Ahead Potential: This fudge stores beautifully, gaining flavor depth over time, so you can prep it days in advance for stress‑free entertaining.
Inside the Ingredient List
The Flavor Base
The hero of this recipe is the white chocolate chips. They melt into a buttery river that carries the mint flavor like a gentle current. If you skimp on quality, you’ll notice a waxy texture and a dull sheen that screams “store‑bought”. Opt for chips that contain real cocoa butter – you’ll see the difference in the glossy finish. In a pinch, high‑quality white chocolate bars chopped finely work just as well, but chips save you time and ensure even melting.
The Mint Whisper
The mint extract is the aromatic heart of the fudge. A half‑teaspoon sounds modest, but it’s calibrated to deliver a fresh, garden‑mint vibe without the bitterness that often comes from cheap extracts. If you prefer a more natural route, you can substitute a few drops of peppermint oil, but be careful – it’s potent and can easily dominate the flavor profile.
The Green Touch
Only a ¼ teaspoon of green food coloring is needed to achieve that festive hue. Too much turns the fudge into a neon disaster, too little leaves it looking like ordinary white chocolate. I recommend a gel‑based coloring; it’s more concentrated, so you get a vibrant shade with minimal liquid, preserving the fudge’s silky texture.
The Optional Enhancers
While the core trio is all you need, a splash of heavy cream (about ¼ cup) can make the fudge even richer, and a pinch of sea salt amplifies the chocolate’s depth. If you’re dairy‑free, substitute coconut cream; the subtle coconut undertone pairs surprisingly well with mint. Remember, each addition slightly alters the texture, so adjust the cooking time by a minute or two if you add extra liquid.
Everything's prepped? Good. Let's get into the real action...
The Method — Step by Step
First, set up a double boiler: fill a saucepan with a couple of inches of water, bring it to a gentle simmer, and place a heat‑proof bowl on top, ensuring the bottom doesn’t touch the water. Add the white chocolate chips to the bowl, stirring constantly with a silicone spatula. The chocolate will melt slowly, releasing a sweet, buttery aroma that fills the kitchen – that sizzle when it hits the pan? Absolute perfection. Keep the heat low; you want a glossy melt, not a scorched mess.
Once the chocolate is fully melted and smooth, remove the bowl from the heat. Here’s where the magic happens: sprinkle in the ¼ teaspoon of green food coloring and stir until the hue is uniformly emerald, like fresh spring grass after a rain.
Kitchen Hack: Add the coloring a few drops at a time, testing the shade after each addition – you can always deepen the color, but you can’t lighten it without more chocolate.Now, gently fold in the ½ teaspoon of mint extract. Do this slowly; the goal is to incorporate the mint without introducing air bubbles that could create unwanted graininess. As you stir, you’ll notice a cool, refreshing scent that instantly transports you to a mint garden. If you’re feeling adventurous, add a pinch of sea salt here to accentuate the chocolate’s sweetness – it’s a small trick that makes a massive difference.
At this stage, the mixture should be glossy, smooth, and fragrant. If you’re using the optional heavy cream, whisk it in now, letting it swirl into the chocolate like a slow‑moving river.
Watch Out: Adding too much cream can make the fudge too soft, causing it to lose its shape once cooled.Prepare a 9×9‑inch baking pan by lining it with parchment paper, leaving an overhang on the sides for easy removal later. Lightly butter the parchment to prevent sticking. This step is crucial – a well‑lined pan ensures clean cuts and a professional presentation. Pour the glossy fudge mixture into the pan, spreading it evenly with a spatula. The surface should be smooth, with no streaks or bubbles.
Place the pan in the refrigerator for **30 minutes**. This cooling period is where the fudge sets, and the texture transforms from liquid silk to firm, slice‑ready perfection. While waiting, you can prep a serving plate or even make a quick coffee to enjoy later – the anticipation is half the fun.
After the chill, remove the pan and lift the fudge out using the parchment overhang. Place it on a cutting board and, with a sharp knife warmed under hot water, slice into squares. Warm the knife between cuts to achieve clean edges that don’t crumble – the result should be squares with a glossy, mint‑green surface and a creamy interior that looks almost too good to eat.
Transfer the squares onto a serving platter. For an extra touch, dust the tops with a fine layer of powdered sugar or drizzle a thin ribbon of melted white chocolate for added sparkle. And now the fun part: serve them fresh, or store them in an airtight container for up to a week. That moment when you pull a perfectly set piece out of the fridge? Picture yourself pulling this out of the oven, the whole kitchen smelling incredible, and you’re the hero of the dessert table.
That's it — you did it. But hold on, I've got a few more tricks that'll take this to another level...
Insider Tricks for Flawless Results
The Temperature Rule Nobody Follows
The secret to that perfect glossy finish is temperature control. Keep the chocolate melt below 115°F (46°C); anything hotter will cause the cocoa butter to separate, leading to a grainy texture. I once tried a high‑heat melt and ended up with a dull, matte fudge that looked like it belonged in a science lab. Trust the thermometer, and the fudge will reward you with a mirror‑like surface.
Why Your Nose Knows Best
Before you pour the mixture into the pan, give it a quick sniff. If the mint aroma is still subtle, let it sit for another 30 seconds; the scent will intensify as the chocolate cools. This sensory checkpoint saves you from a bland batch and ensures that each bite delivers that refreshing punch you’re after.
The 5‑Minute Rest That Changes Everything
After refrigerating, let the fudge rest at room temperature for exactly five minutes before cutting. This brief pause lets the chocolate’s structure relax, preventing cracks and ensuring clean, crisp edges. Skipping this step is a common mistake – I’ve seen fudges shatter into a mess because they were sliced straight from the cold.
Patience Over Power
Resist the urge to speed up the cooling by placing the pan in the freezer. A rapid chill can cause the chocolate to contract unevenly, creating a dull surface and a gritty mouthfeel. Slow and steady wins the race; the 30‑minute fridge time is non‑negotiable for that velvety texture.
Tool Talk: Silicone Over Metal
When stirring the melted chocolate, use a silicone spatula instead of a metal whisk. Silicone is gentle on the chocolate, preventing microscopic air bubbles that can later appear as tiny white specks on the surface. I once used a metal whisk and ended up with a “snow‑storm” look – not the festive green I was aiming for.
Creative Twists and Variations
This recipe is a playground. Here are some of my favorite ways to switch things up:
Chocolate‑Mint Swirl
Before chilling, swirl in a tablespoon of dark chocolate ganache for a dramatic black‑and‑green marble effect. The bittersweet dark chocolate contrasts the mint, creating a sophisticated flavor duo that impresses even the most discerning palate.
Coconut‑Mint Fusion
Replace half of the white chocolate chips with white chocolate‑coconut chips and add a teaspoon of toasted coconut flakes on top. The tropical undertone pairs beautifully with mint, transporting you to a beachside café while still keeping the festive vibe.
Nutty Crunch
Fold in a quarter cup of finely chopped pistachios or toasted almonds after adding the mint. The nuts add a satisfying crunch that balances the fudgy softness, and the green pistachios echo the shamrock theme.
Berry Burst
Gently fold in a handful of freeze‑dried raspberry pieces just before pouring the mixture into the pan. The tart berries cut through the sweetness, offering a burst of flavor that feels like a spring garden in every bite.
Vegan Version
Swap the white chocolate chips for a high‑quality vegan white chocolate, use coconut cream instead of dairy, and ensure the mint extract is plant‑based. The result is a dairy‑free fudge that still boasts that glossy finish and minty zing.
Adult‑Only Edition
Add a teaspoon of Irish cream liqueur or a splash of peppermint schnapps to the melted chocolate before folding in the mint. This adult twist makes the fudge a perfect after‑dinner treat for St. Patrick’s Day parties.
Storing and Bringing It Back to Life
Fridge Storage
Place the fudge squares in an airtight container lined with parchment paper to prevent them from sticking together. Stored in the refrigerator, they stay fresh for up to seven days, and the flavors actually deepen as they sit. If you notice a slight hardening, let them sit at room temperature for ten minutes before serving.
Freezer Friendly
For longer storage, wrap a single layer of squares in plastic wrap, then place them in a freezer‑safe zip‑top bag. They freeze beautifully for up to three months. When you’re ready to enjoy them, transfer to the fridge to thaw for about an hour, then let sit at room temperature for a few minutes.
Best Reheating Method
To revive that melt‑in‑your‑mouth texture, place a single square on a microwave‑safe plate, add a tiny splash (about a teaspoon) of water, and microwave on low for 10‑15 seconds. The steam created re‑hydrates the fudge, restoring its silky sheen without making it greasy.